Water damage can be a homeowner’s worst nightmare. Whether it’s due to a leaky roof, burst pipes, or flooding, the damage can be extensive and costly. Beyond the immediate aesthetic and structural concerns, water damage opens the door to a more insidious problem: mold growth.
Mold not only poses serious health risks but also leads to more expensive repairs. Thus, effectively drying out walls after water damage without causing mold is crucial. Let’s delve into the process and strategies to achieve this.
Understanding the Basics of Water Damage
Before we get into the drying process, it’s important to understand what water damage entails. When water intrudes into your home, it can saturate walls, floors, and ceilings. This saturation compromises the integrity of structural elements and creates an ideal environment for mold to thrive. Recognizing the extent and type of damage is the first step in effectively managing it.
Types of Water Damage
There are three categories of water damage, each requiring a different approach:
- Clean Water Damage: This type of damage comes from a clean source, such as a broken pipe or rainwater. While it poses no immediate health risk, it can quickly lead to mold if not addressed promptly.
- Grey Water Damage: Originating from sources like dishwashers or washing machines, grey water contains some level of contaminants. This type of water damage can pose a health risk if left untreated, as it may harbor bacteria or chemicals that require careful handling during cleanup.
- Black Water Damage: The most dangerous type, black water damage often results from sewage or floodwaters. It contains harmful bacteria, viruses, and other pathogens, necessitating professional handling. Immediate action and specialized equipment are crucial to safely addressing this type of damage.
Steps to Dry Out Walls
Drying out walls after water damage is a meticulous process. Here’s a step-by-step guide to help you manage it effectively:
1. Assess the Damage
Before you start drying, assess the extent of the damage. Determine how much of the wall is wet and how long it has been exposed to water. This assessment helps you decide on the necessary steps and whether professional help is needed. Consider using moisture meters to get accurate readings of the saturation levels, as this information is vital for planning your drying strategy.
2. Remove Excess Water
Use a wet/dry vacuum to remove as much water as possible. For larger areas, you might need to rent commercial-grade equipment. Promptly removing excess water is crucial to prevent further saturation and potential mold growth.
In cases of significant water intrusion, employing submersible pumps or industrial-grade extraction equipment may be necessary to efficiently tackle the water removal process.
3. Ventilate the Area
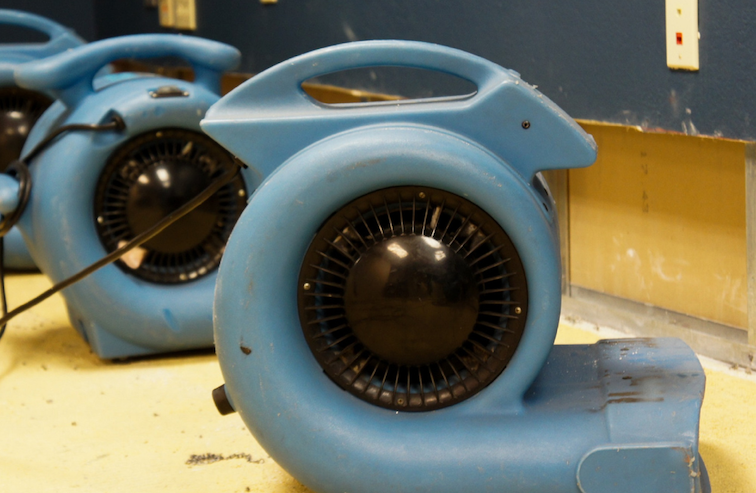
Proper ventilation is key to drying out walls. Open windows and doors to allow fresh air to circulate. If the weather permits, use fans to accelerate the drying process. Dehumidifiers can also be beneficial in removing moisture from the air.
Consider using high-capacity dehumidifiers for larger spaces to ensure thorough moisture removal, as this step is critical to preventing mold growth.
4. Remove Damaged Materials
If the drywall or insulation is soaked, it might be necessary to remove and replace it. Wet insulation and drywall can harbor mold and prevent proper drying. Cut away the damaged sections and dispose of them properly. Ensure you wear protective gear while handling these materials, as they may contain harmful mold spores or bacteria.
5. Use Professional Drying Equipment
For extensive water damage, using professional drying equipment like air movers and industrial dehumidifiers can be more effective. These tools are designed to speed up the drying process and ensure all moisture is removed. Professionals also have access to advanced moisture detection tools to ensure no hidden pockets of moisture remain, which is crucial for thorough remediation.
Preventing Mold Growth
Mold can begin to grow within 24 to 48 hours after water exposure, so preventing it is crucial. Taking proactive steps can save you from future health hazards and financial burdens associated with mold remediation.
1. Clean and Disinfect
After removing excess water, clean and disinfect the affected area. Use a mixture of water and bleach or a commercial disinfectant to kill any potential mold spores. Pay extra attention to corners, seams, and other areas where moisture might linger. For those sensitive to chemicals, there are natural alternatives like vinegar and tea tree oil that can be effective mold inhibitors.
2. Monitor Moisture Levels
Use a moisture meter to monitor the levels in your walls. Ensure they return to normal before considering the job done. This prevents hidden moisture from becoming a breeding ground for mold. Regular monitoring, even after the initial drying process, can help catch any lingering issues before they escalate into full-blown mold infestations.
3. Hire a Water Damage Restoration Company
If the damage is extensive, consider hiring a professional water damage restoration company. They have the expertise and equipment to ensure your home is thoroughly dried and treated for mold prevention. Professionals offer peace of mind with their ability to identify and address hidden moisture, ensuring a comprehensive approach to restoration.
When to Call a Professional
While DIY methods can be effective for minor water damage, certain situations require professional intervention. Knowing when to call in the experts can prevent further damage and health risks.
- Severe Flooding: If your home experiences significant flooding, a professional can provide the necessary equipment and expertise to handle the situation. They can also assist with insurance claims and documentation, which can be invaluable during the recovery process.
- Black Water Damage: Due to the health risks associated with black water, it’s best left to professionals. They have the protective equipment and specialized training to safely manage and remediate this type of damage.
- Persistent Mold Issues: If mold has already begun to grow, a professional can effectively remove it and prevent future occurrences. They can also offer long-term solutions and preventive measures to ensure your home remains mold-free.
Conclusion
Dealing with water damage can be overwhelming, but taking immediate action to dry out walls can prevent mold and save you from costly repairs. By following these steps and knowing when to call for professional help, you can effectively manage water damage in your home. For expert water damage restoration and mold remediation, contact our team at PuroClean of Hiram today!