Sump pumps are crucial for keeping your home safe from water damage, especially here on Long Island where basement flooding and heavy rain are common concerns for homeowners. During storms or rapid snow melts, sump pumps help remove excess groundwater from around your home’s foundation and safely redirect it away from your property. But simply having a sump pump isn’t enough—it’s critical to test it regularly to ensure it’s working when you need it most.
In this article, we’ll walk you through how to test your sump pump in just a few minutes. You don’t need to be a plumber or contractor to do this—just follow these easy steps to make sure your home stays dry and protected.
Why Testing Your Sump Pump Matters on Long Island
Long Island homes are especially vulnerable to water issues due to the area’s high water table, aging infrastructure, and seasonal weather patterns like Nor’easters and tropical storms. Improperly working sump pumps are one of the top causes of basement water damage, which can lead to mold growth, ruined flooring, and costly repairs.
Whether you’re preparing for spring rains or fall storms, testing your sump pump now could save you thousands in restoration costs down the line.
How to Test a Sump Pump
Follow these simple steps to ensure your sump pump is in top working order:
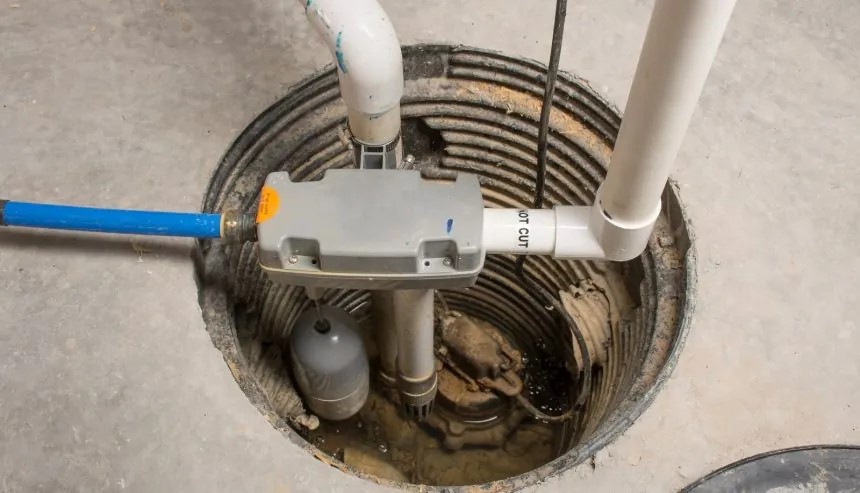
1. Locate and Inspect the Exit Pipe
Start by finding the discharge pipe, which carries water from your sump pump to the outside. This pipe can become clogged by dirt, leaves, or other debris.
Ensure the pipe is clear and not obstructed. Make sure it directs water well away from your home’s foundation to prevent water from pooling and causing structural issues.
2. Inspect the Sump Pump Area
Head to your basement or crawl space and locate the sump pit. If your sump pump has a cover, remove it carefully. Look inside and check for debris or sediment that may clog the pump and make sure the float switch moves freely without resistance.
Cleaning this area is essential to ensure smooth operation.

3. Test the Sump Pump Using the Electrical Cords
If your sump pump has two cords:
Unplug both cords from the power outlet. Plug only the pump cord back in directly. The pump should turn on immediately. If it runs, you’ll hear a humming sound, indicating the motor is functioning.
Afterward, plug the float cord back in first, followed by the pump cord into the back of the float plug.
If your sump pump has only one cord, skip this step and move on to the water test.
4. Pour Water into the Sump Pump Pit
This method simulates what happens during a flood or heavy rain.
Slowly pour a 5-gallon bucket of water into the pit. As the water level rises, the float should rise, triggering the pump to activate. The pump should start removing water and shut off automatically once it’s done.
Repeat the process once or twice to confirm everything is working consistently.
5. Manually Lift the Float
If you can’t use water or want a quicker test, gently lift the float by hand. The pump should turn on as if water had triggered it. Only let it run for a few seconds to avoid damage from running dry.
Pro Tip: Test Your Pump Twice a Year
We recommend testing your sump pump twice a year, once in the spring and again in the fall. It’s a small step that provides big protection.
Need Help with Water Damage? Call PuroClean of Huntington
Don’t wait until it’s too late—protect your home before disaster strikes. If your sump pump fails or you’re dealing with water intrusion, PuroClean of Huntington is here to respond quickly and effectively. Our experienced team specializes in water removal, structural drying, and mold prevention, helping homeowners across Suffolk and Nassau Counties get back to normal—fast.
Call us today at 631-402-9700 and trust PuroClean of Huntington to be your reliable partner in water damage restoration. When every moment counts, you can count on us to act fast and restore what matters most.