How moisture meters work: detect hidden water damage fast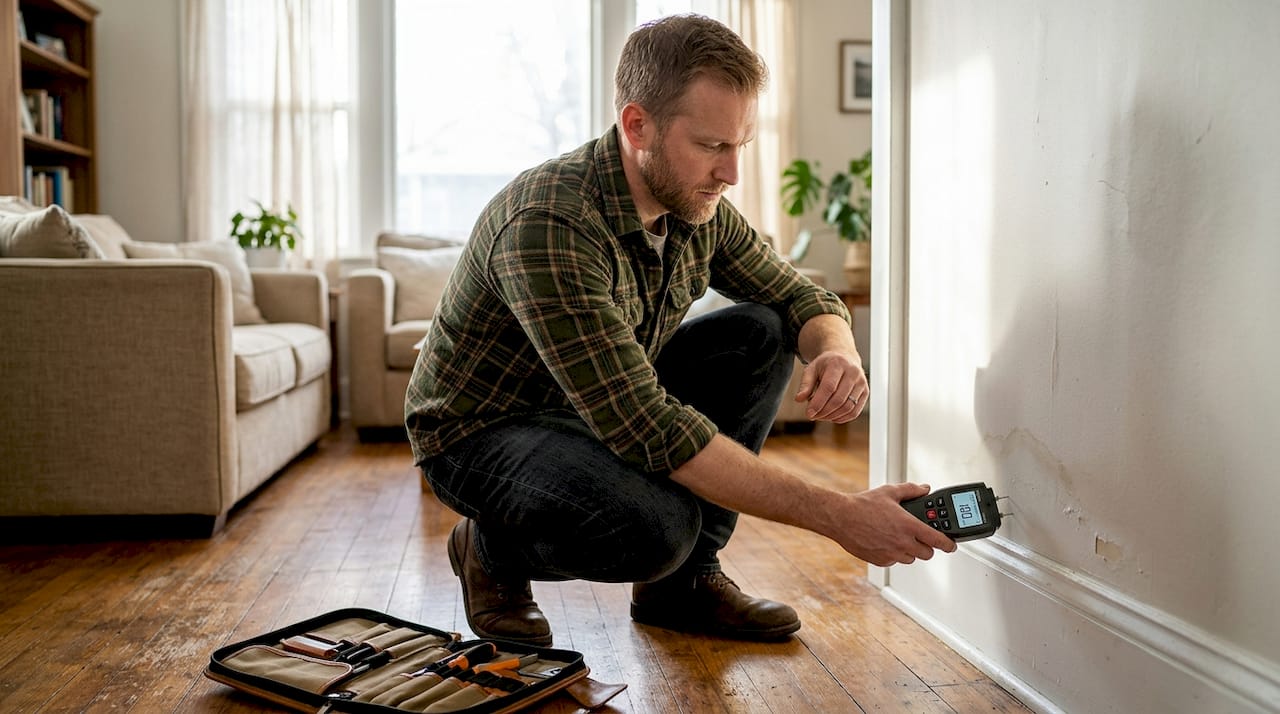
Water damage hides behind walls, under floors, and within ceilings, creating costly problems before you notice visible signs. Understanding moisture meter technologies transforms how you approach water damage detection, giving you the same diagnostic power restoration professionals rely on daily. These devices reveal invisible moisture that leads to mold growth, structural decay, and expensive repairs. Knowing how moisture meters operate empowers you to catch water intrusion early, document damage accurately, and make informed decisions about restoration needs.
Table of Contents
Key takeaways
Understanding moisture meters: the basics of how they work
Comparing moisture meter types: pin vs. pinless and when to use them
Using moisture meters effectively in water damage detection and restoration
Common challenges and best practices for homeowners and property managers
Reliable water damage solutions in Northeast Sacramento
Frequently asked questions
Key Takeaways
Point
Details
Hidden moisture detection
Moisture meters reveal moisture that is invisible to the naked eye, helping you catch problems early.
Meter types pin and pinless
There are pin meters for pinpoint readings and pinless meters for fast surface scans.
Calibration matters
Using the correct calibration for each material yields accurate moisture readings and avoids missing damage.
Regular checks prevent mold
Regular moisture checks help prevent mold growth and structural damage.
Understanding moisture meters: the basics of how they work
A moisture meter is a diagnostic tool that measures water content within building materials by detecting changes in electrical properties. Moisture meters use electrical signals to detect moisture content, making invisible water damage visible through numerical readings. These devices have become essential for homeowners and property managers who need to verify water intrusion after leaks, floods, or plumbing failures.
Pin-type meters operate by inserting two metal probes into the material surface. Water conducts electricity better than dry materials, so the meter measures electrical resistance between the pins. Higher moisture content creates lower resistance, which the meter converts into a moisture percentage reading. This direct contact method works exceptionally well for wood framing, drywall, and other porous materials where you need precise readings at specific depths.
Pinless meters take a different approach by using electromagnetic waves that penetrate the surface without physical contact. These scanners emit radio frequency signals that interact with water molecules beneath the surface, then measure the reflected signal to calculate moisture levels. The advantage here is speed and surface preservation. You can scan large wall sections quickly without creating pin holes in finished surfaces like painted walls or hardwood floors.
Moisture affects electrical properties in predictable ways. Dry wood has high electrical resistance, while wet wood conducts electricity more readily. Pin meters exploit this relationship by measuring how easily current flows between probes. Pinless meters detect how electromagnetic fields change when water molecules are present. Both methods translate these electrical changes into moisture readings you can understand and act upon.
Calibration matters tremendously for accurate results. Each material type has different density and composition, affecting how it conducts electricity or reflects electromagnetic waves. Quality meters include calibration settings for common materials like Douglas fir, oak, drywall, and concrete. Using the wrong calibration setting produces readings that misrepresent actual moisture levels, potentially causing you to miss hidden water damage or overreact to normal conditions.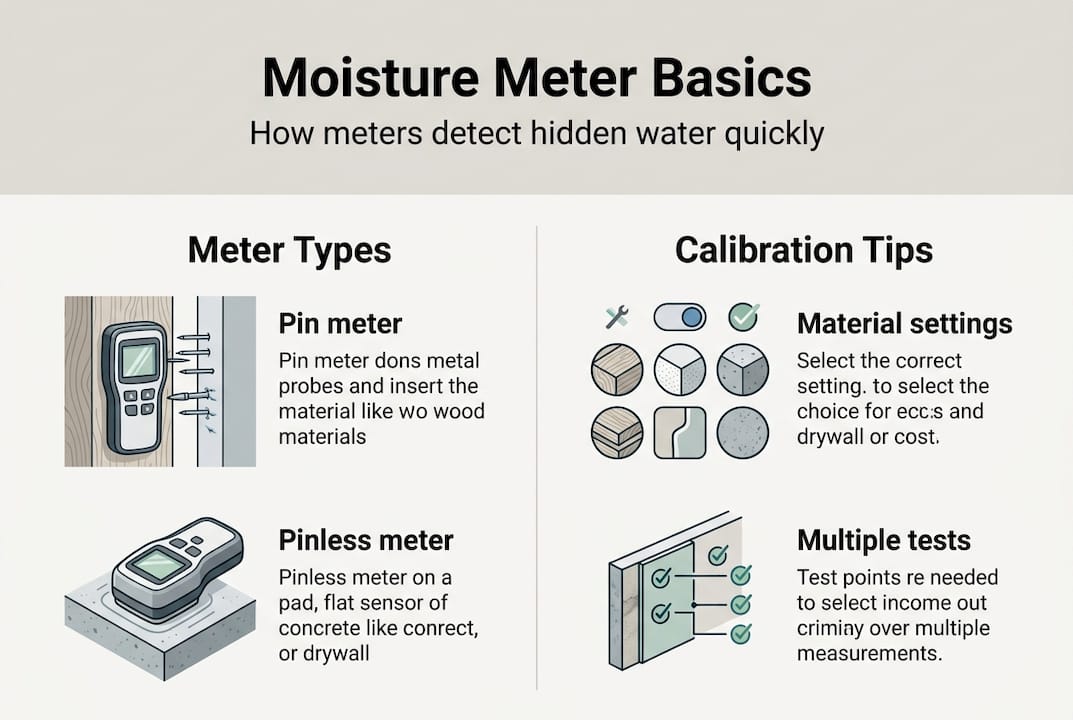
Pro Tip: Always test in multiple spots across the suspected area and compare readings. A single measurement might catch a localized issue or reflect an anomaly, but pattern recognition across multiple points reveals the true extent of moisture intrusion.
Comparing moisture meter types: pin vs. pinless and when to use them
Pin meters excel when you need pinpoint accuracy in specific locations. The probes penetrate the surface, measuring moisture at the exact insertion depth. This makes them ideal for checking behind baseboards, inside wall cavities through small access holes, or testing wood framing where precise readings determine structural integrity. The invasive nature means you create small punctures, but these are typically insignificant in areas already damaged or hidden from view.
Pinless meters shine during initial assessments and finished surface inspections. You can scan entire walls in minutes, identifying moisture hotspots without damaging paint, wallpaper, or flooring. This non-invasive approach works perfectly when you suspect water damage but want to preserve aesthetics while investigating. The trade-off is less precision about moisture depth and exact location compared to pin meters.
Feature
Pin Meters
Pinless Meters
Accuracy
Highly precise at probe depth
General area measurement
Invasiveness
Leaves small holes
No surface damage
Material Compatibility
Wood, drywall, concrete
All surfaces including finished
Speed
Slower, point by point
Fast area scanning
Cost
Generally lower
Typically higher
Typical Uses
Structural checks, verification
Initial surveys, finished surfaces
Different moisture meter types suit varying restoration needs and materials, and understanding these differences helps you choose the right tool for your situation. Professional restoration technicians often carry both types, using pinless meters for rapid area assessment and pin meters for detailed verification where readings indicate problems.
Combining both types delivers the most comprehensive moisture detection. Start with a pinless meter to scan large areas quickly, mapping out moisture patterns across walls, ceilings, and floors. When you identify elevated readings, switch to a pin meter for precise measurements that confirm moisture depth and severity. This two-step approach balances efficiency with accuracy, ensuring you don’t miss hidden water damage while avoiding unnecessary invasive testing in dry areas.
Material compatibility influences which meter type works best. Pin meters struggle with very hard surfaces like tile or metal but work beautifully in wood and drywall. Pinless meters handle any surface but may give less reliable readings in materials with high mineral content or metal backing. Knowing your building materials guides meter selection and interpretation.
Pro Tip: Use pinless meters for quick area scans, then confirm with pin meters where readings are high. This workflow minimizes surface damage while ensuring you catch every moisture problem.
Using moisture meters effectively in water damage detection and restoration
Professional water damage inspections follow a systematic approach that maximizes moisture meter effectiveness. Understanding this process helps you apply the same rigor when checking your own property or evaluating restoration work. The goal is creating a complete moisture map that guides drying efforts and verifies restoration success.
Perform the initial scan across all potentially affected areas. Start with a pinless meter to cover walls, floors, and ceilings adjacent to the water source. Scan in a grid pattern, noting readings as you move across each surface. This establishes baseline conditions and identifies obvious moisture concentrations.
Identify moisture hotspots requiring detailed investigation. Any reading significantly above normal for that material type marks a hotspot. Common thresholds are 15-20% for wood and 1-2% for drywall, though exact numbers vary by material and meter calibration. Mark these locations for pin meter verification.
Test hidden areas where water typically migrates. Water travels along structural members, through wall cavities, and beneath flooring. Check inside cabinets, behind baseboards, and in closets adjacent to affected rooms. Moisture meters are essential to document and monitor water damage for effective restoration, especially in areas not immediately visible.
Document all readings with photos and written notes. Record meter readings, locations, dates, and times. This documentation proves invaluable for insurance claims, tracking drying progress, and verifying restoration completion. Create a simple sketch showing where you took measurements and what values you recorded.
Retest regularly throughout the drying process. Take fresh readings daily or every other day, depending on damage severity. Moisture levels should steadily decline as dehumidifiers and air movers do their work. Stalled readings indicate inadequate drying equipment or hidden water sources requiring additional attention.
Moisture readings directly inform restoration decisions. High readings in structural wood mean you need aggressive drying to prevent rot and mold. Elevated drywall moisture might require removal if readings exceed salvage thresholds. Concrete slab moisture guides decisions about flooring replacement timing. Each reading helps you understand whether materials can be saved or need replacement.
Mold mitigation depends heavily on moisture control, and mold remediation steps begin with eliminating moisture sources. Moisture meters verify that materials have dried below the 20% threshold where mold growth accelerates. Without meter confirmation, you’re guessing about whether conditions still support mold colonization.
Structural repairs require dry materials for proper adhesion and long-term stability. Attempting repairs on wet framing or drywall leads to future problems like fastener corrosion, paint failure, and renewed mold growth. Moisture meters tell you exactly when materials have reached safe moisture levels for reconstruction.
Pro Tip: Regular post-restoration moisture monitoring prevents recurrence. Check previously affected areas monthly for the first six months, then quarterly for a year. Early detection of returning moisture lets you address small problems before they become major disasters.
“Moisture meters transform water damage restoration from guesswork into science. They reveal hidden problems, guide equipment placement, and confirm when restoration is truly complete. Without accurate moisture measurement, you’re operating blind in situations where precision determines success.”
Understanding how to spot water damage examples combined with moisture meter skills creates a powerful diagnostic capability that protects your property investment.
Common challenges and best practices for homeowners and property managers
Even with quality equipment, moisture meter users encounter obstacles that compromise accuracy and effectiveness. Recognizing these challenges helps you avoid common mistakes that lead to missed water damage or unnecessary alarm.
Incorrect meter selection tops the list of user errors. Buying a basic pin meter when you need to scan finished surfaces, or choosing a pinless meter for deep structural assessments, limits your diagnostic capability. Match your meter type to your primary inspection needs, or invest in both types for comprehensive coverage.
Inaccurate calibration produces misleading readings that undermine the entire inspection process. Each building material has unique electrical properties, and meters must be calibrated accordingly. Using a wood setting to test drywall, or failing to adjust for different wood species, generates numbers that don’t reflect actual moisture content. Always verify your meter’s calibration setting before testing.
Overlooking hidden moisture areas allows water damage to progress undetected. Water follows gravity and structural pathways that aren’t always obvious. Checking only the visible wet spot misses moisture that has migrated into adjacent cavities, beneath flooring, or up into wall assemblies through capillary action. Expand your inspection zone beyond the immediately visible damage.
Surface contamination interferes with electrical readings in ways that confuse inexperienced users. Dust, dirt, or surface moisture from condensation can affect pin meter contact or pinless meter signal reflection. Clean surfaces before testing, and distinguish between surface dampness and deep moisture penetration by testing at multiple depths or using different meter types.
Proper moisture meter use is critical to avoid false readings and missed water damage, and following proven best practices ensures reliable results. These strategies come from restoration professionals who depend on accurate moisture detection daily.
Top 5 user mistakes and how to avoid them:
Testing only obvious wet areas: Water spreads beyond visible damage. Scan a minimum three-foot radius around any known moisture source.
Taking single-point readings: One measurement proves nothing. Take multiple readings across the area to establish patterns and confirm problems.
Ignoring manufacturer calibration instructions: Generic settings produce generic results. Use material-specific calibrations for accurate measurements.
Failing to document baseline readings: Without initial measurements, you can’t track drying progress or verify restoration completion. Record everything from day one.
Stopping moisture checks too early: Materials that feel dry may still contain excessive moisture. Continue testing until readings stabilize in the normal range for at least 48 hours.
Regular meter calibration maintains accuracy over time. Electronic components drift, and physical probes wear with use. Check calibration monthly using the manufacturer’s procedure or reference samples. This simple maintenance step prevents the gradual accuracy degradation that makes older meters unreliable.
Using both meter types when conditions warrant provides the most complete moisture picture. Initial pinless scans identify problem areas quickly, while pin meter verification confirms moisture depth and severity. This combined approach catches issues that single-method testing might miss.
Moisture mapping creates a visual record of water damage extent and drying progress. Draw a simple floor plan and mark moisture readings at each test location. Update this map with each inspection round, creating a timeline that shows how moisture levels change. This documentation proves essential for insurance claims and verifying contractor work quality.
Understanding material differences prevents misinterpretation of readings. Dense hardwoods read differently than softwoods. Drywall moisture readings don’t translate directly to wood moisture percentages. Concrete requires specialized meters or settings. Learn the normal moisture range for materials in your property, so you recognize when readings indicate problems.
Timely moisture detection prevents mold proliferation and structural damage that multiply restoration costs. Mold colonies establish within 24 to 48 hours in wet conditions. Wood begins degrading when moisture content exceeds 20% for extended periods. Early detection through regular moisture monitoring catches problems in the intervention window where simple drying prevents major damage.
Reliable water damage solutions in Northeast Sacramento
Understanding moisture meter operation gives you powerful diagnostic capability, but some water damage situations require professional expertise and equipment. When moisture readings confirm significant water intrusion, partnering with experienced restoration specialists ensures thorough remediation and prevents recurring problems.
PuroClean of Northeast Sacramento combines advanced moisture detection technology with comprehensive restoration services that address water damage from initial assessment through final verification. Our technicians use commercial-grade moisture meters alongside thermal imaging and humidity monitoring to create complete moisture maps that guide strategic drying plans. This precision approach ensures no hidden moisture escapes detection.
Whether you’re dealing with burst pipes, slab leaks, appliance failures, or flooding aftermath, our 24/7 mold mitigation and removal services protect your property from the mold growth that follows water intrusion. We also provide sewage cleanup and sanitization services for contaminated water situations, and fire damage restoration services when water damage results from firefighting efforts. Contact us immediately when moisture meter readings confirm water damage requiring professional attention.
Frequently asked questions
How accurate are moisture meters for detecting hidden water damage?
Moisture meters provide reliable accuracy when properly calibrated and used according to manufacturer guidelines. They excel at detecting moisture invisible to visual inspection, but work best as part of comprehensive assessment that includes visual examination and thermal imaging. Combining multiple detection methods ensures you don’t miss hidden water damage in unexpected locations.
Can homeowners use moisture meters effectively without professional training?
Basic moisture meters are designed for homeowner use with clear instruction manuals and intuitive displays. You can achieve good results by following calibration procedures, taking multiple readings, and comparing values against manufacturer guidelines for normal moisture ranges. However, professional training improves interpretation accuracy, especially in complex scenarios involving multiple materials or extensive damage. Following mold remediation steps for property owners helps homeowners use meters effectively within broader water damage management.
How often should moisture readings be taken during water damage restoration?
Take moisture readings daily throughout active drying to monitor progress and verify equipment effectiveness. Consistent documentation helps you identify when drying has stalled, indicating equipment adjustment or additional intervention needs. Continue daily testing until readings stabilize within normal range for the material type for at least 48 consecutive hours. This regular monitoring prevents premature equipment removal that leaves residual moisture supporting mold growth. Proper water damage documentation includes dated readings showing moisture decline over time.
What materials can moisture meters measure accurately?
Moisture meters work effectively on wood, drywall, plaster, concrete, and masonry when properly calibrated for each material type. Pin meters excel with porous materials like wood and drywall where probes can penetrate easily. Pinless meters handle finished surfaces including painted walls, tile, and hardwood flooring without damage. However, readings vary significantly between material types due to different electrical properties and density. Always use material-specific calibration settings and understand normal moisture ranges for what you’re testing. Learning to recognize water damage material types improves your ability to interpret readings correctly and plan appropriate restoration responses.
Recommended
7 Common Examples of Water Damage and How to Spot Them – PuroClean of Northeast Sacramento
Effective Water Damage Mitigation Steps for Fast Recovery – PuroClean of Northeast Sacramento
Water Damage Restoration Guide: Restore Property Fast – PuroClean of Northeast Sacramento
How to Handle Water Damage: Step-by-Step Restoration Guide – PuroClean of Northeast Sacramento
