How to Handle Water Damage: Step-by-Step Restoration Guide
Water damage strikes fast and can cost homeowners an average of $3,000 in repairs. Even a small leak can lead to major headaches if not handled early. Quick, informed action protects your home from mold, structural risks, and rising repair bills. This guide walks you through every crucial step, giving you practical advice to restore your property safely and prevent costly mistakes.
Table of Contents
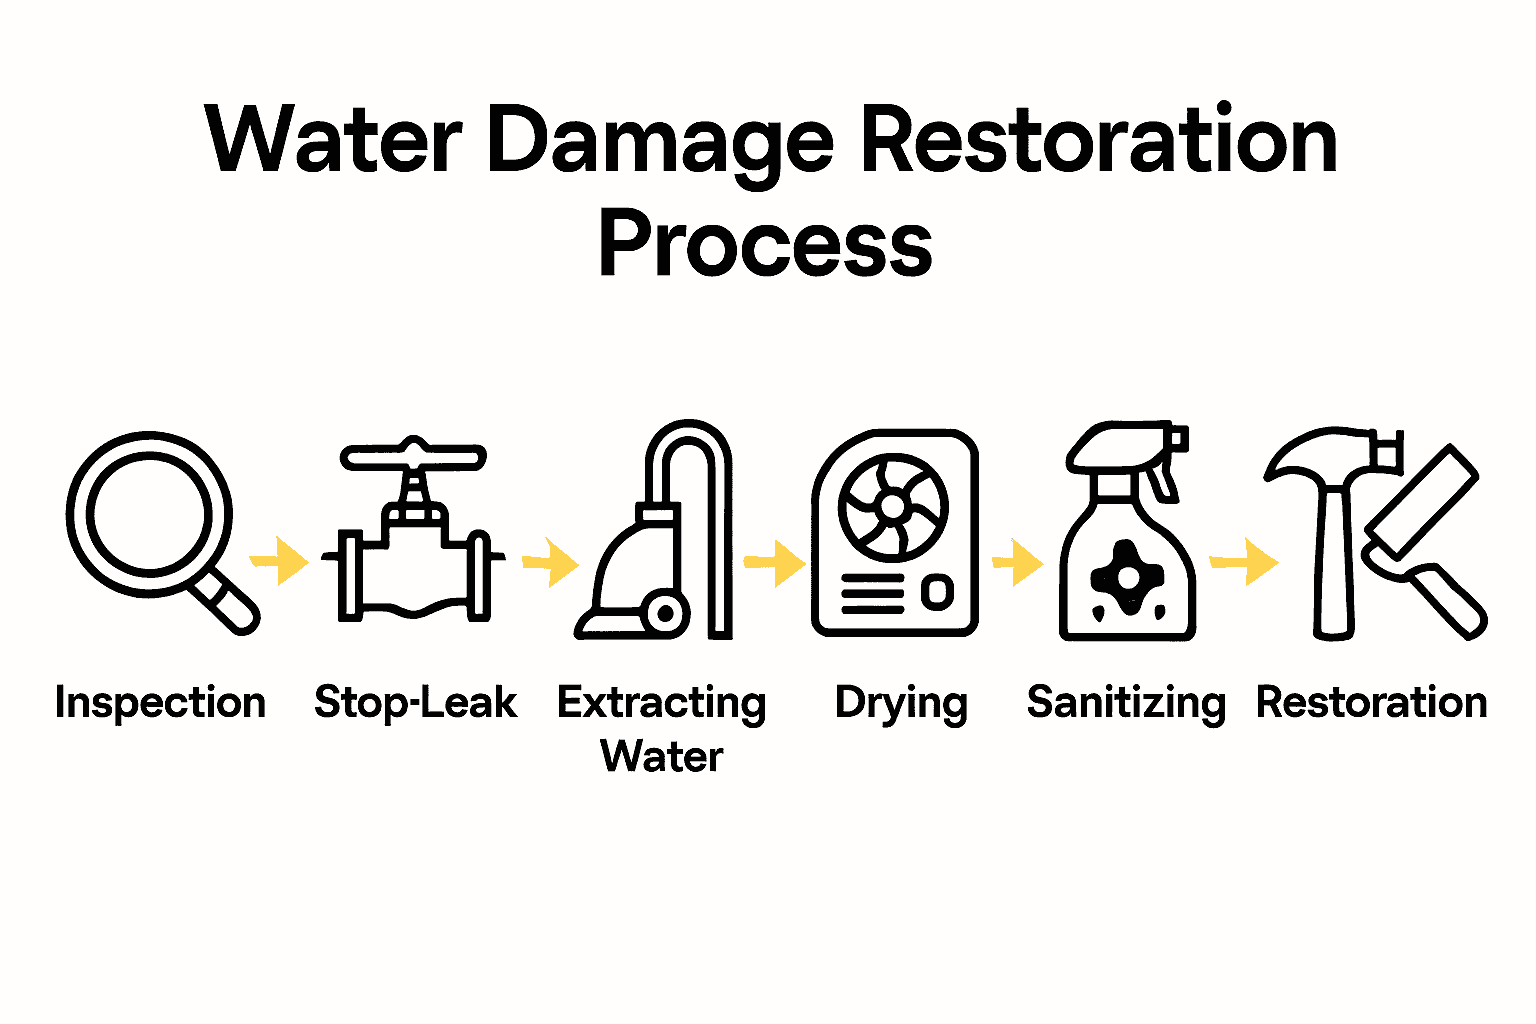
- Step 1: Assess The Water Damage And Ensure Safety
- Step 2: Stop The Source And Remove Excess Water
- Step 3: Extract Water And Remove Wet Materials
- Step 4: Dry And Dehumidify All Affected Areas
- Step 5: Sanitize Surfaces And Prevent Mold Growth
- Step 6: Verify Dryness And Restore Damaged Property
Quick Summary
| Key Point | Explanation |
|---|---|
| 1. Assess damage safely first | Inspect the affected area for risks and document the damage before taking further action. |
| 2. Stop the water source immediately | Identify and address leaks promptly to prevent further water damage and hazards, prioritizing safety. |
| 3. Remove standing water efficiently | Use appropriate tools like wet vacuums for large areas, ensuring to protect yourself from contaminants. |
| 4. Dry and dehumidify thoroughly | Employ fans and dehumidifiers to ensure all moisture is removed, preventing mold growth and damage. |
| 5. Sanitize to prevent mold | Clean surfaces with disinfectant solutions and use antifungal treatments on vulnerable materials to inhibit mold development. |
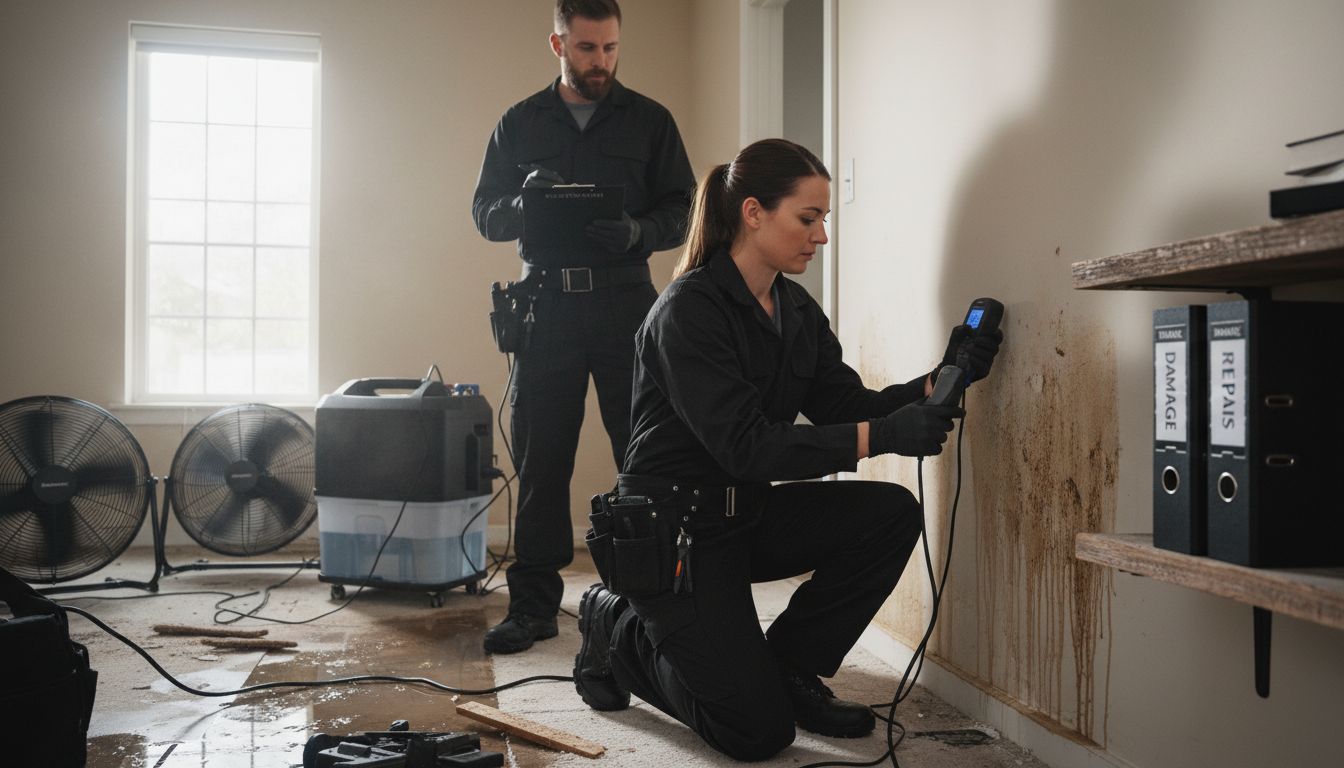
Step 1: Assess the Water Damage and Ensure Safety
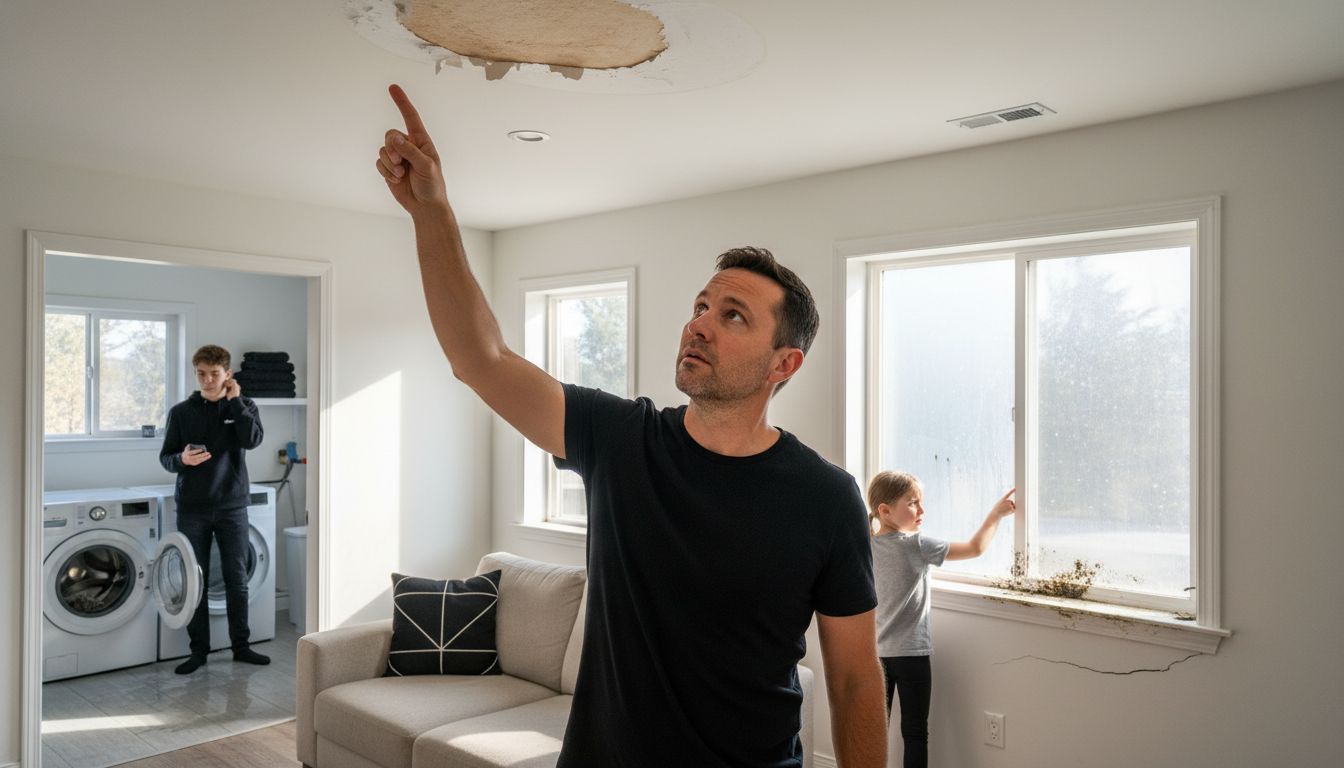
Your first priority after discovering water damage is conducting a safe and thorough initial assessment to understand the extent of damage and prevent potential hazards. This crucial step helps you determine the necessary restoration actions and protect yourself from potential risks.
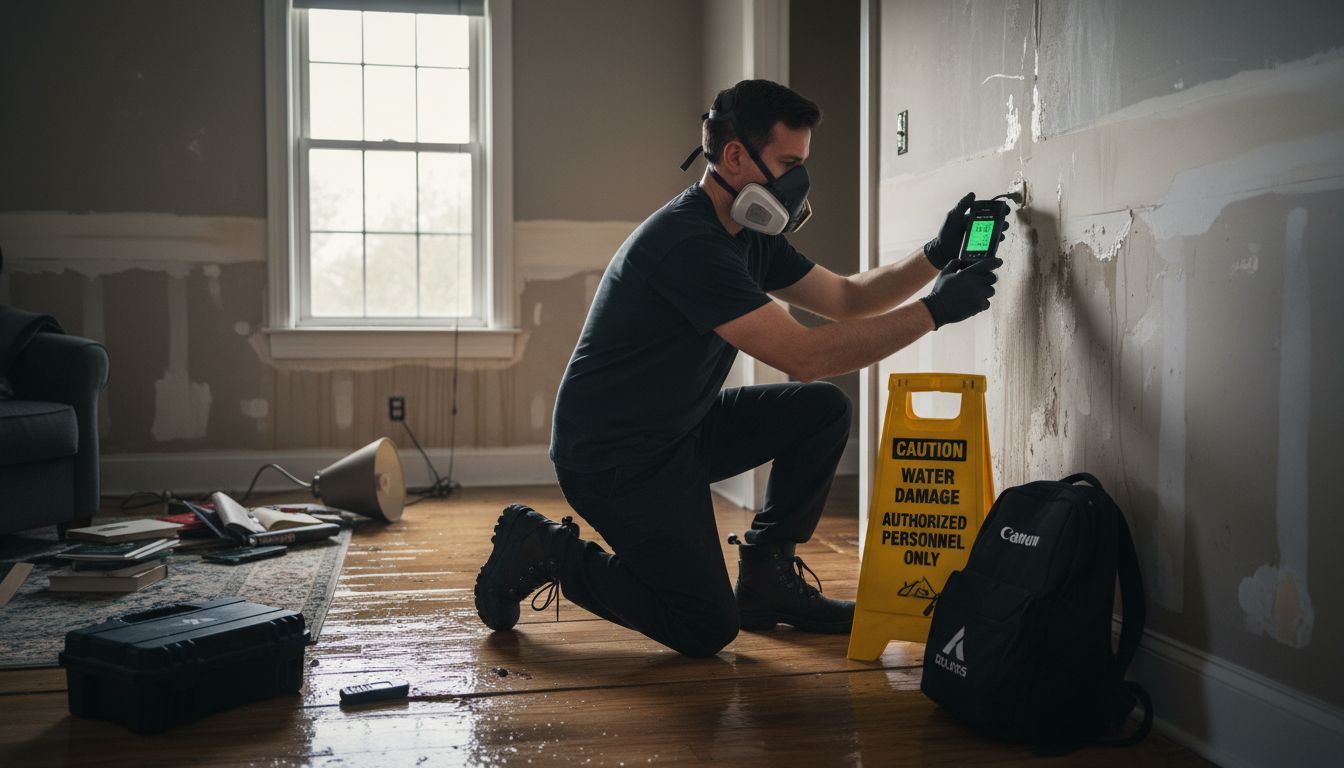
Begin by carefully inspecting the affected area while prioritizing personal safety. According to San José gov, pay special attention to structural integrity check ceilings and floors for signs of sagging or water saturation that could indicate potential collapse risks. Look for visible signs of damage like discoloration, warping, or soft spots on walls, floors, and ceilings. Wear protective gear such as rubber gloves, waterproof boots, and a face mask to minimize exposure to potential contaminants.
To accurately assess moisture levels beyond visible damage, Mass gov recommends using moisture measuring devices that can detect hidden moisture trapped within walls or under flooring. These tools help identify areas at risk for mold growth and potential structural deterioration. If you do not have professional moisture detection equipment, look for telltale signs like musty odors, unexplained dampness, or recent leaks from pipes or ventilation systems.
Pro tip: Before proceeding with any restoration efforts, document the damage by taking clear photographs from multiple angles. These images will be crucial for insurance claims and professional assessment. If the water damage appears extensive or you notice significant structural concerns, stop and contact professional restoration services immediately.
Ready to move forward? The next step involves removing standing water and starting the initial drying process to prevent further damage.
Step 2: Stop the Source and Remove Excess Water
The critical next step in water damage restoration is immediately stopping the water source and removing excess water to prevent further damage and potential structural issues. This phase requires quick action and strategic planning to minimize long term consequences.
According to Stanford Environmental Health & Safety, your first priority is identifying and stopping the water source such as burst pipes, clogged drains, or roof leaks. Turn off the main water supply to prevent additional water flow and eliminate electrical risks. If the water source involves complex plumbing or potential electrical hazards, contact professional maintenance services immediately. Be extremely cautious around electrical appliances and avoid contact with water near any electrical outlets or equipment.
North Carolina Historic Preservation Office recommends using strategic water removal techniques depending on the volume of water. For small amounts, use mops, towels, and buckets to manually remove standing water. For larger volumes, employ wet vac systems or drainage pumps to extract water quickly and efficiently. If possible, create temporary repairs on roofs or windows to prevent additional water entry and further damage.
Pro tip: Always wear protective rubber boots and gloves during water removal to protect yourself from potential contaminants and electrical risks. If water levels are high or the damage seems extensive, consider professional water extraction services to ensure thorough and safe removal.
Now that you have stopped the water source and begun removing excess water, the next critical step is setting up proper drying equipment to prevent mold growth and further structural damage.
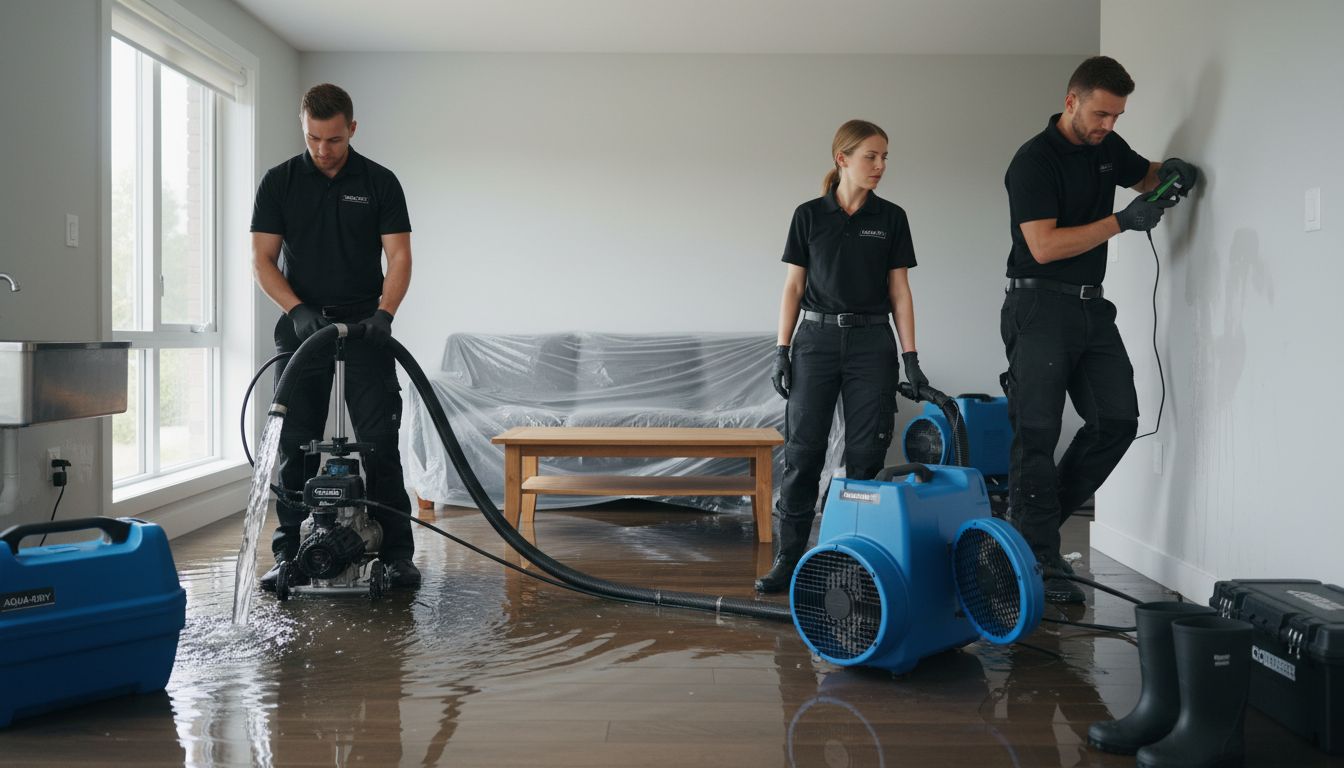
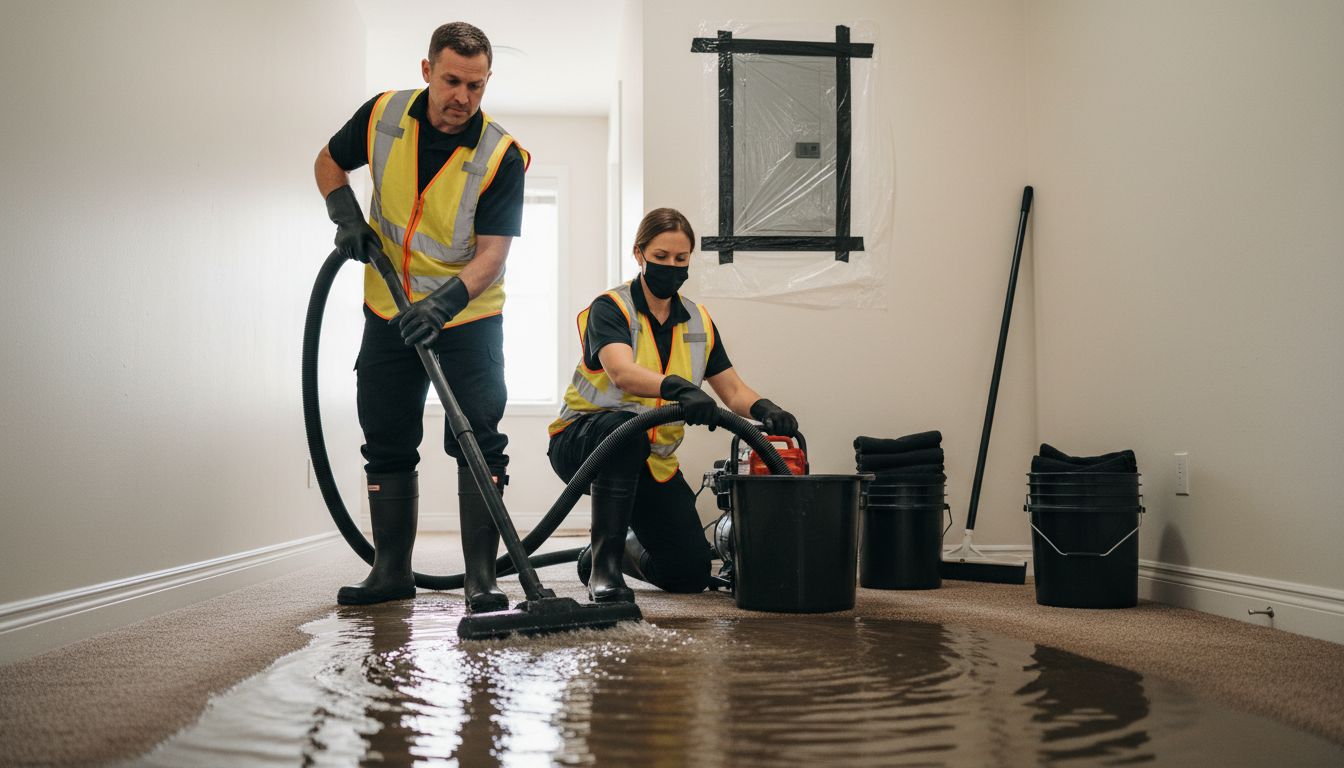
Step 3: Extract Water and Remove Wet Materials
After stopping the water source, your next critical task is systematically extracting standing water and removing water damaged materials to prevent long term structural and health risks. This step requires careful planning and strategic removal to minimize potential mold growth and further property damage.
Venture World emphasizes the importance of quickly removing standing water using appropriate equipment. For small areas, use towels, mops, and buckets to manually extract water. For larger volumes, industrial grade wet vacuums and pumps provide the most efficient water removal. Focus on extracting water from floors, carpets, and low lying areas where moisture tends to accumulate.
Begin systematically removing wet materials that cannot be effectively dried. This includes saturated carpeting, drywall, insulation, and wooden materials that show signs of significant water absorption. Carefully cut and remove damaged sections at least 12 inches above the visible water line to prevent potential mold spread. Prioritize removing porous materials that can quickly become breeding grounds for harmful microorganisms.
Pro tip: Wear protective gear including rubber gloves, waterproof boots, and a respirator mask when removing wet materials. Create designated staging areas outside your living space to sort salvageable and non salvageable items, which will help streamline the restoration process.
With water extracted and wet materials removed, you are now ready to begin the critical drying and dehumidification phase of water damage restoration.
Step 4: Dry and Dehumidify All Affected Areas
After removing standing water and wet materials, the critical phase of drying and dehumidification begins. Your goal is to completely dry all affected areas to prevent mold growth, structural damage, and potential health hazards associated with prolonged moisture exposure.
North Carolina Historic Preservation Office advises starting the drying process systematically from the attic downward. Open all available windows and doors to promote maximum air circulation, but be cautious about using portable heaters or air conditioners which can cause additional damage to water sensitive materials. Position industrial fans strategically to create cross ventilation and accelerate moisture evaporation across all affected surfaces.
Venture World recommends using a combination of fans, dehumidifiers, and targeted heating to expedite the drying process. Place dehumidifiers in central locations to extract moisture from the air and prevent humidity buildup. Monitor humidity levels carefully aim to maintain indoor humidity below 50% to discourage mold and mildew development.
Pro tip: Use moisture detection meters to track progress and ensure thorough drying. Pay extra attention to hidden areas like wall cavities, under flooring, and inside cabinets where moisture can remain trapped and undetected.
Once all affected areas are completely dry, you will be ready to assess and repair any remaining structural damage.
Step 5: Sanitize Surfaces and Prevent Mold Growth
After successfully drying affected areas, the next critical step is thoroughly sanitizing surfaces to eliminate potential health hazards and prevent future mold development. This phase requires careful cleaning and strategic treatment of all water damaged areas to ensure complete restoration.
Security.org recommends creating an effective disinfection solution using 10% bleach and 90% water for nonporous hard surfaces. Apply this solution using a stiff brush to clean areas like concrete thoroughly. Ensure the cleaning solution remains on surfaces for at least 10 minutes before rinsing to maximize its disinfecting potential. Focus on scrubbing all hard surfaces including tiles, sealed concrete, and metal fixtures that may harbor bacteria or potential mold spores.
Weill Cornell Medicine emphasizes the importance of promptly notifying maintenance services to coordinate comprehensive remediation efforts. After initial cleaning, use specialized antifungal treatments on porous surfaces like drywall and wood to create an additional barrier against potential mold growth. Pay special attention to areas with high moisture exposure such as bathrooms, basements, and areas near plumbing fixtures.
Pro tip: Wear protective gear including rubber gloves, a respirator mask, and eye protection when performing sanitization to prevent exposure to harmful chemicals and potential contaminants. Ventilate the area well during and after cleaning to allow proper air circulation and rapid drying.
With surfaces sanitized and preventative measures in place, you are now ready to begin the final stage of assessing and repairing any remaining structural damage.
Step 6: Verify Dryness and Restore Damaged Property
Reaching the final stage of water damage restoration requires meticulous verification of dryness and strategic repair of affected areas. This critical phase ensures your property returns to its pre damage condition while preventing potential future complications.
North Carolina Historic Preservation Office cautions against rushing the drying process with portable heaters or air conditioners which can cause additional damage. Instead, use professional moisture detection equipment to comprehensively verify that all surfaces have returned to acceptable moisture levels. Focus on checking hidden areas like wall cavities, under flooring, and inside insulation where moisture can remain trapped and undetected.
National Property Insurance Program recommends creating a systematic maintenance and inspection schedule to prevent future damage. Carefully assess and repair structural elements including drywall, wooden frames, flooring, and electrical systems. Replace any materials that show significant water damage or signs of potential structural weakness. Document all repairs and restoration efforts for insurance purposes and future reference.
Pro tip: Consider consulting professional restoration experts for complex or extensive damage. They can provide specialized assessment and ensure your property is thoroughly restored to safe and livable conditions.
With verification complete and necessary repairs made, you have successfully navigated the water damage restoration process and restored your property to its pre damage state.
Fast, Professional Help When Water Damage Strikes Your Home or Business
Dealing with water damage is challenging and stressful. From assessing the damage to drying, sanitizing, and restoring your property, every step requires care and expertise to prevent ongoing issues like mold or structural problems. If you have discovered water damage, you are likely facing urgent needs to stop leaks, remove excess water, and begin the restoration process safely and thoroughly. PuroClean of Northeast Sacramento understands these challenges and is ready to provide rapid, expert assistance whenever you need it.
Don’t wait for minor issues to become major repairs. Visit PuroClean of Northeast Sacramento to connect with certified water damage restoration professionals who offer 24/7 emergency response and use advanced methods to get your property dry and safe faster. Learn about our comprehensive water damage restoration services and see why so many homeowners and businesses trust us for urgent help you can count on. Act now to protect your home or commercial property and get your life back to normal.
Frequently Asked Questions
What should I do first when I discover water damage?
Start by assessing the water damage while prioritizing your safety. Inspect the affected area for structural integrity, ensuring to check ceilings and floors for signs of sagging, and wear protective gear like gloves and boots.
How can I stop the source of water damage?
Immediately turn off the main water supply to stop further water flow. If the source involves complex plumbing or electrical risks, call a professional to handle it safely.
What steps should I take to remove excess water?
Use mops, towels, or a wet vac to remove standing water. For larger volumes, employ drainage pumps to extract water efficiently from affected areas.
How do I ensure everything is dried properly after water damage?
Dry all affected areas starting from the attic downwards to promote proper ventilation. Use fans and dehumidifiers until indoor humidity levels are below 50%, and check hidden areas to ensure thorough drying.
What cleaning solutions should I use to sanitize surfaces after water damage?
Create a disinfecting solution using 10% bleach and 90% water for hard surfaces. Scrub these surfaces thoroughly to eliminate bacteria and mold spores, ensuring the solution sits for at least 10 minutes before rinsing.
How do I verify that the affected areas are dry before restoring my property?
Use moisture detection equipment to confirm that all surfaces are at acceptable moisture levels. Pay particular attention to hidden areas and document the results before proceeding with any repairs.
Recommended
Water Damage Restore: Key Actions in First 24 Hours
How to Repair Water Damaged Drywall Step by Step
How to Clean Up Water Damage Fast: 7 Effective Steps – PuroClean of Coral Gables