Mold Prevention Steps for Water-Damaged Homes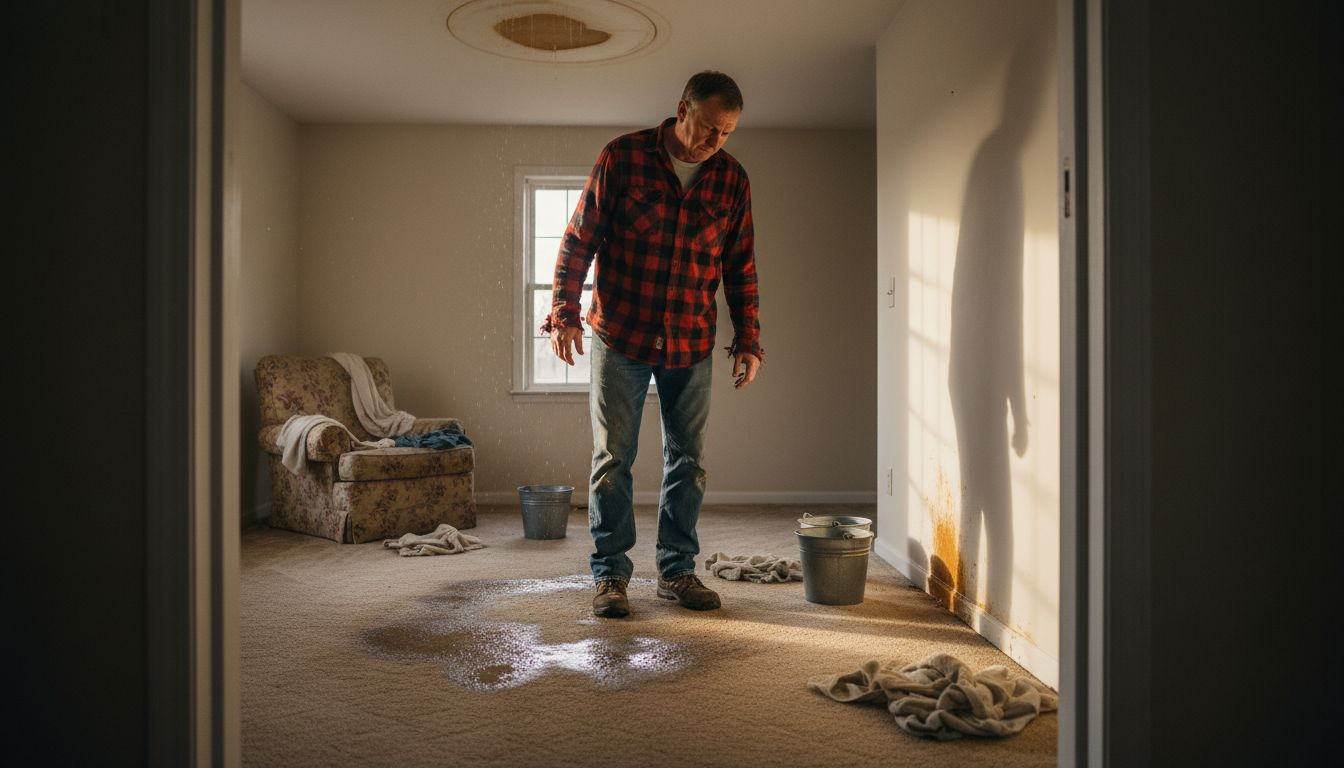
Waking up to the aftermath of water damage in your Northeast Sacramento home brings more than just soggy carpets and damp walls. The risk of mold growth threatens not only your property value but also your family’s health. Taking action quickly and understanding where water hides is the foundation for lasting protection. This guide breaks down practical prevention tips so you can address hidden moisture, act within critical time frames, and defend your home against mold before problems begin.
Table of Contents
Step 1: Assess Water Damage Areas Thoroughly
Step 2: Remove Excess Moisture Immediately
Step 3: Clean Affected Surfaces Carefully
Step 4: Apply Mold Prevention Products Effectively
Step 5: Verify Dryness And Monitor For Mold
Quick Summary
Essential Insight
Clarification
1. Identify all moisture sources
Thoroughly assess areas for hidden water damage to prevent mold growth. Document visible and hidden moisture through images and notes.
2. Act quickly to remove water
Extract standing water and accelerate drying within 24-48 hours to stop mold from forming. Use pumps and dehumidifiers effectively.
3. Clean surfaces to eliminate spores
Scrub affected areas with detergent to remove mold. Discard materials that cannot be cleaned, like soaked carpets and drywall.
4. Apply prevention products correctly
Use mold-resistant paints on completely dry surfaces to prevent reinfestation. Proper application prevents future mold growth effectively.
5. Monitor moisture levels constantly
Use moisture meters to verify dryness and hygrometers to track indoor humidity, preventing mold recurrence by ensuring moisture control.
Step 1: Assess water damage areas thoroughly
After water enters your home, the first 24 to 48 hours are critical for preventing mold growth. Your goal right now is to identify exactly where water has penetrated, how deep it goes, and what hidden areas might be affected. This assessment guides your entire recovery strategy.
Start by documenting what you can see. Look for visible moisture, discoloration on walls and ceilings, and areas where water has pooled or left watermarks. Take photos and videos of everything—wet drywall, saturated flooring, damaged furniture, and water lines on baseboards. These images matter for insurance claims and help contractors understand the full scope of damage.
The real challenge is finding water where you cannot see it. Water travels horizontally along framing and seeps behind walls far from the initial leak point. Identify moisture sources and water intrusion points by checking these often-missed locations:
Behind baseboards and trim
Under carpet and padding
Inside wall cavities and insulation
Above suspended ceilings
Around window frames and door frames
Under appliances and HVAC units
Inside crawl spaces and attics
Along plumbing lines and radiators
Look for soft spots in walls and floors that indicate saturation. Press gently on drywall—if it feels spongy or your finger leaves an indentation, moisture has penetrated deeper than the surface. Peer into wall outlets and light switches where you might see moisture seeping. Check for musty odors, which often signal moisture in hidden cavities before visible mold appears.
If the water damage covers more than a small area, bring in professionals who have moisture detection tools like thermal imaging cameras and moisture meters. These instruments reveal water behind walls and under flooring without requiring destructive investigation. The cost is worth it because missing hidden pockets of moisture leads directly to mold problems weeks later.
Document every wet area with photos and notes. This thorough inventory prevents mold from hiding and spreading undetected in your home.
Pro tip: Mark wet areas with tape or chalk to maintain a visual record if moisture patterns shift during initial drying, and keep notes of what you found where so restoration crews don’t miss anything.
Step 2: Remove excess moisture immediately
Time is your enemy right now. Water sitting in carpets, drywall, and furniture begins breeding mold colonies within 24 to 48 hours. Your mission is to remove standing water and start the drying process before mold gets a foothold.
Begin by extracting standing water from floors, basements, and low-lying areas. If you have a wet vacuum or submersible pump, use it to pull water away from affected surfaces. For smaller amounts, mop and squeeze water into buckets. Every gallon you remove reduces the moisture load significantly.
Once standing water is gone, focus on accelerating evaporation. Open windows and doors to increase air circulation, but only if outdoor humidity is lower than indoor humidity. On humid days, opening windows traps moisture inside and works against you. Turn on ceiling fans, box fans, and portable fans to keep air moving across wet surfaces.
Use dehumidifiers to lower indoor humidity levels below 50 percent, which halts mold germination. Place units in the most affected rooms and leave them running continuously. Dehumidifiers pull moisture from the air and drain it away, creating an environment where mold cannot thrive.
Remove water-saturated materials strategically:
Pull up wet carpet and padding to expose the concrete or wood underneath
Tear out wet drywall up to at least 12 inches above the water line
Remove soaked insulation to prevent hidden moisture pockets
Discard cardboard boxes and porous items that absorbed water
Wring out wet textiles or hang them to dry if salvageable
Don’t delay on these removals. Wet materials trapped against dry surfaces create a perfect breeding ground for mold. The longer damp items stay in place, the more spores germinate.
If you have access to commercial drying equipment like air movers and large-capacity dehumidifiers, deploy them immediately. Drying water-damaged areas within 24 to 48 hours is critical for preventing mold and structural decay. Professional restoration crews use industrial-grade equipment that accelerates this process far faster than standard fans.
The moisture window is narrow. Every hour counts between water intrusion and mold colonization.
Pro tip: Rent commercial dehumidifiers and air movers from equipment rental shops if your home damage is extensive—the rental cost is minimal compared to mold remediation and structural repairs down the road.
Step 3: Clean affected surfaces carefully
Now that moisture is under control, you need to eliminate mold spores and bacteria that have already begun colonizing surfaces. Cleaning is not optional—it removes the food source mold needs to spread. However, improper cleaning can actually scatter spores and make the problem worse.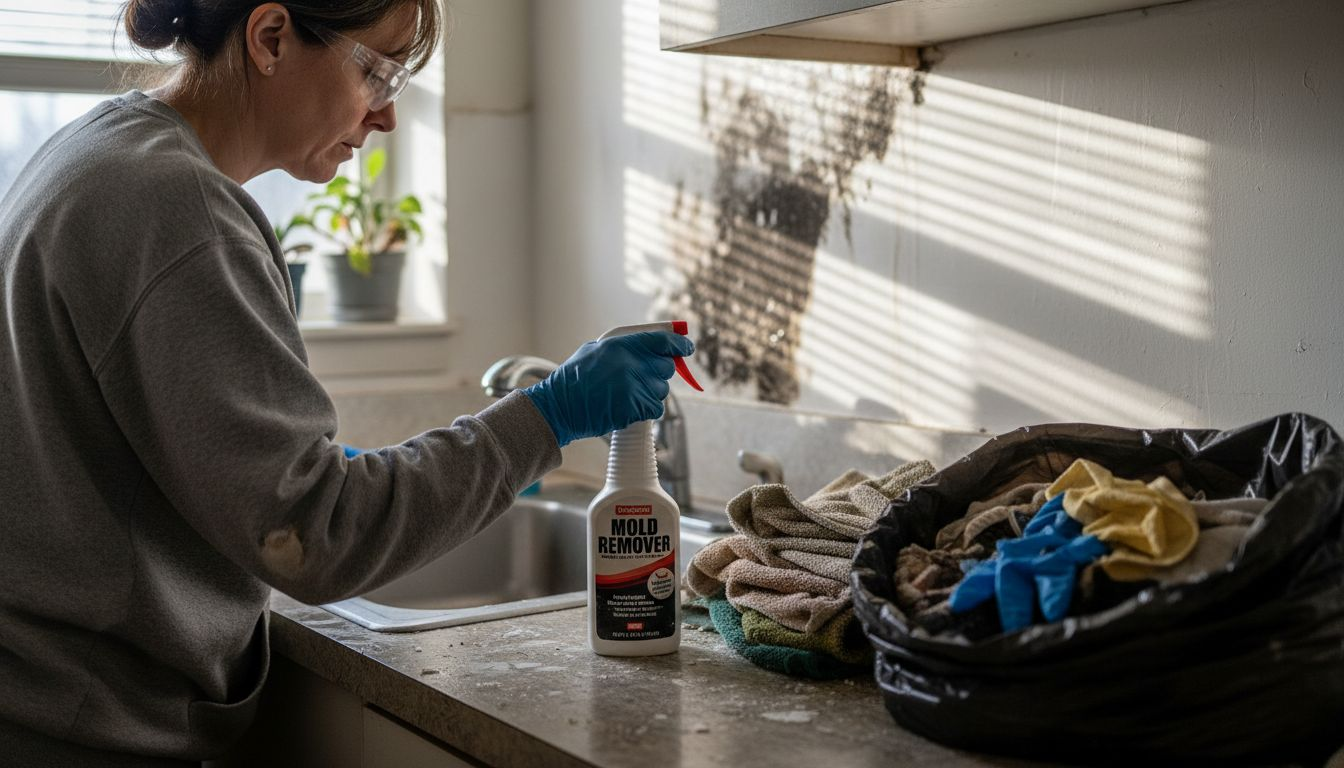
Start with personal protection first. Wear nitrile gloves, safety glasses, and an N95 respirator mask before touching any moldy areas. Mold spores are microscopic and airborne. Breathing them directly causes respiratory irritation and allergic reactions. Even if you do not see visible mold yet, water-damaged areas harbor spore colonies invisible to the naked eye.
Clean moldy surfaces with detergent and water, then dry completely. Use a stiff brush or scrub pad to remove visible mold from hard surfaces like tile, concrete, and wood. Do not just wipe surfaces—scrub them aggressively to break up mold colonies embedded in the material.
Follow this cleaning sequence for best results:
Spray affected surfaces with a detergent solution (dish soap and water works fine)
Let the solution sit for 5 to 10 minutes to loosen mold
Scrub thoroughly with a brush, working in small sections
Rinse with clean water and a cloth
Dry immediately with towels or fans
Work on small sections at a time rather than the entire room at once. This prevents mold spores from becoming airborne throughout your home. Open windows during cleaning for ventilation, but keep interior doors closed to contain airborne spores in the affected area.
Porous materials like drywall, carpet, and insulation that are extensively moldy should be discarded. You cannot clean porous materials thoroughly enough to remove all spores hiding inside the material. Replacing them is faster and safer than attempting remediation.
Below is a summary of cleaning methods and what materials they are best suited for:
Surface Type
Preferred Cleaning Method
Should Be Discarded?
Hard Surfaces
Scrub with detergent & water
Only if heavily damaged
Carpets
Remove, dry or replace
Yes, if saturated or moldy
Drywall
Cut above water line, replace
Yes, if moldy/damaged
Insulation
Remove, replace
Always if wet or moldy
Wood Floors
Dry, clean, sand if needed
Only if severe mold or rot
Never mix cleaning chemicals like bleach and ammonia. This creates toxic fumes that cause serious respiratory damage. Stick with simple detergent and water—it works effectively without creating hazards.
Protect yourself first, scrub thoroughly second, and discard what cannot be salvaged. This sequence prevents both health risks and incomplete cleanup.
Pro tip: Bag and seal all moldy materials before removing them from the house to prevent spores from spreading to unaffected areas during transport.
Step 4: Apply mold prevention products effectively
Cleaning removes existing mold, but prevention products create a chemical barrier that stops new colonies from forming. Think of these products as insurance against regrowth while your home completes the drying process. However, applying them incorrectly wastes money and offers no protection.
The critical rule is simple: only apply mold prevention products to completely dry surfaces. If moisture remains underneath or within the material, the product cannot penetrate or bond properly. You are essentially sealing moisture inside, which defeats the entire purpose. Wait until affected areas are bone dry before proceeding.
Use mold-resistant paints and primers on cleaned and dried surfaces to prevent regrowth. These specialized products contain mold inhibitors that kill spores before they colonize. Apply them to walls, ceilings, and trim that experienced water exposure. Standard paint offers zero mold protection, so do not skip this upgrade.
Follow these application steps for best results:
Ensure all surfaces are completely dry (use a moisture meter to verify)
Sand rough or flaking areas and remove any residue
Apply a mold-resistant primer first (this is essential, not optional)
Apply mold-resistant paint in 2 coats for maximum coverage
Allow proper drying time between coats per manufacturer instructions
Mold prevention products work only as part of a complete system. They cannot compensate for ongoing moisture problems. If gutters remain clogged, ventilation stays blocked, or humidity stays above 50 percent, mold will return despite the best prevention products.
For Northeast Sacramento homeowners, maintaining gutters and roof drainage is essential during our winter months. Improper water drainage from roofs and gutters creates the exact moisture conditions that mold loves. These maintenance tasks prevent future water intrusion before it starts.
Prevention products are only effective when moisture control is permanent. Paint cannot fix a broken gutter or seal a leaking roof.
Pro tip: Invest in mold-resistant paint for bathrooms, basements, and laundry areas year-round, even without prior water damage, since these spaces naturally harbor moisture.
Step 5: Verify dryness and monitor for mold
Your home feels dry to the touch, but hidden moisture can linger in wall cavities, subflooring, and structural materials for weeks. Incomplete drying is the number one reason mold returns after remediation. Verification using proper tools removes the guesswork and confirms your recovery is truly complete.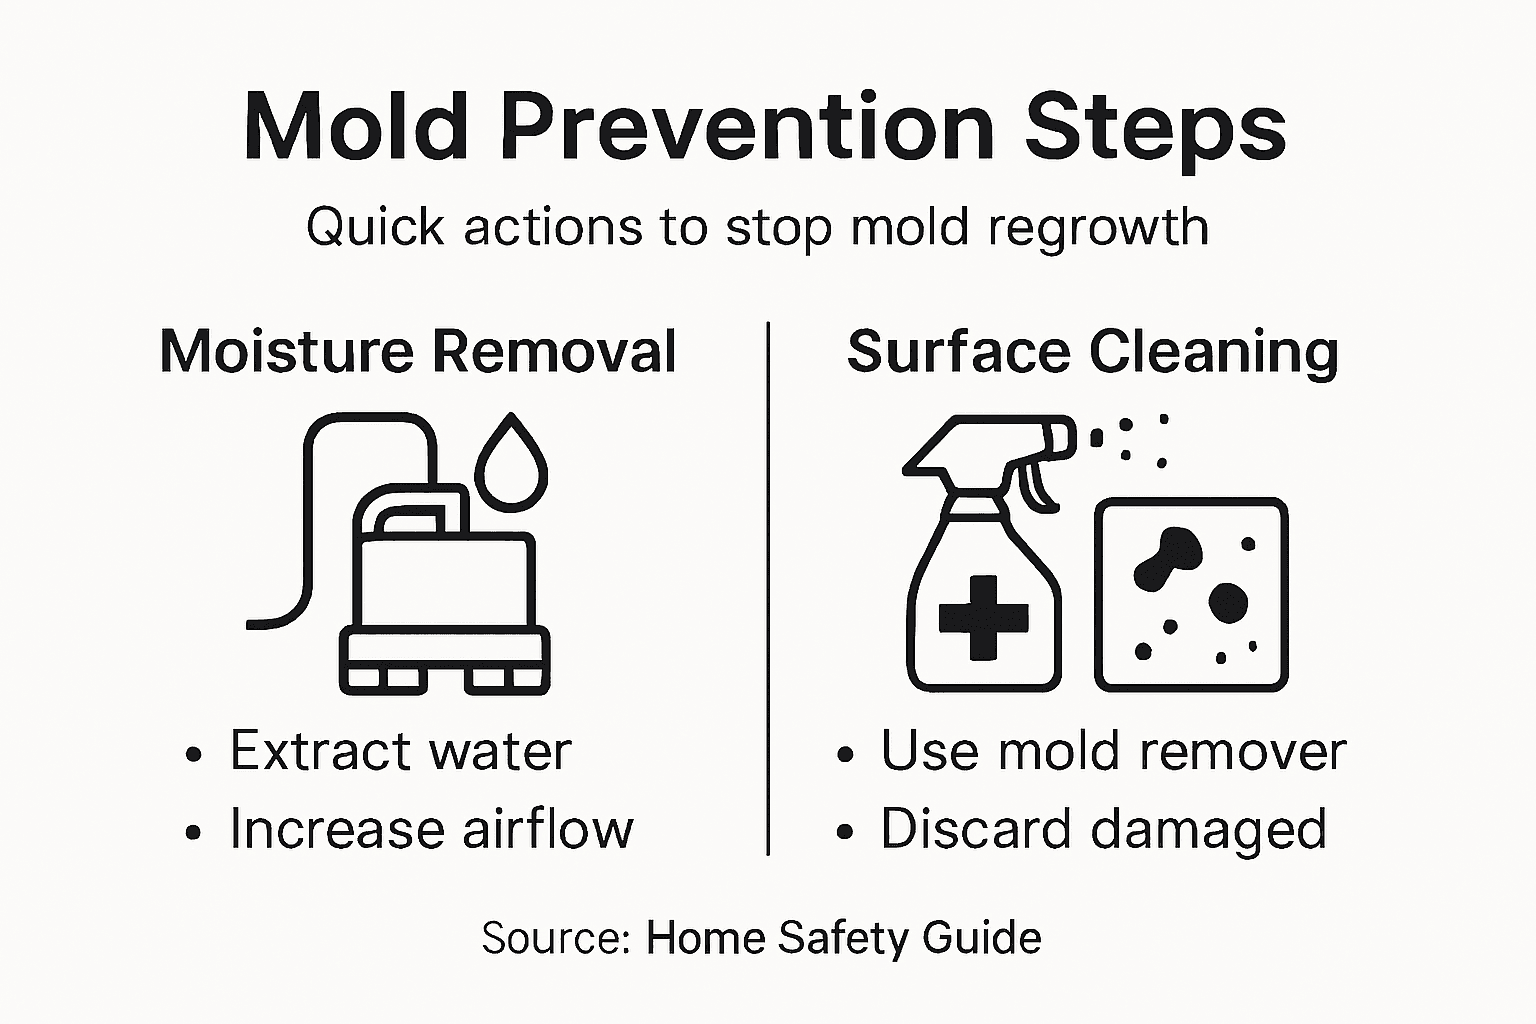
Invest in a moisture meter to measure actual moisture content in building materials. These affordable devices (typically $20 to $50) reveal what your hands cannot feel. Press the pins into drywall, wood, and concrete to get readings. Materials should read below 16 percent moisture content before you consider them dry. Anything higher still contains enough water for mold to grow.
Use a hygrometer to monitor indoor humidity levels continuously. This device measures relative humidity in the air. Maintaining relative humidity below 50 percent helps prevent mold regrowth even if surfaces are technically dry. In Northeast Sacramento, winter moisture from rain and condensation can push humidity above this threshold quickly. Keep your hygrometer in the most vulnerable areas: basements, bathrooms, and any previously water-damaged rooms.
Here’s a comparison of tools used for detecting and monitoring moisture in homes:
Tool
Primary Use
Typical Cost
Key Advantage
Moisture Meter
Checks hidden material dampness
$20 to $50
Reveals moisture inside walls
Hygrometer
Measures indoor humidity
$15 to $40
Tracks air moisture accurately
Thermal Camera
Identifies moisture patterns
$200+
Visualizes hidden water paths
Dehumidifier
Reduces room humidity
$200+ (purchase)
Lowers mold risk quickly
Here is your verification checklist:
Take moisture meter readings in all affected areas (document these numbers)
Check readings again after 3 to 5 days to ensure they continue dropping
Monitor humidity with a hygrometer daily for the first two weeks
Look and sniff for early signs of mold growth like musty odors or dark spots on surfaces
Keep windows cracked during dry weather to improve air circulation
Run HVAC systems and dehumidifiers continuously if humidity stays elevated
If moisture readings plateau or increase instead of decreasing, you have a hidden moisture source. This could mean a slow leak, poor drainage, or inadequate drying. Stop and investigate before moving forward. Missing this step invites mold colonization that becomes invisible until serious damage occurs.
Monitoring does not end after two weeks. Check moisture and humidity monthly for the next three months. Seasonal shifts in Sacramento weather can reintroduce moisture through walls and foundations. Catching problems early prevents expensive remediation later.
Moisture meters reveal what your eyes cannot see. They transform guesswork into confirmation and prevent costly mold recurrence.
Pro tip: Place hygrometers in multiple rooms and check readings at the same time each day to track humidity patterns and identify which areas struggle most with moisture control.
Protect Your Home Quickly After Water Damage to Prevent Mold Growth
Water damage creates a race against time to remove moisture and stop mold before it starts. This article highlights the critical steps of thorough assessment, rapid drying, careful cleaning, and ongoing moisture monitoring. If you face challenges like hidden leaks behind walls or standing water in your basement you need expert help fast to avoid costly mold and structural damage.
At PuroClean of Northeast Sacramento, we specialize in swift water extraction and advanced structural drying using state-of-the-art technology. Our 24/7 emergency response ensures your home is dried efficiently to prevent mold growth in the most vulnerable spaces. We also coordinate leak detection and repairs to eliminate hidden moisture sources that cause recurring problems. Trust our certified team to protect your property from water-related losses with professionalism and care.
Explore our Water Damage Restoration services now and get ahead of mold before it threatens your health and home.
Don’t wait and risk mold spreading silently. Contact PuroClean of Northeast Sacramento immediately for expert water damage cleanup and restoration that safeguards your home’s future.
Frequently Asked Questions
How can I assess areas of water damage in my home?
To assess water damage, start by documenting visible signs such as moisture, discoloration, and water pooling. Check often-overlooked areas like behind baseboards and under carpets, and take pictures for reference.
What should I do immediately after discovering water damage?
Immediately remove standing water using a wet vacuum or mops, and start the drying process by opening windows and using fans. Remove any water-saturated materials like carpets or drywall within 24 to 48 hours to prevent mold growth.
How do I clean moldy surfaces after water damage?
Clean moldy surfaces using a mixture of detergent and water, and scrub thoroughly to remove mold colonies. Wear protective gear and work in small sections to minimize the spread of spores while cleaning.
When should I apply mold prevention products after cleaning?
Apply mold prevention products only after ensuring all affected areas are completely dry. Use mold-resistant paints and primers, and follow up with two coats for maximum effectiveness.
How can I verify that my home is dry and monitor for mold?
Use a moisture meter to check that all affected materials read below 16 percent moisture content, indicating dryness. Additionally, monitor indoor humidity levels with a hygrometer to keep them below 50 percent, preventing mold regrowth.
What are the signs of potential mold regrowth after water damage?
Watch for early signs of mold regrowth, such as musty odors or dark spots appearing on surfaces. Regularly check moisture levels and inspect for changes over the following months to catch problems early.
Recommended
Strategies to Prevent Mold Growth after Water Damage
Preventing Mold Growth After Water Damage: Expert Tips for Maryland Homeowners – PuroClean Emergency Restoration
Home Mold Remediation: 10 Essential Tips to Prevent Mold Recurrence – PuroClean of Coral Gables
3 Common Causes Of Mold Growth In Homes And How To Prevent It
