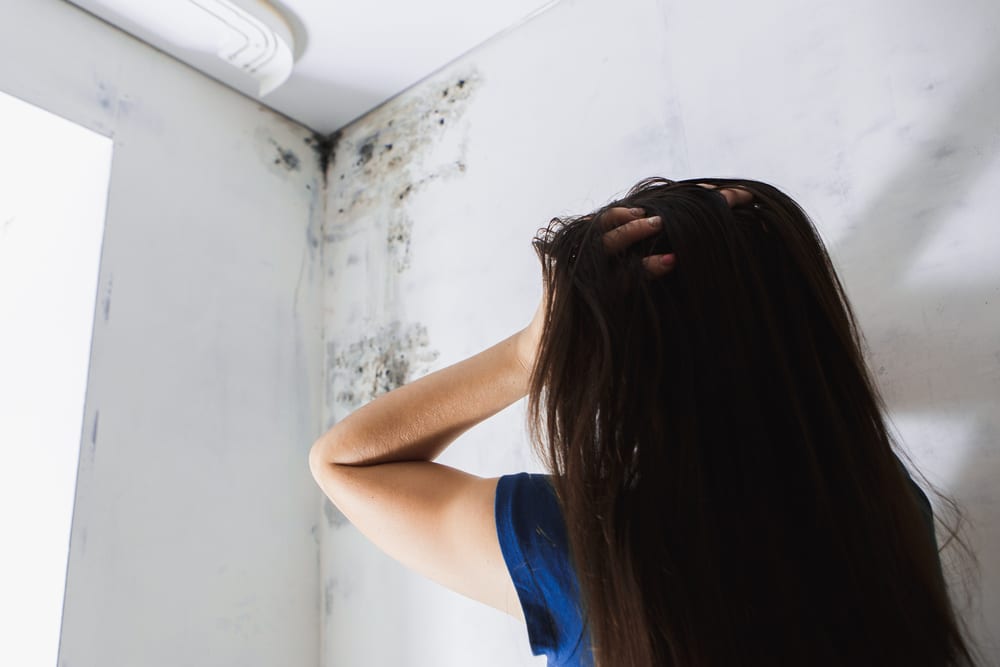
he sound of rushing water echoed through his Royersford home on Donegal Court a sound no homeowner ever wants to hear. By the time he located the source, his worst fears were confirmed: a second-floor toilet had overflowed, and water was cascading through his ceiling, flooding his hallway, laundry room, and eventually pooling in his finished basement.
For most homeowners, this scenario represents a nightmare extensive damage across multiple floors, thousands of dollars in restoration costs, and the overwhelming question: “Where do I even start?” But Ben had an advantage. He was a returning customer who had trusted PuroClean with his sump pump emergency back in 2023. He knew exactly who to call.
This is the story of how our team transformed a devastating multi-floor water disaster into a complete restoration success and what other homeowners can learn from Ben’s experience about responding to water emergencies, working with insurance companies, and choosing the right restoration partner.
The Emergency Call: Saturday Morning Crisis
Initial Contact and Immediate Response
On Saturday, October 19th, 2025, at 9:36 AM, James contacted PuroClean of Lansdaale. Despite the weekend timing, our 24/7 emergency response team immediately sprang into action. Within minutes of receiving James’s call, we had:
- Gathered critical information about the water source and affected areas
- Dispatched our certified technician Sergio to the Royersford property
- Initiated our emergency response protocol with a projected arrival time
- Began coordinating with our project management team for comprehensive restoration planning
By 10:48 AM just over an hour after Ben’s initial call Sergio was already on the way to the property, equipped with professional moisture detection equipment, documentation tools, and emergency extraction gear.

Why Rapid Response Matters
Many homeowners don’t realize that the first few hours after water damage occurs are absolutely critical. Every minute water sits in your home:
- Porous materials absorb more moisture, making restoration increasingly difficult
- Contamination spreads from the initial source to adjacent areas
- Structural damage worsens as water seeps into building materials
- Restoration costs increase exponentially as more materials require replacement
- Mold growth risks escalate once moisture levels reach critical thresholds
Our arrival at 11:51 AM just 2 hours and 15 minutes after Ben’s call meant we could intervene before the damage reached catastrophic levels. This rapid response would prove crucial in saving thousands of dollars in materials that might otherwise have required complete replacement.
The Initial Assessment: Understanding the Full Scope
What We Found Upon Arrival
When Sergio arrived at James’s property, the situation was more extensive than a simple bathroom overflow. Water had traveled through multiple pathways:
Second Floor Damage: The overflow originated from the upstairs bathroom, but water never respects boundaries. It had:
- Saturated the bathroom vinyl flooring (3′ x 4’9″)
- Seeped through floor joints and penetrated the subfloor
- Damaged trim and baseboards throughout the bathroom area
- Compromised the toilet seal, requiring complete removal and reset
First Floor Impact: Gravity had pulled water downward, affecting:
- Hallway hardwood flooring (3′ x 3’1″) showing signs of water absorption
- Pantry hardwood (2’3″ x 4’8″) with visible moisture damage
- Laundry room vinyl tiles (5’7″ x 6’1″) completely saturated
- Multiple drywall sections requiring flood cuts to prevent further damage
Basement Devastation: The finished basement a space many Royersford families use as recreation areas had suffered the most:
- Carpet and padding (13’4″ x 12′) completely saturated with water
- Laminate flooring (8’5″ x 10′) showing separation and buckling
- Ceiling drywall (multiple sections totaling approximately 58 sq ft) water-stained and compromised
- Pop-up ceiling tiles (25 tiles) soaked and requiring replacement
- Wall drywall affected in several areas from water traveling through wall cavities
Professional Moisture Detection and Documentation
Using professional-grade moisture meters and thermal imaging cameras, we conducted comprehensive moisture mapping throughout the property. This wasn’t just about identifying visible water it was about finding every pocket of hidden moisture that could cause problems weeks or months later.
Our Documentation Process Included:
- Detailed photographs of every affected area from multiple angles
- Precise measurements of all damaged materials for insurance documentation
- Moisture readings at multiple points throughout the structure
- Video walkthrough showing the full extent of damage (recorded and shared via Google Drive for insurance purposes)
- Written assessment detailing our restoration recommendations
Daniel, one of our documentation specialists, created a comprehensive video walkthrough that would later prove invaluable for insurance claim processing and project planning. This level of documentation sets professional restoration companies apart from contractors who simply show up with equipment.
The Strategic Restoration Plan: Saving What We Can
Making Critical Decisions
Not all water-damaged materials require replacement. One of the most valuable aspects of professional restoration is knowing when materials can be saved versus when replacement is necessary and having the equipment and expertise to execute successful salvage operations.
The Hardwood Floor Decision: During our initial assessment, Sergio made a critical observation: Ben’s hallway and pantry hardwood floors, while certainly wet, hadn’t yet begun to cup or buckle significantly. Given that we were arriving on just the second day after the incident, there was a realistic chance of saving these floors through specialized drying techniques.
This decision mattered enormously. Hardwood flooring replacement costs $8-$15 per square foot, plus labor and finishing. For the combined hallway and pantry areas (approximately 25 square feet total), replacement would have cost $1,500-$2,500. By attempting in-place drying with specialized equipment, we could potentially save Ben thousands of dollars while preserving the original flooring character of his home.
Materials Requiring Immediate Removal: Our experience told us that certain materials couldn’t be salvaged:
- Basement carpet and padding: Once saturated, carpet padding becomes a breeding ground for bacteria and mold
- Laminate flooring: Water causes irreversible core damage and delamination
- Drywall below 2 feet: Standard practice requires flood cuts to prevent wicking and mold growth
- Vinyl flooring with moisture underneath: Creates perfect conditions for mold growth between floor and subfloor
- Compromised ceiling tiles and drywall: Water-stained ceiling materials must be replaced for safety and aesthetic reasons
Creating the Containment Strategy
Before beginning any demolition work, we needed to protect the rest of Ben’s home from contamination and debris. Our team established comprehensive containment:
Basement Containment:
- 220 square feet of 4-mil plastic barriers creating a sealed work environment
- 4 support poles ensuring barriers remained secure throughout the project
- 2 zippered access points allowing controlled entry and exit
- Negative air pressure system preventing dust and airborne particles from escaping to other areas
Upper Floor Protection:
- 70 square feet of additional containment isolating bathroom and laundry work areas
- 2 additional zippers for efficient access while maintaining protection
- Floor protection for walkways protecting undamaged areas from equipment and foot traffic
- HEPA air scrubbers continuously filtering air throughout the restoration process
This level of containment serves multiple purposes: it prevents cross-contamination, minimizes disruption to the family, protects undamaged areas from construction debris, and demonstrates to insurance companies that proper protocols are being followed.
Day One: Emergency Mitigation and Demolition
October 22nd: Work Begins
By October 22nd three days after the initial incident we had completed our assessment, received insurance approval to proceed, and mobilized our full restoration team. The date was officially marked as “Work Started” in our project management system at 3:52 PM.
Morning: Water Extraction and Initial Setup Our team arrived at 9:30 AM with industrial water extraction equipment, containment materials, and demolition tools. The first priority was removing any remaining standing water and beginning the drying process for materials we hoped to save.
Extraction Process:
- Truck-mounted extraction systems removed bulk water from basement carpet
- Portable extractors addressed smaller water pockets in laundry and bathroom areas
- Specialized hardwood floor drying equipment was positioned in hallway and pantry
- Initial dehumidifiers and air movers were strategically placed throughout affected areas
Systematic Demolition: Working Room by Room
Professional demolition isn’t about destruction it’s about surgical removal of damaged materials while preserving everything possible. Our team worked systematically through each affected space:
Basement Restoration: Dylan, our lead demolition technician, carefully documented every measurement as materials were removed:
- Carpet and padding removal (13’4″ x 12′): Complete extraction ensuring no contaminated materials remained
- Laminate flooring removal (8’5″ x 10′): Careful extraction preventing damage to underlying subfloor
- Ceiling tile removal (25 pop-up tiles plus metal tracks): Systematic removal of 13’3″ x 1’3″, 7’4″ x 2′, 2’6″ x 6′, and 2′ x 2′ sections
- Ceiling drywall removal (12′ x 1′, 8’5″ x 5’6′): Cutting and removal of water-damaged sections
- Wall drywall flood cuts: Strategic 2-foot cuts in affected wall sections (9″ x 1’3″, 6″ x 6’5″, 1’5″ x 7’4″)
- Trim and baseboard removal: Careful extraction of approximately 25 linear feet of materials for potential reuse
Laundry Room Restoration: The laundry room required comprehensive material removal:
- Vinyl tile removal (5’7″ x 6’1″): Complete floor surface removal including adhesive
- Drywall flood cuts: Multiple sections (5’7″ x 2′, 3’1″ x 2′, 3’1″ x 2′) ensuring complete moisture removal
- Trim removal: 5’7″, 3’1″, 3’1″, 6’11”, 6’11”, 1′, and 2’10” sections carefully extracted
- Appliance disconnection: Washer and dryer professionally disconnected and moved to safe storage
Bathroom Restoration: The source of the overflow required thorough attention:
- Vinyl tile removal (3′ x 4’9″): Complete floor surface extraction
- Trim removal: Multiple sections (6’11”, 6’11”, 1’8″, 3′, 1′, 4’9″) carefully removed
- Toilet removal: Complete fixture removal exposing damaged wax seal and flange
Hallway and Pantry: These areas received special attention for hardwood preservation:
- Strategic drywall flood cuts (2’7″ x 2′ in hallway): Minimal removal while ensuring moisture escape
- Hardwood floor treatment (2’3″ x 4’8″ pantry, 3′ x 3’1″ hallway): Specialized drying equipment positioned
- Trim removal (pantry: 2’8″, 4’3″, 2’8″; hallway: 6’11”, 6’11”, 2’7″, 1′): Careful extraction allowing floor access
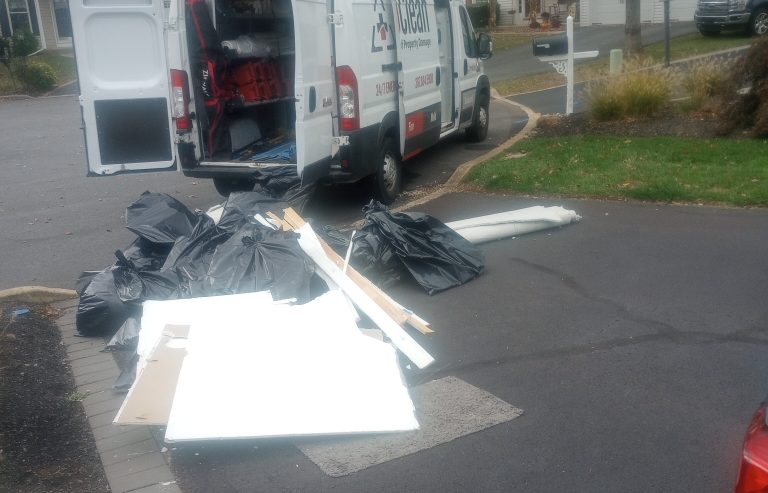
Proper Disposal and Environmental Responsibility
All removed materials were properly disposed of according to Pennsylvania environmental regulations:
- Water-damaged materials separated for appropriate disposal
- Recyclable materials (metal tracks, clean wood trim) diverted from landfills when possible
- Contaminated materials properly contained and transported
- Documentation of disposal for insurance and regulatory compliance
The Drying Phase: Science Meets Experience
Creating the Perfect Drying Environment
With contaminated materials removed, we could focus on thoroughly drying the remaining structure. This phase is where professional restoration truly separates itself from DIY attempts.
Strategic Equipment Placement: Our team positioned over a dozen pieces of specialized drying equipment throughout Ben’s home:
- Industrial dehumidifiers (3 units) removing moisture from the air continuously
- High-velocity air movers (12 units) positioned for optimal air circulation
- Specialized hardwood floor drying mats with weighted pressure for the hallway and pantry
- Injection drying equipment for moisture trapped in wall cavities
- HEPA air scrubbers (2 units) filtering air while drying progressed
Monitoring and Adjustments: Professional drying isn’t “set it and forget it.” Our team visited the property daily to:
- Take moisture readings at multiple points throughout the structure
- Adjust equipment positioning based on drying progress
- Document progress with updated photographs and readings
- Communicate progress to Ben and the insurance company
The Hardwood Success Story
Our gamble on saving James’s hardwood floors was paying off. Daily moisture readings showed steady progress:
- Day 1: Elevated moisture readings (15-18% on moisture meter)
- Day 3: Significant reduction (10-12% readings)
- Day 5: Approaching normal levels (8-10% readings)
- Day 7: Successfully dried to normal moisture content (6-8% readings)
The specialized drying mats created pressure and heat, drawing moisture out while preventing the cupping and buckling that typically requires floor replacement. This successful salvage saved James approximately $2,000 in replacement costs while preserving his home’s original character.
Antimicrobial Treatment and Odor Control
Throughout the drying process, we applied antimicrobial treatments to all affected surfaces:
- EPA-registered disinfectants preventing bacterial growth
- Antimicrobial fogging reaching areas behind remaining walls
- Hydroxyl radical generation for safe odor elimination
- Continuous air filtration preventing musty odors from developing
Working with Insurance: Maximizing Coverage
The Claims Process
One of the most stressful aspects of property damage for homeowners is navigating insurance claims. Ben’s experience illustrates how professional restoration companies add tremendous value beyond the physical work.
Initial Claim Filing: On June 21st, our project manager Dana worked with James to initiate his insurance claim:
- Claim number was filed and documented in our system
- Local agent information was collected and recorded
- While no adjuster had been assigned initially, we documented the agent’s contact information
- Most importantly, Ben understood his financial responsibility upfront
The Financial Clarity Conversation: We had a frank discussion with James: “You are responsible if insurance doesn’t pay.” This transparency is crucial. Many restoration companies avoid this conversation, leading to unpleasant surprises later. We believe in clear communication from day one:
- Ben understood his deductible responsibility
- He knew the estimated total project cost
- He was aware that his coverage would likely pay the majority
- He had no surprises when final billing occurred
Professional Documentation Makes the Difference
Insurance companies require extensive documentation to process claims efficiently. Our comprehensive approach included:
Visual Documentation:
- Initial damage assessment video (uploaded to Google Drive and shared with Ben and his adjuster)
- Post-demo video showing extent of material removal
- Daily progress photographs throughout drying and restoration
- Final completion photographs proving quality work
Written Documentation:
- Detailed measurement notes from Dylan Hoff’s demolition work
- Daily moisture readings throughout the drying phase
- Itemized materials list with costs
- Labor documentation with timestamps
- Certificates of completion and final clearance
Communication Log:
- Multiple customer contact notes documenting conversations
- Insurance company communication records
- Timeline documentation showing prompt response and mitigation
- ProAssist system tracking providing real-time project visibility
This level of documentation resulted in smooth insurance approval and reimbursement, with Ben paying only his deductible while insurance covered the remaining $12,000+ in restoration costs.
Reconstruction: Bringing the Home Back to Life
From Bare Studs to Beautiful Finish
With the structure completely dried and antimicrobial treatments applied, reconstruction could begin. This phase transforms a construction zone back into a comfortable living space.
Basement Reconstruction: Our team rebuilt Ben’s basement recreation area:
- New drywall installation: Properly measured, hung, taped, and finished on walls and ceiling
- Laminate flooring installation (8’5″ x 10′): Quality flooring matching the adjacent areas
- Carpet and padding installation (13’4″ x 12′): Fresh, clean carpet with proper padding
- Ceiling tile installation: New pop-up tiles creating a finished appearance
- Baseboard and trim reinstallation: Professional finishing touches completing the space
- Paint: Fresh paint throughout the restored areas
Laundry Room Renewal: The laundry room received complete restoration:
- New vinyl tile flooring (5’7″ x 6’1″): Durable, water-resistant flooring
- Drywall installation and finishing: Smooth walls ready for use
- Trim and baseboard installation: Professional finishing throughout
- Appliance reconnection: Washer and dryer properly reinstalled and tested
- Paint and final details: Complete finish work
Bathroom Completion: The source of the damage was fully restored:
- New vinyl tile flooring (3′ x 4’9″): Fresh, clean bathroom floor
- Toilet reinstallation: Proper wax seal and secure mounting
- Trim and baseboard installation: Professional finish work
- Paint and caulking: Water-resistant finishes throughout
Hardwood Floor Success: The hallway and pantry hardwood floors our successful salvage project received final treatments:
- Professional cleaning removing any residual dirt or debris
- Inspection confirming no cupping or buckling
- Minor sanding if needed for smooth finish
- Protective coating application matching existing finish
Quality Assurance and Final Inspection
Before calling the project complete, we conducted comprehensive final inspections:
Moisture Verification:
- Final moisture readings throughout all affected areas
- Confirmation that all materials had reached normal moisture content
- Thermal imaging scan ensuring no hidden moisture remained
- Documentation of results for insurance and homeowner records
Structural Verification:
- Visual inspection of all reconstruction work
- Verification that all materials were properly installed
- Testing of all fixtures and appliances
- Confirmation that electrical and plumbing systems were functional
Aesthetic Quality:
- Inspection of paint finishes and trim work
- Flooring installation quality verification
- Ensuring all areas matched pre-loss condition
- Final walkthrough with Ben confirming satisfaction
The Results: Complete Property Restoration
Project Timeline Success
From emergency call to complete restoration, Ben’s project demonstrated the efficiency of professional water damage restoration:
- October 19th (Day 1): Emergency call, rapid response, comprehensive assessment
- October 21st (Day 3): Insurance claim filed, restoration plan finalized
- October 22nd (Day 4): Demolition and drying equipment installation
- October 23rd (Day 5): Continued drying with daily monitoring
- October 24th-29th (Days 6-11): Drying completion and antimicrobial treatment
- October 30th-November 5th (Days 12-18): Complete reconstruction
- November 6th (Day 19): Final inspection and project completion
In less than three weeks, we transformed a multi-floor water disaster affecting over 500 square feet of finished space back into a fully functional, beautiful home.
Financial Outcome
The total project cost was approximately $14,500, including:
- Emergency response and assessment
- Complete water extraction and drying
- Comprehensive material removal and disposal
- Professional antimicrobial treatment
- Complete reconstruction of all affected areas
- Project management and insurance coordination
James’s out-of-pocket cost: $1,000 (his insurance deductible)
By working directly with his insurance company and providing comprehensive documentation, we ensured maximum coverage. James paid just 6.9% of the total project cost, with insurance covering the remaining $13,500.
Materials Saved vs. Replaced
Successfully Salvaged:
- Hallway hardwood flooring (saving ~$1,200)
- Pantry hardwood flooring (saving ~$800)
- Structural framing throughout (saving ~$3,000)
- Various trim pieces that could be reused (saving ~$400)
Total Savings from Salvage: Approximately $5,400
Materials Replaced:
- 340 square feet of various flooring (carpet, vinyl, laminate)
- 200+ square feet of drywall
- 25 ceiling tiles plus metal tracks
- 80+ linear feet of trim and baseboard
- Various fixtures and hardware
Lessons Learned: What Homeowners Can Take Away
The Value of Rapid Response
James’s quick decision to call professionals made an enormous difference. If he had waited even 24 additional hours:
- His hardwood floors would likely have required complete replacement
- Mold growth would have begun in hidden areas
- Additional structural materials would have needed removal
- Total costs could have increased by $5,000-$8,000
Key Takeaway: When water damage occurs, call professionals immediately even if it’s 2 AM on a Saturday.
The Importance of Proper Documentation
The comprehensive documentation we provided wasn’t just helpful it was essential for:
- Smooth insurance claim processing
- Maximizing insurance coverage
- Proving proper restoration procedures
- Protecting home value for future sale
Key Takeaway: Choose restoration companies that document everything, not just those who show up with equipment.
Professional Equipment Makes the Difference
The specialized hardwood drying equipment, industrial dehumidifiers, and antimicrobial treatments aren’t available at hardware stores. This professional equipment:
- Dries materials faster and more thoroughly
- Prevents mold growth through proper moisture control
- Salvages materials that DIY methods would miss
- Ensures complete restoration preventing future problems
Key Takeaway: Professional equipment pays for itself through faster drying, better outcomes, and materials salvage.
The Relationship Advantage
As a returning customer, Ben had confidence in our process from day one. He didn’t need to research companies in a panic, compare credentials, or worry about choosing the wrong contractor. He knew from experience that we would:
- Respond rapidly to his emergency
- Communicate clearly throughout the process
- Work effectively with his insurance company
- Complete the restoration properly
Key Takeaway: Building a relationship with a restoration company before you need them eliminates stress during emergencies.
Why This Restoration Succeeded
The Critical Success Factors
1. Immediate Professional Response Our 2-hour response time on a Saturday morning prevented damage from escalating exponentially.
2. Comprehensive Assessment Detailed moisture mapping and documentation ensured we addressed all damage, including hidden moisture.
3. Strategic Material Decisions Knowing when to salvage versus replace saved thousands while ensuring quality outcomes.
4. Professional Equipment and Techniques Specialized drying equipment and antimicrobial treatments delivered results DIY methods can’t match.
5. Insurance Expertise Our experience with claims processing maximized Ben’s coverage while minimizing his stress and out-of-pocket costs.
6. Quality Reconstruction Professional finish work returned the home to pre-loss condition, maintaining property value.
7. Clear Communication Regular updates and transparent discussions kept Ben informed and comfortable throughout the process.
Conclusion: Your Water Damage Doesn’t Have to Be a Disaster
Ben’s story illustrates a fundamental truth about water damage: the outcome depends largely on how you respond. The same toilet overflow that could have resulted in $20,000+ in damage, weeks of displacement, and permanent home value loss instead became a manageable restoration project completed in three weeks for just Ben’s insurance deductible.
The difference wasn’t luck it was the decision to call professionals immediately, choose a restoration company with proven expertise, and trust the process rather than attempting DIY shortcuts.
Water damage emergencies are never convenient. They strike at 2 AM, on weekends, during holidays, and when you least expect them. But with the right restoration partner, these disasters become manageable problems with solutions that protect your home, your health, and your financial investment.
James’s experience shows what’s possible when professional restoration companies bring specialized equipment, extensive training, insurance expertise, and genuine care to water damage emergencies. From his initial Saturday morning call through final project completion, every step focused on delivering the best possible outcome while minimizing stress and cost.
Facing water damage in your home? Don’t wait and hope it gets better water damage only gets worse with time. Every hour of delay increases restoration costs, health risks, and the likelihood of permanent damage.
Contact PuroClean immediately for professional water damage restoration. Our certified technicians respond 24/7 to water emergencies with the expertise, equipment, and commitment that turned Ben’s multi-floor disaster into a complete restoration success story. We work directly with insurance companies, document everything comprehensively, and guarantee results that protect your home and your investment. Call us now for immediate emergency response because when water threatens your property, professional restoration is your path from disaster to complete recovery.
Frequently Asked Questions (FAQs)
How quickly should I call professionals after water damage occurs?
Call professional water damage restoration immediately ideally within the first hour. Every hour of delay increases damage extent, restoration costs, and mold growth risks. Ben called within hours of discovery, allowing us to respond within 2 hours and 15 minutes. This rapid response saved his hardwood floors and prevented thousands in additional damage that would have occurred with even 24 hours of delay.
Can hardwood floors be saved after water damage?
Hardwood floors can often be saved if professional drying begins within 24-48 hours, as demonstrated in Ben’s case. We use specialized weighted drying mats and dehumidification that draw moisture out while preventing cupping and buckling. Success depends on wood type, water contamination level, and response speed. We assess salvage potential during initial inspection and make strategic decisions that can save thousands in replacement costs.
How long does complete water damage restoration take?
Complete water damage restoration typically takes 2-4 weeks depending on damage extent. Ben’s multi-floor project took 19 days from emergency call to final completion, including 7 days of drying and 9 days of reconstruction. Simple single-room projects may complete in 1-2 weeks, while extensive whole-house flooding can take 4-6 weeks. Professional companies provide realistic timelines during initial assessment.
Will my insurance cover water damage restoration?
Most homeowner’s insurance policies cover sudden and accidental water damage, including toilet overflows, pipe bursts, and appliance malfunctions. Ben’s insurance covered approximately $13,500 of his $14,500 restoration, with him paying only his $1,000 deductible. Professional restoration companies work directly with insurance companies, provide comprehensive documentation, and maximize coverage while minimizing your out-of-pocket costs.
What’s included in professional water damage restoration costs?
Professional water damage restoration costs include emergency response, comprehensive assessment with moisture mapping, water extraction, structural drying with industrial equipment, antimicrobial treatment, contaminated material removal and disposal, complete reconstruction with materials, and project management with insurance coordination. Ben’s $14,500 project included all these services across multiple floors, with insurance covering 93% of costs.
Why can’t I just dry out water damage myself with fans and dehumidifiers?
DIY water damage drying rarely succeeds because household equipment can’t remove moisture fast enough to prevent mold growth and material damage. Professional restoration uses industrial dehumidifiers removing 10-20x more moisture, specialized equipment for hidden water in walls and floors, antimicrobial treatments preventing bacterial growth, and moisture meters ensuring complete drying. Ben’s hardwood floors required specialized weighted drying mats that aren’t available to consumers equipment that saved him $2,000 in replacement costs.
Protect Your Investment & Restore Your Peace of Mind
Don’t let water damage and potential mold growth overwhelm you. Contact PuroClean of Plymouth Meeting today at (484) 412-4422 for a free consultation. We’ll be there to guide you through the restoration process and ensure your property is restored quickly, safely, and efficiently.