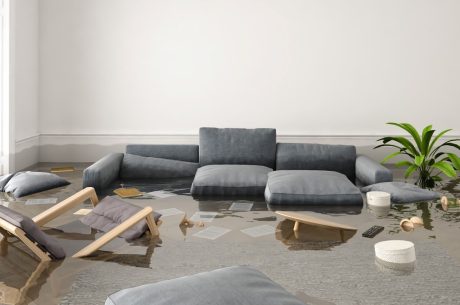
Water damage can turn your peaceful home into a nightmare in minutes. Whether it’s a burst pipe flooding your basement, or sewage backup in your bathroom, knowing how to repair water damage properly can save you thousands of dollars and protect your family’s health.
Every year, water damage affects millions of American homes, with the average claim costing over $10,000. But here’s the good news: with the right repair water damage tips and immediate action, you can minimize the destruction and restore your property effectively. This comprehensive guide walks you through every step of the water damage repair process, from initial assessment to final restoration.
Montgomery County homeowners in Lansdale, Plymouth Meeting, Norristown, and Skippack face unique challenges with seasonal flooding, aging infrastructure, and severe weather patterns. Understanding these repair water damage tips isn’t just helpful—it’s essential for protecting your investment.
Understanding the Three Types of Water Damage
Featured Snippet Answer: Water damage falls into three categories: clean water (pipes, rain), gray water (dishwashers, toilets), and black water (sewage, flooding). Clean water costs $3.75/sq ft to remediate, gray water $4.50/sq ft, and contaminated black water $7/sq ft professionally.
Before you begin any repair water damage project, you must identify the water type affecting your property. This classification determines your safety protocols, cleanup methods, and whether professional intervention is necessary.
Clean Water Damage
Clean water originates from sanitary sources like:
- Broken supply pipes
- Rainwater infiltration
- Appliance malfunctions
- Condensation issues
Safety Level: Low risk for DIY cleanup Professional Cost: Approximately $3.75 per square foot
Gray Water Damage
Gray water contains mild contaminants from:
- Washing machines
- Dishwashers
- Clean toilet overflows
- Sump pump failures
Safety Level: Moderate risk requiring protective equipment Professional Cost: Approximately $4.50 per square foot
Black Water Damage
Black water poses serious health hazards, originating from:
- Sewage systems
- River flooding
- Toilet backups with waste
- Long-standing water accumulation
Safety Level: High risk requiring professional remediation Professional Cost: Approximately $7.00 per square foot
Critical First Steps: Immediate Response to Repair Water Damage
Time is your enemy when water invades your home. These repair water damage tips focus on the crucial first 24-48 hours that determine the extent of long-term damage.
1. Ensure Safety First
Before attempting any repair water damage work:
- Turn off electricity to affected areas
- Identify the water source and stop it if possible
- Evacuate if black water is present
- Document everything with photos for insurance
2. Contact Your Insurance Company
Most homeowners’ policies cover sudden water damage but exclude gradual leaks. Contact your insurer immediately to:
- Report the claim
- Schedule an adjuster visit
- Understand coverage limitations
- Begin the documentation process
3. Begin Water Extraction
Speed matters when you repair water damage. Remove standing water using:
- Wet/dry vacuums for small amounts
- Submersible pumps for significant flooding
- Professional extraction equipment for large areas
- Buckets and mops as last resort
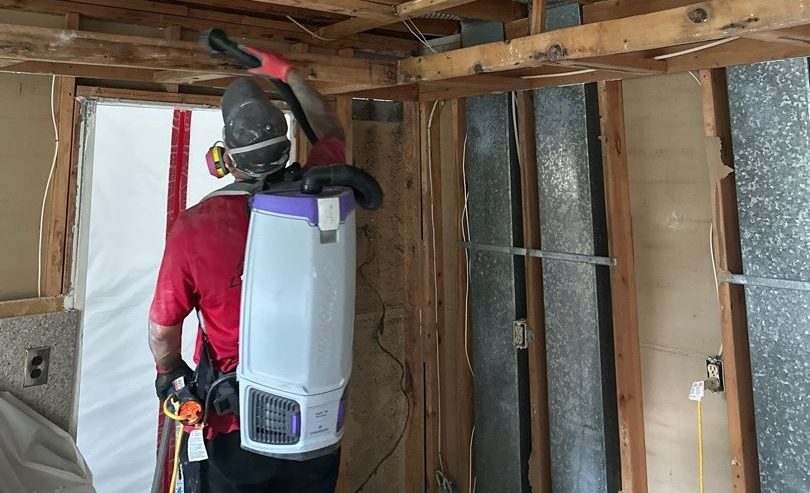
Professional Mold Inspection: A Critical Repair Water Damage Step
Mold growth begins within 24 hours in optimal conditions, making inspection a top priority in any repair water damage project. Professional mold assessment protects both your property value and family health.
Signs of Mold Growth
Watch for these indicators during your repair water damage assessment:
- Musty, earthy odors
- Visible discoloration on surfaces
- Increased allergy symptoms
- Warped or stained materials
Hidden Mold Locations
Mold often grows in concealed areas:
- Inside wall cavities
- Under flooring materials
- Behind appliances
- In HVAC systems
When to Call Professionals
Contact certified mold remediation specialists if you discover:
- Mold growth exceeding 10 square feet
- Signs of toxic black mold (Stachybotrys)
- Mold in HVAC systems
- Structural contamination
Complete Drying: The Foundation of Effective Repair Water Damage
Thorough moisture removal prevents secondary damage and mold growth. This critical repair water damage step requires patience and the right equipment.
Air Circulation Strategy
Create optimal drying conditions by:
- Positioning fans for maximum airflow
- Opening windows and doors when weather permits
- Running HVAC systems to circulate air
- Using multiple fans in large spaces
Dehumidification Process
Professional-grade dehumidifiers accelerate the repair water damage timeline:
- Refrigerant dehumidifiers for normal conditions
- Desiccant units for cold environments
- Target humidity levels below 50%
- Monitor progress with hygrometers
Drying Timeframes by Material
| Material Type | Typical Drying Time | Special Considerations |
|---|---|---|
| Drywall | 3-5 days | May require removal if saturated |
| Hardwood flooring | 7-14 days | Monitor for cupping and crowning |
| Carpet and padding | 24-72 hours | Padding often requires replacement |
| Concrete | 14-28 days | Longest drying material |
| Insulation | Replace if wet | Rarely salvageable when saturated |
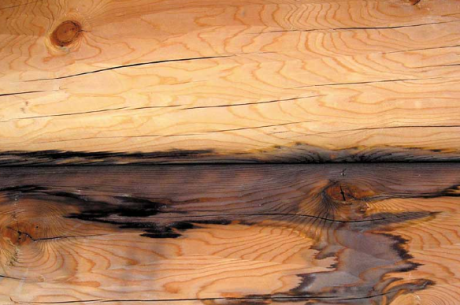
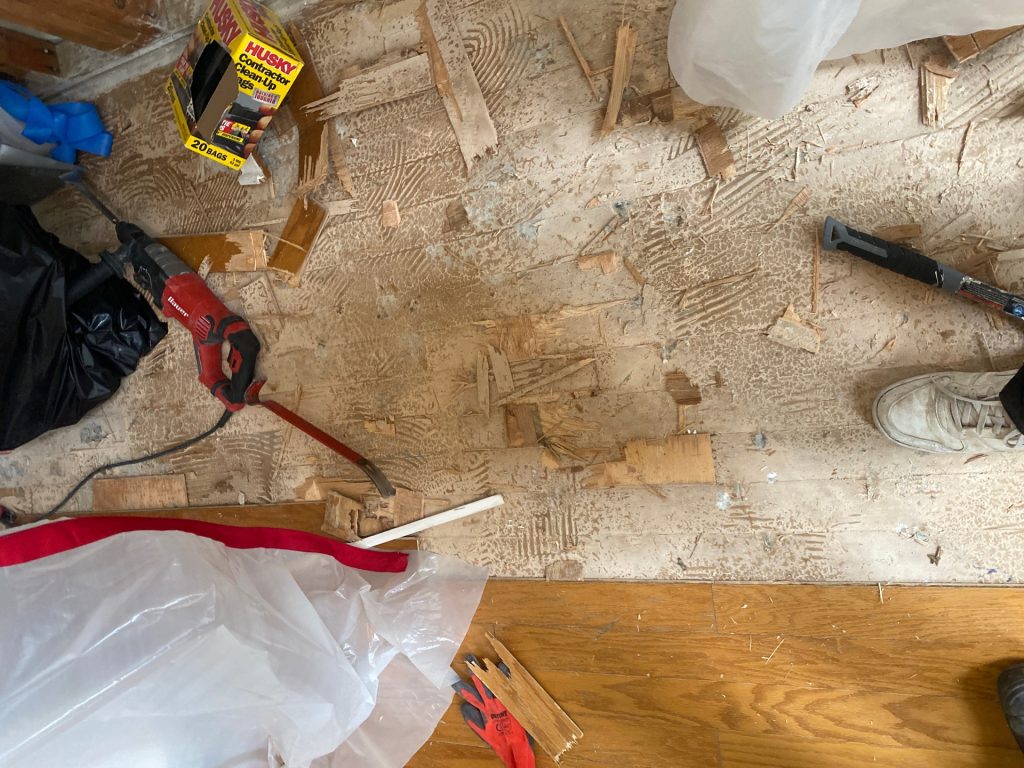
Removing Damaged Materials: Essential Repair Water Damage Tips
Not all water-damaged materials can be saved. Knowing what to remove prevents future problems and ensures successful restoration.

Porous Materials Requiring Replacement
These materials absorb water deeply and rarely dry completely:
- Carpet padding
- Drywall below flood line
- Insulation materials
- Fabric-based items
- Unsealed wood products
Salvageable vs. Replacement Materials
Often Salvageable:
- Sealed hardwood flooring
- Tile and stone surfaces
- Metal fixtures and appliances
- Solid wood furniture
- Non-porous flooring
Usually Requiring Replacement:
- Particle board and MDF
- Laminate flooring
- Carpet and padding
- Drywall with significant swelling
- Paper-faced materials
Proper Disposal Methods
Follow local regulations when disposing of water-damaged materials:
- Bag moldy materials immediately
- Label contaminated waste clearly
- Use certified disposal facilities for hazardous materials
- Document disposal for insurance claims
Disinfection and Sanitization in Repair Water Damage Projects
Proper disinfection eliminates harmful bacteria and prevents mold growth, making it an essential repair water damage step.
Effective Disinfection Solutions
Choose appropriate cleaners based on contamination level:
- Bleach solution (1:10 ratio) for most surfaces
- Commercial antimicrobial products for serious contamination
- Natural alternatives like vinegar for minor issues
- Professional-grade disinfectants for black water damage
Application Techniques
Apply disinfectants properly to maximize effectiveness:
- Pre-clean surfaces of visible debris
- Allow adequate contact time (minimum 10 minutes)
- Ensure proper ventilation during application
- Rinse surfaces after disinfection when required
Ceiling Repair: Priority Area in Water Damage Restoration
Water-damaged ceilings pose immediate safety risks and require prompt attention in any repair water damage project.
Assessment Protocol
Evaluate ceiling damage systematically:
- Measure sagging (replace if exceeding 3/8 inch)
- Check for soft spots indicating structural compromise
- Identify staining patterns to locate leak sources
- Test with moisture meters for hidden saturation
Repair vs. Replacement Decision
Repair When:
- Staining without structural damage
- Minor discoloration only
- No sagging or soft areas
- Moisture levels return to normal quickly
Replace When:
- Sagging exceeds 3/8 inch
- Visible mold growth present
- Structural materials compromised
- Multiple leak incidents in same area
Safety Considerations
Ceiling work during repair water damage projects requires extra caution:
- Use proper scaffolding or ladders
- Wear protective equipment
- Have assistants for large sections
- Check electrical fixtures before work
Flooring Restoration: Advanced Repair Water Damage Tips
Flooring suffers significant impact from water damage and often requires specialized restoration techniques.
Hardwood Floor Assessment
Evaluate wood floors carefully before deciding on repair strategies:
- Measure cupping and crowning with straightedge
- Check for loose boards or nails
- Test moisture content with appropriate meters
- Identify finish damage vs. structural damage
Subfloor Considerations
Don’t overlook the subfloor in repair water damage projects:
- Check for delamination in plywood
- Look for mold growth on bottom surfaces
- Verify structural integrity after drying
- Replace if moisture content remains high
Waterproof Flooring Options
Consider upgrading to water-resistant materials:
- Luxury vinyl plank (LVP)
- Ceramic or porcelain tile
- Polished concrete
- Engineered hardwood with waterproof core
Drywall Repair Water Damage: Professional Techniques
Drywall damage is common in water incidents and requires specific repair water damage techniques for optimal results.
The 3/8-Inch Rule
This industry standard determines repair vs. replacement:
- Swelling or sagging under 3/8 inch: spot repair possible
- Exceeding 3/8 inch: full sheet replacement required
- Measure from original baseline, not current position
- Consider multiple measurement points
Cutting and Patching Techniques
For partial drywall repairs:
- Cut clean, square edges for patches
- Score both sides before breaking
- Sand rough edges smooth
- Prime all cut edges before mudding
Behind-the-Wall Inspection
Always check concealed areas during repair water damage work:
- Inspect insulation for water damage
- Look for mold growth on framing
- Check electrical components for water exposure
- Verify structural integrity of studs
External Damage Assessment and Repair
Water damage often affects exterior building components, requiring comprehensive repair water damage strategies.
Siding Evaluation
Common exterior damage patterns include:
- Water infiltration behind siding panels
- Ice dam damage to lower courses
- Gutter overflow staining and rot
- Foundation wall moisture penetration
Immediate Protective Measures
Prevent further damage with temporary solutions:
- Apply emergency tarping to compromised roofs
- Install temporary gutters or downspouts
- Seal obvious penetration points
- Redirect surface water flow
Long-term Exterior Repairs
Plan comprehensive exterior restoration:
- Upgrade to moisture-resistant siding materials
- Improve ventilation behind exterior cladding
- Install proper flashing and weather barriers
- Consider drainage improvements
Final Finishing: Paint, Caulk, and Sealing
The final phase of repair water damage involves aesthetic restoration and moisture protection.
Surface Preparation
Proper preparation ensures lasting repairs:
- Sand all repaired areas smooth
- Prime stained surfaces with appropriate primers
- Fill any remaining gaps or holes
- Clean surfaces thoroughly before painting
Moisture-Resistant Products
Choose appropriate finishing materials:
- Mold-resistant paints for bathrooms and basements
- Waterproof caulks for wet areas
- Vapor barrier paints where appropriate
- High-quality exterior sealants
Color Matching Strategies
Achieve seamless repairs with proper color matching:
- Take samples to paint stores for computer matching
- Test colors in actual lighting conditions
- Consider repainting entire walls for uniformity
- Document paint colors for future reference
Montgomery County Specific Considerations
Local homeowners in Lansdale, Plymouth Meeting, Norristown, and Skippack face unique challenges that affect repair water damage strategies.
Regional Weather Patterns
Understanding local conditions helps prevent future damage:
- Heavy spring rains causing basement flooding
- Summer thunderstorms with high winds
- Winter freeze-thaw cycles affecting pipes
- Seasonal humidity variations
Common Local Issues
Frequent problems in Montgomery County include:
- Older home plumbing failures
- Basement moisture intrusion
- Roof damage from severe weather
- Municipal water pressure fluctuations
Local Resources
Take advantage of regional services:
- Montgomery County building permit requirements
- Local waste disposal facilities
- Regional restoration contractors
- Insurance adjusters familiar with area conditions
Prevention: Long-term Repair Water Damage Tips
Implementing preventive measures reduces future water damage risks and protects your investment.
Regular Maintenance Schedule
Create a systematic approach to prevention:
- Monthly plumbing inspections
- Seasonal roof and gutter cleaning
- Annual appliance maintenance
- Regular basement moisture monitoring
Early Warning Systems
Install monitoring equipment to catch problems early:
- Water leak detectors near appliances
- Basement moisture alarms
- Smart home water monitoring systems
- Regular professional inspections
Upgrade Considerations
Invest in improvements that reduce water damage risk:
- Whole-house surge protection
- Backup sump pump systems
- Improved drainage around foundations
- High-efficiency, leak-resistant appliances
Frequently Asked Questions About Repair Water Damage
How quickly should I start repair water damage work?
Begin repair water damage efforts immediately, ideally within the first 24-48 hours. This timeframe prevents mold growth and minimizes structural damage to your property.
Can I repair water damage myself or do I need professionals?
You can handle clean water damage yourself with proper equipment and knowledge. However, gray water requires protective equipment, and black water always needs professional remediation for safety reasons.
How long does the complete repair water damage process take?
The repair water damage timeline varies based on extent and materials affected. Small incidents may resolve in 3-5 days, while major flooding can require 2-4 weeks for complete restoration.
What’s the most expensive part of repair water damage projects?
Structural repairs and mold remediation typically represent the highest costs in repair water damage work. Prevention and quick response significantly reduce these expenses.
Will insurance cover my repair water damage costs?
Most homeowners’ insurance covers sudden water damage like burst pipes but excludes gradual leaks or flooding. Review your policy and consider flood insurance for comprehensive protection.
How do I prevent future water damage after repairs?
Implement regular maintenance schedules, install monitoring systems, upgrade vulnerable components, and address drainage issues around your property to prevent future water damage incidents.
Conclusion: Professional Help When You Need It Most
Successfully implementing these repair water damage tips requires knowledge, proper equipment, and careful attention to safety protocols. While many homeowners can handle minor clean water incidents, significant damage or contaminated water requires professional expertise.
Don’t let water damage compromise your family’s safety or your property value. Whether you’re dealing with a small leak or major flooding in Lansdale, Plymouth Meeting, Norristown, or Skippack, PuroClean of Lansdale provides the expertise and equipment necessary for complete restoration.
Our certified technicians understand Montgomery County’s unique challenges and provide 24/7 emergency response when disaster strikes. From initial assessment through final restoration, we guide you through every step of the repair water damage process.
Take Action Today: Contact PuroClean of Lansdale at the first sign of water damage. Our rapid response team will assess your situation, work with your insurance company, and restore your property to pre-loss condition. Don’t wait call now to protect your home and family from the devastating effects of water damage.
PuroClean of Lansdale serves Montgomery County including Lansdale, Plymouth Meeting, Norristown, Skippack, and surrounding communities with professional water damage restoration, mold remediation, and emergency cleanup services.