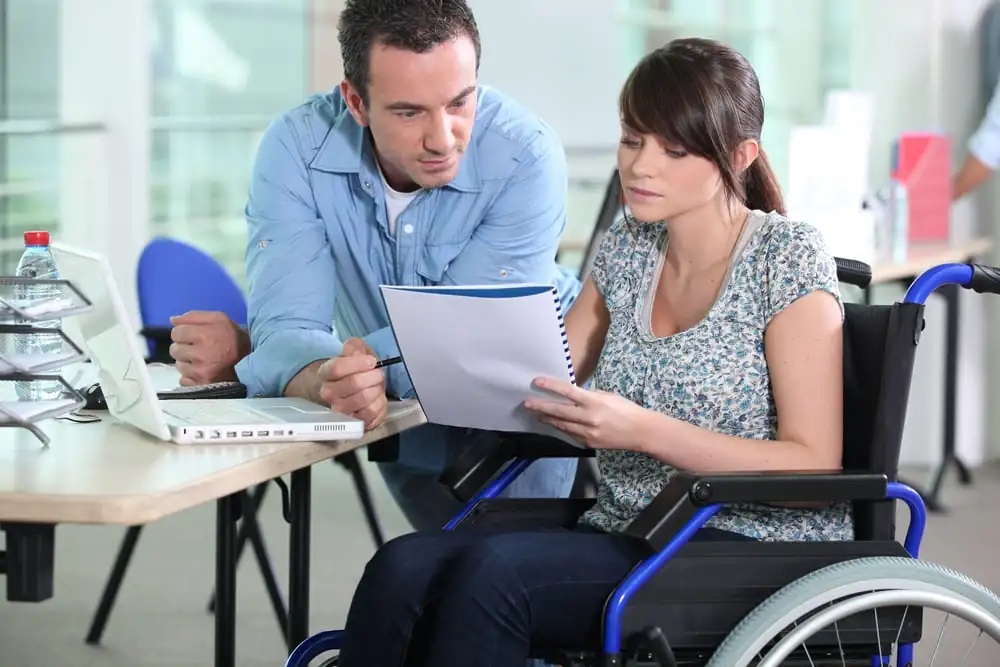
The sun-drenched streets of West Los Angeles often lull us into a sense of security. Yet, beneath the palm trees and bustling urban landscape, the reality of potential disasters—from earthquakes and wildfires to power outages and more localized emergencies—looms. For every resident, preparedness is not just prudent; it’s essential. But for individuals with disabilities, emergency planning takes on an even greater, more critical dimension, demanding tailored strategies and a proactive approach that goes “beyond the blueprint” of standard preparedness guidelines.
At PuroClean of West Los Angeles, we understand that disasters can strike without warning, leaving behind a trail of physical damage, emotional distress, and significant disruption. While our expertise lies in restoring properties affected by fire, water, and mold damage, our commitment extends to the well-being and safety of our entire community. We recognize that for individuals living with disabilities, the challenges posed by an emergency can be magnified, requiring specialized planning and a robust support network.
Read Also: Ionization or Photoelectric Smoke Detector? How to Determine Which is Right for Your Los Angeles, CA Property
This extensive guide is designed to be a definitive resource for people with disabilities in West Los Angeles, their families, caregivers, and support networks. We will delve deep into the intricacies of emergency preparedness, offering actionable advice, specific considerations, and a framework for building resilience in the face of the unexpected.
The Unique Imperative: Why Disability-Inclusive Preparedness Matters
Standard emergency preparedness guides often assume a baseline of physical and cognitive ability that doesn’t apply to everyone. For people with disabilities, a “one-size-fits-all” approach to disaster planning falls dangerously short. The challenges can range from:
- Mobility Impairments: Difficulty with stairs, navigating uneven terrain, or reliance on assistive devices like wheelchairs, walkers, or prosthetics can complicate evacuation.
- Sensory Impairments: Hearing impairments can prevent individuals from hearing alarms or emergency announcements. Visual impairments can hinder navigation in unfamiliar or smoke-filled environments.
- Cognitive or Intellectual Disabilities: Understanding complex instructions, making rapid decisions, or communicating needs during a crisis can be difficult.
- Medical Conditions and Equipment Reliance: Individuals may depend on life-sustaining medical equipment (e.g., ventilators, oxygen concentrators), refrigeration for medications (e.g., insulin), or require specialized medical procedures (e.g., dialysis). Power outages can be life-threatening.
- Communication Barriers: Speech impediments, non-verbal communication, or reliance on assistive communication devices can impede relaying vital information to first responders.
- Mental Health Conditions: Stress and anxiety caused by an emergency can exacerbate existing mental health conditions, impacting the ability to cope and follow instructions.
Recognizing these diverse needs is the first step towards truly effective emergency preparedness. It’s about empowering individuals to maintain their independence and safety, even in chaos.
Pillar 1: The Personalized Disaster Preparedness Kit (Go-Bag)
Your emergency kit is your lifeline. For individuals with disabilities, it’s not just about water and first aid; it’s about anticipating and addressing specific daily needs that are magnified during a crisis.
Components to Prioritize:
- Prescribed Medication:
- Minimum 7-Day Supply: Aim for at least a seven-day supply of all prescribed medications. If possible, a 14-day supply is even better.
- Original Containers: Keep medications in their original, clearly labeled containers to avoid confusion and for identification by emergency personnel.
- Pharmacy Contact Information: Include the name, address, and phone number of your pharmacy and prescribing physician(s).
- Medication List: Create a detailed, legible list of all medications, dosages, frequency, and reason for use. Include over-the-counter medications you regularly use.
- Refrigerated Medications: If you require medications that need refrigeration (e.g., insulin), consider an insulated bag with freezer packs or a small, portable cooler. Research how long these can maintain temperature without power.
- Disposal: Be mindful of expiration dates and rotate your supply every six months.
- Extra Batteries/Power Sources for Medical Devices:
- Assistive Devices: This includes extra batteries for hearing aids, cochlear implants, power wheelchairs, scooters, communication devices, glucose meters, or any other battery-operated medical equipment.
- Portable Chargers/Power Banks: Invest in high-capacity power banks for phones and smaller devices. Consider a solar charger for prolonged outages.
- Vehicle Chargers: If you have a car, ensure you have chargers that work with its power outlet.
- Manual Backup: For devices that have manual options (e.g., manual wheelchair in addition to power chair), ensure they are accessible and functional.
- Generator Information: If you rely on a home generator for life-sustaining equipment, include instructions for its operation, fuel type, and contact information for maintenance.
- Copies of Important Documents: Store these in a waterproof, easily accessible bag within your kit.
- Identification: Driver’s license, state ID, passport, or other government-issued ID.
- Medical Information: Medical records, doctor’s orders, diagnoses, allergies, immunizations, and contact information for all healthcare providers. Include information on any specific conditions, such as diabetes, epilepsy, or cognitive impairments.
- Insurance Information: Health insurance cards, Medicare/Medicaid information, and property insurance policies.
- Proof of Disability: Documentation proving your disability, such as a doctor’s letter or disability benefits statement, which may be needed for emergency shelters or special assistance.
- Support Plan: Copies of your personal emergency plan, including contact lists and communication instructions (discussed below).
- Financial Documents: Copies of bank account numbers, credit card numbers (redacted for security), and some emergency cash in small denominations.
- Wills/Trusts: For essential legal documents, consider digital copies on a secure, encrypted USB drive in addition to paper copies.
- Specialized Supplies:
- Mobility Aids: Lightweight, foldable cane or walker, spare wheelchair tires, or a patch kit if applicable.
- Communication Aids: Communication boards, pen and paper, assistive communication devices, or a whiteboard.
- Sensory Needs: Braille labels, tactile maps, magnifiers, or communication devices for individuals with visual or hearing impairments.
- Hygiene: Catheters, ostomy supplies, adult diapers, wipes, gloves, and specific personal hygiene items.
- Comfort Items: For individuals with autism or sensory sensitivities, include familiar comfort items like a favorite blanket, toy, or noise-canceling headphones.
- Prescription Eyewear/Contacts: An extra pair of glasses or contact lenses and solution.
- Hearing Aids: Extra batteries for hearing aids.
- Standard Kit Essentials (Adapted):
- Water: One gallon per person per day for at least three days, for drinking and sanitation. Consider collapsible water containers.
- Food: At least a three-day supply of non-perishable food that requires no cooking and is easy to eat. Include items that meet dietary restrictions (e.g., gluten-free, low-sodium).
- First Aid Kit: A well-stocked kit, including any specific wound care supplies you might need.
- Flashlight & Whistle: Hand-crank or battery-operated flashlight with extra batteries. A whistle to signal for help.
- Radio: Battery-powered or hand-crank radio to receive emergency broadcasts.
- Dust Mask: To filter contaminated air.
- Wrench/Pliers: To turn off utilities.
- Manual Can Opener: For food.
- Local Maps: With escape routes and shelters marked, in case GPS or phones are down.
- Medication List: (as above)
- First Aid Kit: (as above)
Storage and Accessibility: Your kit should be easily accessible, ideally near an exit, and robust enough to withstand potential minor damage. Consider multiple smaller kits if it’s too heavy, or if you spend significant time in different locations (e.g., car, work).
Pillar 2: Building Your Personal Support Network
No one should face a disaster alone. For people with disabilities, a pre-arranged support network is not just helpful; it’s often essential for survival and well-being.
Action Steps:
- Identify Your Support Team (Minimum 3 Trustworthy People):
- Diverse Locations: Choose individuals who live or work in different locations, ideally within West Los Angeles but also outside your immediate neighborhood, to increase the likelihood that at least one person will be able to reach you.
- Reliability: Select people you trust implicitly, who are dependable, and who genuinely care about your safety.
- Accessibility: Ensure they have access to your home if needed, and understand any security measures.
- Roles: Assign specific roles if possible (e.g., one person for medical needs, one for communication, one for transportation).
- Educate Your Support Team About Your Needs:
- Detailed Understanding: They must have a thorough understanding of your specific needs, capabilities, and limitations. This includes:
- Medical Conditions: All diagnoses, medications (where they are stored, how they are administered).
- Assistive Devices: How to operate your wheelchair, communication device, or any other critical equipment.
- Communication Methods: How you communicate best, especially under stress (e.g., visual cues, specific phrases, communication board).
- Personal Care Needs: Any assistance required with hygiene, feeding, or other personal care tasks.
- Emotional Support: Understanding any triggers or calming techniques if you have sensory sensitivities or cognitive disabilities.
- Hands-on Training: If applicable, give them hands-on practice with your equipment or in assisting you with specific tasks.
- Share Your Personal Emergency Plan: Give each member of your support team a copy of your plan, including your contact list, medical information, and evacuation routes. Review it with them regularly.
- Detailed Understanding: They must have a thorough understanding of your specific needs, capabilities, and limitations. This includes:
- Communication Protocols:
- Primary Contact: Designate one out-of-state contact person who all members of your support network will check in with if local communication lines are down. This person can act as a central hub for updates.
- Multiple Contact Methods: Provide multiple ways to reach each person:
- Phone Numbers: Home, cell, work.
- Email Addresses: Personal and work.
- Social Media Handles: For direct messaging (Facebook Messenger, X/Twitter DMs, Instagram).
- Texting: Often works when voice calls fail.
- Out-of-State Contact: A designated family member or friend outside your immediate area to relay messages if local lines are jammed.
- Pre-arranged Check-in Times: Establish specific times to check in with your support team during an emergency (e.g., 9 AM and 5 PM daily).
- Neighborhood Communication: Consider a neighborhood group chat or a designated neighbor who can check on you.
Pillar 3: Personal Capability Assessment & Needs Communication
Understanding your own capabilities and clearly articulating your needs is fundamental to effective planning. This is an honest self-assessment, not a judgment.
Steps for Self-Assessment:
- List Your Needs and Capabilities:
- Mobility: Can you use stairs? How far can you travel unassisted? Do you rely on a wheelchair, scooter, or other device? Can you operate a manual wheelchair if your power chair fails?
- Sensory: Are you able to hear alarms? Can you see clearly in low light or smoky conditions? Do you rely on tactile information?
- Cognitive/Communication: Can you understand complex instructions under stress? How do you communicate best (verbal, sign language, communication board, gestures)? Do you need assistance making decisions?
- Medical: Do you require specific medical procedures or equipment? What are your medication schedules? Do you have allergies or conditions that require immediate attention (e.g., severe asthma attack)?
- Personal Care: What assistance do you need with daily activities like eating, drinking, or hygiene?
- Transportation: Can you drive? Do you rely on paratransit, ride-share, or public transportation?
- Emotional/Mental Health: How might stress or disruption impact your emotional or mental well-being? What strategies or support do you need?
- Scenario Planning & Self-Reliance Assessment:
- Fire: If a fire starts in your home, do you need help using a fire extinguisher (only for small, contained fires)? Can you exit the home on your own? Are your exits clear and wide enough?
- Earthquake: Can you “Drop, Cover, and Hold On” effectively? Can you safely navigate debris after the shaking stops?
- Flood: Can you move to higher ground quickly? Do you have access to a safe upper floor?
- Power Outage: How would a prolonged power outage affect your medical equipment or daily routines? Do you have backup power?
- Evacuation: Can you get to a designated meeting point or shelter unaided? If not, what specific assistance would you need (e.g., lift assistance, guide)?
- Shelter-in-Place: Can you remain safely in your home for 3-7 days without external assistance?
- Share Your Needs with Your Support Team and Relevant Authorities:
- Detailed Document: Create a clear, concise document outlining your needs, capabilities, and any specific instructions.
- Share with Support Team: Ensure every member of your support team has a copy and understands it.
- Inform First Responders (Voluntary): In West Los Angeles, you can register your information with local fire departments or emergency services. This can include a “Special Needs Registry” or similar program, which provides first responders with critical information about individuals with disabilities in their area. This allows them to prioritize and tailor their response. Check with the Los Angeles Fire Department (LAFD) or LA County Office of Emergency Management for specific programs.
- Home Alert Systems: Consider a medical alert system that can directly connect you to emergency services.
Pillar 4: Engaging with Local Emergency Plans in West Los Angeles
Being informed about community-wide emergency plans is crucial. Your personal plan needs to integrate with these broader frameworks.
Key Information to Gather:
- Identify Local Disaster Risks in West Los Angeles:
- Earthquakes: This is the primary risk. Understand “The Big One” scenarios, aftershocks, and liquefaction zones in West LA.
- Wildfires: Especially relevant for areas bordering hillsides (e.g., Santa Monica Mountains adjacent areas). Understand evacuation routes for wildfire events.
- Power Outages: Frequent during heatwaves or high winds, impacting medical devices and refrigeration.
- Flooding: While less common than earthquakes, heavy rains can cause localized flooding, especially near canyons or poor drainage areas.
- Landslides/Mudslides: Following heavy rains, especially in areas previously affected by wildfires.
- Tsunamis: Though West LA is not directly on the coast, tsunamis could impact coastal areas and have ripple effects. Be aware of inundation zones if you live or work closer to the water.
- Understand Local Response Plans:
- Emergency Management Offices: Contact the Los Angeles Emergency Management Department (EMD) and the Los Angeles Fire Department (LAFD). They provide resources, alerts, and public information.
- Alert Systems: Sign up for local alert systems such as NotifyLA, Nixle, and the LA County’s Emergency Public Information (EPI) portal. These deliver critical information via text, email, and phone calls.
- Reverse 911: Ensure your phone numbers are registered for reverse 911 calls.
- Social Media: Follow official emergency services accounts on social media (e.g., LAFD, LAPD, City of LA) for real-time updates.
- Evacuation Plans and Assistance:
- Designated Evacuation Routes: Know the primary and secondary evacuation routes from your specific neighborhood in West LA. Practice these routes.
- Transportation Assistance:
- Register in Advance: If you anticipate needing help with transportation during an evacuation, register this need in advance with your local emergency management office or relevant disability organizations. Do not wait until an emergency strikes.
- County and City Services: Research programs like the “Access Services” paratransit system for their emergency role.
- Neighbor Network: Your personal support network is vital here. Can a neighbor or support team member provide transportation?
- Shelter Transportation: Understand how transportation to designated shelters for people with special needs is typically handled.
- Emergency Shelters:
- Identify Accessible Shelters: Not all shelters are fully accessible. Inquire about designated accessible shelters or “shelters of last resort” that can accommodate individuals with various disabilities. The Red Cross and local emergency services can provide this information.
- Pre-registration: Some areas allow for pre-registration at special needs shelters. Inquire if this is available in West LA.
- Shelter Needs: Understand what services are available at shelters (e.g., medical support, power for devices) and what you should bring from your personal kit to supplement.
Pillar 5: Home Safety: Escape Routes and Safe Places
Your home should be your sanctuary, but in an emergency, it can quickly become a hazard. Planning your internal escape routes and safe zones is paramount.
Action Plan for Your Home:
- Map Out Escape Routes (Minimum Two Per Room):
- Primary and Secondary: For every room, identify at least two distinct ways out (e.g., the door and a window).
- Accessibility Check: Ensure all escape routes are genuinely accessible. Can your wheelchair fit through doorways? Are windows easy to open for everyone, including children or those with limited dexterity?
- Clear Pathways: Keep hallways, stairwells, and exits clear of clutter, furniture, or obstacles that could impede movement, especially in the dark or smoke.
- Window Accessibility: For upper-floor rooms, if windows are part of the escape plan, ensure they are not painted shut and can be opened easily. For individuals needing assistance, consider fire escape ladders if practical, and ensure your support team knows how to deploy them and assist.
- Low to the Ground: Practice crawling low to the ground in a smoke-filled environment, as smoke rises.
- Assisted Evacuation Practice: If you need assistance, practice the exact movements and techniques your support team will use to help you evacuate, accounting for any specific devices or transfer techniques.
- Designated Safe Places within Your Home:
- Earthquake: Identify “safe zones” under sturdy tables or desks, or against interior walls away from windows and heavy furniture that could fall.
- Tornado/Severe Wind (Less Common in West LA, but possible): An interior room on the lowest level, away from windows (e.g., a bathroom or closet).
- Flooding: An upper floor or the highest point in your home.
- Accessibility to Safe Places: Ensure you can easily access these designated safe places, even if mobility is restricted.
- Practice Emergency Drills (At Least Twice a Year):
- Full Participation: Include everyone in your household: family members, caregivers, your support team, and even pets (if they are part of the evacuation plan).
- Varied Scenarios: Practice drills during the day and at night. Simulate conditions (e.g., turning off lights for a “smoke-filled” scenario, using only flashlights).
- Meeting Point: Always practice evacuating to your designated outdoor meeting place.
- “Once Out, Stay Out”: Reinforce the crucial rule: once you are out, stay out. Never re-enter a burning building for any reason.
- Review and Refine: After each drill, debrief. What went well? What were the challenges? Adjust your plan accordingly. For instance, if a path was difficult to navigate, can it be cleared or can an alternative be found?
Pillar 6: Mastering Utility Shut-Offs
Knowing how to turn off utilities can prevent further damage and ensure safety after an emergency, especially during an earthquake or if you suspect a gas leak.
Essential Knowledge:
- Electricity (Main Breaker Panel):
- Location: Know the exact location of your main electrical breaker panel.
- Operation: Learn how to switch off the main circuit breaker. This typically involves flipping a large master switch.
- Safety: Wear dry shoes and stand on a dry surface. If the panel is wet, do not touch it.
- Why: To prevent electrical fires from damaged wiring or to avoid electrocution if there’s standing water.
- Natural Gas (Main Shut-Off Valve):
- Location: Know the location of your main gas shut-off valve (usually outside your home, near the gas meter).
- Operation: You will need a wrench (often a 12-15 inch adjustable wrench or a specific “earthquake wrench”) to turn the valve a quarter turn in either direction until the tang is crosswise to the pipe.
- Safety: Never turn off your gas unless you smell gas, hear the hiss of escaping gas, or are instructed to by authorities. If you turn it off, only a qualified professional (e.g., SoCalGas) can turn it back on and relight pilot lights.
- Why: To prevent gas explosions or fires if gas lines are damaged by an earthquake or other disaster.
- Water (Main Shut-Off Valve):
- Location: Know the location of your main water shut-off valve (usually where the main water line enters your house, or near the water meter at the street).
- Operation: This might be a gate valve (turn counter-clockwise) or a ball valve (turn perpendicular to the pipe).
- Why: To prevent significant water damage from burst pipes after an earthquake or if your plumbing is compromised.
- Tools and Accessibility: Keep the necessary tools (wrench for gas, adjustable wrench for water) immediately accessible near the shut-off valves. If these valves are difficult to reach or operate due to your disability, ensure a member of your support team knows how to do it.
Pillar 7: Specialized Considerations for Diverse Disabilities
While the above guidelines are broad, truly effective preparedness considers the nuances of different disabilities.
Specific Disability Case Preparedness (Expanded):
- Mobility Impairments:
- Wheelchairs/Scooters:
- Have a manual wheelchair as a backup if you use a power chair.
- Ensure batteries are always fully charged.
- Keep a repair kit for flat tires or minor issues.
- Practice transferring to and from your chair independently or with your support team.
- Ensure clear, wide pathways for evacuation.
- Consider a “glide” or “evacuation” chair for multi-story buildings if stairs are the only exit.
- Walkers/Canes: Keep extra mobility aids readily accessible.
- Prosthetics: Have a plan for quick removal or protection if needed.
- Wheelchairs/Scooters:
- Hearing Impairments:
- Visual Alarms: Install smoke alarms and carbon monoxide detectors with strobe lights or vibrating alarms.
- Communication: Utilize TTY/TDD phones, text-to-911 services (if available), or a communication board.
- Support Team: Ensure your support team understands your preferred method of communication and can relay information.
- Medical Alert Bracelets: Wear a bracelet identifying your hearing impairment.
- Visual Impairments:
- Tactile Cues: Create tactile markers on escape routes (e.g., raised dots, textured strips on walls or floors).
- Familiarity: Practice escape routes repeatedly until memorized.
- Guide Animals: If you have a guide animal, ensure it is trained for emergency situations and include its needs in your kit (food, water, harness).
- Voice Alarms: Alarms with voice commands can be helpful.
- Medical Alert Bracelets: Wear a bracelet identifying your visual impairment.
- Technology: Explore apps that can describe surroundings or read text during an emergency.
- Cognitive/Intellectual Disabilities:
- Simple Instructions: Use visual aids, social stories, and simple, concrete language when teaching emergency procedures.
- Routine: Practice drills frequently to create muscle memory and familiarity.
- Behavioral Plan: Include a behavioral plan in your emergency documents for your support team, outlining triggers and calming strategies.
- Identification: Ensure the individual wears an ID bracelet with emergency contacts and information about their disability.
- Support Person: Always have a designated support person who stays with the individual.
- Speech Impairments/Non-Verbal:
- Communication Boards: Have readily available communication boards with essential phrases (e.g., “I need help,” “I need medicine,” “I am hurt”).
- Assistive Communication Devices (ACDs): Keep ACDs charged and have a backup (e.g., simple pictures, pen and paper).
- First Responder Information: Ensure first responders are aware of your communication method through a special needs registry or medical alert information.
- Chronic Health Conditions (e.g., Diabetes, Respiratory Issues, Dialysis):
- Medical Team Consultation: Discuss emergency planning with your doctors and specialists. What are the protocols if you can’t access regular treatments?
- Extra Supplies: Store extra syringes, needles, blood sugar testing strips, nebulizer medication, oxygen tanks (if portable and safe to store), etc.
- Emergency Contact Info: Include full contact details for all specialists and clinics.
- Backup Power: Critical for devices like oxygen concentrators or nebulizers.
- “Diabetic Emergency” or “Asthma Attack” Cards: Clearly visible cards in your wallet or kit.
- Service Animals:
- Needs in Kit: Include food, water, medications, bowls, leash, and a copy of their vaccination records and identification.
- Training: Ensure your service animal is trained for emergency situations (e.g., guiding through smoke, staying calm during loud noises).
- Shelter Policy: Understand that service animals are generally permitted in emergency shelters, but call ahead if possible to confirm.
Beyond the Damage: PuroClean of West Los Angeles is Here to Help
Even the most meticulously crafted plans cannot prevent every disaster. When the unexpected happens, and your West Los Angeles home is affected by fire, water, or mold, the challenges for individuals with disabilities can be compounded. The disruption to routine, the inaccessible environment, and the need for specialized care can be overwhelming.
This is where PuroClean of West Los Angeles steps in as your trusted partner in recovery. We are the “Paramedics of Property Damage®,” equipped to handle the complexities of restoration with the utmost care, compassion, and professionalism, especially when working with individuals with diverse needs.
Our certified and highly trained technicians understand that every situation is unique. We provide:
- Fire Damage Restoration: We specialize in meticulous soot and smoke removal, deodorization, and structural cleaning to restore your home and eliminate corrosive residues, making it safe and livable again. We understand the need for thorough cleaning to prevent respiratory issues.
- Water Damage Restoration: From burst pipes to floodwaters, we swiftly extract water, thoroughly dry affected areas using advanced equipment, and implement strategies to prevent secondary damage like mold growth and structural compromise. We prioritize accessibility during the restoration process.
- Mold Remediation: If moisture leads to mold growth, our certified experts safely and effectively remove mold colonies, sanitize affected areas, and implement preventative measures to ensure healthy indoor air quality, which is crucial for individuals with respiratory sensitivities.
- Accessible Restoration Practices: We strive to maintain accessibility during restoration. We can work with you and your support team to ensure clear pathways, alternative access points, and minimal disruption to essential medical equipment or routines whenever possible. Our team communicates clearly and is sensitive to individual needs.
- Content Cleaning and Restoration: Many of your cherished possessions, including specialized equipment or comfort items, can be salvaged. We meticulously clean, deodorize, and restore salvageable items, reducing your losses and helping you retain vital possessions.
- Compassionate Communication: We understand that emergencies are stressful. Our team is trained to communicate clearly, patiently, and with empathy, ensuring you are informed and comfortable throughout the restoration process. We can work directly with your designated support person to ensure your needs are met.
At PuroClean of West Los Angeles, we are committed to serving our entire community, including those with disabilities, with dignity and respect. We work quickly and efficiently to mitigate further damage, restore your property, and help you return to your routine as safely and smoothly as possible. We aim to ease the burden of recovery so you can focus on what matters most: your health and well-being.
Conclusion: Empowering Resilience in West LA
Emergency preparedness for people with disabilities in West Los Angeles isn’t about being fearful; it’s about empowerment. It’s about taking control, identifying your needs, building a reliable support system, and proactively planning for every eventuality. By creating a personalized disaster kit, establishing a robust communication network, assessing your capabilities, and understanding local emergency plans, you are building a powerful shield against the chaos of unexpected events.
This comprehensive guide serves as a starting point. Remember that every individual’s needs are unique, so take the time to tailor these recommendations to your specific circumstances. Consult with your doctors, caregivers, and support team to ensure your plan is thorough and practical. Regular practice and review are crucial to keeping your plan effective.
Your safety, independence, and peace of mind are paramount. Be proactive, be prepared, and know that the dedicated professionals at PuroClean of West Los Angeles are always ready to assist our community when disaster strikes, helping to restore not just properties, but lives.

For professional fire, water, or mold damage restoration services in West Los Angeles, CA, don’t hesitate to contact PuroClean of West Los Angeles. We are here to help, 24/7.


