
Table of Contents
Steps to Dry Out Damp Walls in a Room
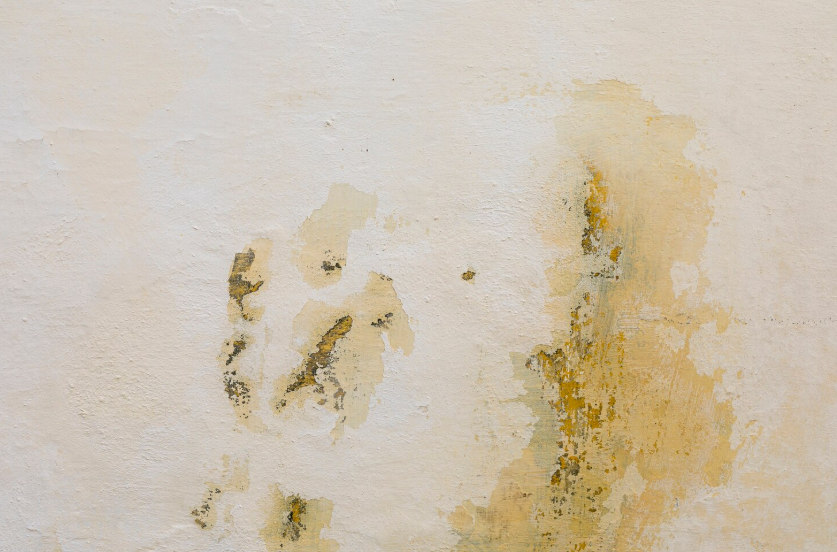
Moisture in your walls isn’t just an inconvenience—it’s a warning sign. Whether caused by a plumbing leak, heavy rain, condensation, or poor ventilation, damp walls can lead to structural damage, peeling paint, and mold growth if not handled promptly.
In Maine, where humidity and fluctuating temperatures can worsen moisture issues, knowing how to properly dry out damp walls is essential for protecting your home’s integrity and your family’s health.
Steps to Dry Out Damp Walls in a Room
Here’s a step-by-step guide on how to dry out damp walls in a room, along with tips on when to call in professional help.
1. Identify the Source of the Moisture
Before drying begins, you must find and fix what’s causing the dampness. Otherwise, the problem will return.
Common sources include:
- Plumbing leaks behind walls or under floors
- Roof leaks allowing water to seep down interior walls
- Foundation cracks letting in groundwater
- Condensation from poor ventilation or high indoor humidity
- Flooding or water intrusion from heavy storms
Use your senses—look for water stains, bubbling paint, or a musty odor. If you can’t pinpoint the cause, it’s best to bring in a water damage restoration professional who can use moisture meters and thermal imaging to detect hidden leaks.
2. Move Furniture and Items Away
Once you identify the affected area, clear the space. Move furniture, rugs, or electronics away from damp walls to prevent further damage. Lift anything off the floor and create a clear working area for airflow and drying equipment.
If any items have been in contact with the wall for a while, inspect them for mold or water damage. Soft furnishings may need professional cleaning or drying to prevent mildew growth.
3. Remove Excess Moisture from the Air
Drying the wall starts with reducing overall humidity in the room. Use one or more of the following tools:
- Dehumidifiers: These machines pull moisture out of the air, accelerating wall drying. Place one or more in the affected area and keep doors and windows closed while it runs.
- Fans: Position fans to blow air along the wall’s surface, not directly at it. Circulating air helps evaporate trapped moisture.
- Heaters: Gently warming the air speeds evaporation, but avoid using direct heat sources on the wall itself, which could cause cracking or further damage.
For the best results, use fans and dehumidifiers together for several days, checking progress daily with a moisture meter if available.
4. Remove Wet Materials if Necessary
If the wall is soaked (for example, after flooding or a burst pipe), the drywall or plaster may not dry properly on its own. In such cases:
- Cut out wet drywall: Remove sections that are soft, swollen, or crumbly. Moisture trapped behind drywall or insulation can lead to mold within 24–48 hours.
- Remove insulation: Wet insulation loses effectiveness and can harbor mold. Replace it once the area is completely dry.
- Clean behind the wall cavity: Use disinfectant or an antimicrobial cleaner to prevent mold and bacterial growth.
While small patches can be handled by homeowners, widespread water damage should always be handled by a certified restoration team.
5. Increase Air Circulation and Ventilation
Improving airflow is key to complete drying. Open doors and windows if weather permits. You can also create cross-ventilation by placing fans at opposite ends of the room to move moist air out and pull in dry air.
If humidity outside is high—as it often is in Maine during summer—it’s better to keep windows closed and rely on dehumidifiers and HVAC systems for controlled drying.
6. Disinfect and Prevent Mold Growth
Once the wall feels dry to the touch, don’t assume the job is done. Hidden moisture can still be trapped beneath surfaces. Mold thrives in these damp spaces.
To prevent it:
- Clean the wall and nearby surfaces with a mild bleach solution (1 cup of bleach per gallon of water) or a commercial mold inhibitor.
- Allow the area to dry again completely.
- Repaint with a mold-resistant primer or paint to help guard against future moisture issues.
If you see black spots, fuzzy growth, or experience a musty odor, it’s likely mold is already present and professional remediation is needed.
7. Repair and Restore
Once everything is fully dry and mold-free, it’s time to restore the wall:
- Replace drywall and insulation as needed.
- Sand and repaint using mold-resistant materials.
- Consider adding vapor barriers or moisture-resistant drywall in basements, bathrooms, or other high-humidity spaces.
Prevent future moisture problems by improving ventilation, sealing foundation cracks, and scheduling regular roof and plumbing inspections.
8. When to Call the Professionals
While small damp patches from condensation can often be managed at home, larger water damage situations require expert attention. Restoration professionals have industrial-grade drying equipment, thermal imaging tools, and antimicrobial treatments that ensure your walls are completely dry and safe.
At PuroClean of Auburn, we specialize in water damage restoration for Maine homes. Our team can locate hidden moisture, dry your walls and structures thoroughly, and prevent mold before it spreads. Whether it’s a burst pipe, basement flooding, or hidden leak, we’ll handle the cleanup and restore your property efficiently and safely.
Final Thoughts
Drying out damp walls is not just about appearance—it’s about protecting your home’s foundation and your indoor air quality. Quick action, proper tools, and professional help when needed can prevent long-term damage and costly repairs.
If you discover damp walls or moisture issues in your home, don’t wait for the problem to worsen. Contact PuroClean of Auburn today on (207) 531-1200 for expert water damage cleanup and structural drying services. We’re here 24/7 to help your home recover—dry, clean, and safe once again.


