


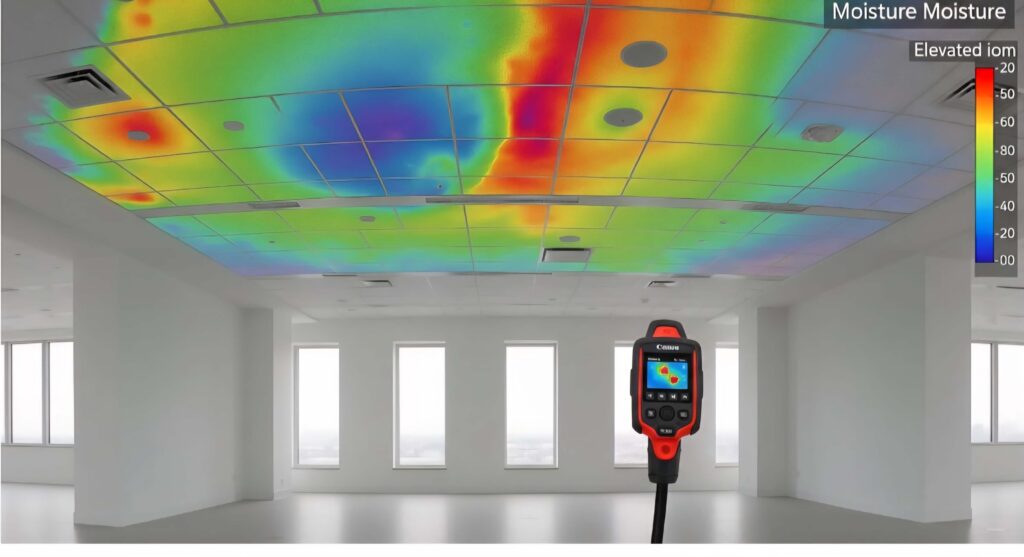
A review of moisture mapping matters most when water has gone where you cannot see it. A burst supply line may soak the wall behind a vanity. A roof leak can travel along framing before it stains a ceiling. Even a small appliance leak can leave moisture beneath flooring, inside cabinets, or behind baseboards. If that hidden water is not identified and dried correctly, a property can face structural damage, odor, and mold growth long after the visible puddle is gone.
For homeowners, facility managers, and business owners, moisture mapping is the process that replaces guesswork with a documented drying plan. It helps restoration professionals determine the true extent of water intrusion, select the right drying equipment, and verify that materials have returned to an appropriate dry condition.
What Is Moisture Mapping?
Moisture mapping is a systematic inspection of a water-damaged area. A technician measures moisture levels in affected building materials, compares them with dry or unaffected areas, and records the findings on a diagram or digital report. The result is a clear picture of where water has migrated and what needs attention.
This is not the same as simply finding a wet spot. Water can move through drywall, insulation, subflooring, wall cavities, hardwood flooring, and cabinet toe kicks. It may travel downward with gravity, spread horizontally through porous materials, or wick upward into drywall and trim. A careful map identifies the boundaries of that movement.
The information guides critical decisions. It can show whether carpet padding needs removal, whether a wall cavity needs targeted drying, whether hardwood floors can be stabilized, or whether materials are too damaged or contaminated to restore safely. It also provides a useful record for property owners and insurance-related documentation.
Review of Moisture Mapping Technology
A professional moisture inspection uses more than one tool because no single device can answer every question. Each tool has a purpose, and the most dependable results come from comparing findings rather than relying on one reading.
Thermal imaging helps locate suspicious areas
Thermal imaging cameras show temperature differences across a surface. When moisture evaporates, it can cool an area and create a thermal pattern that may indicate hidden water. Technicians can use this information to look behind an apparently dry wall, around windows, beneath a ceiling leak, or near plumbing fixtures.
A thermal image is a valuable screening tool, but it does not directly measure moisture. Cool areas can also result from air conditioning, missing insulation, or air movement. That is why a technician should confirm a thermal anomaly with a moisture meter before deciding that material is wet or recommending removal.
Moisture meters confirm moisture content
Moisture meters provide the measurement that thermal imaging alone cannot. Pin-style meters use small probes to test moisture within a material. Pinless meters scan a broader area without creating probe holes, which can be helpful for initial readings on walls, floors, and finished surfaces.
Different materials require different interpretations. Drywall, framing lumber, plaster, engineered wood, and concrete do not all respond the same way. Experienced technicians compare readings from affected materials to known dry areas of the same material. This establishes a practical drying target instead of relying on a generic number.
Hygrometers measure the drying environment
Drying a structure is not only about what is wet. It is also about the air surrounding the affected materials. Hygrometers measure temperature and relative humidity, while more advanced calculations can help assess humidity ratios, dew point, and vapor pressure.
Those readings help technicians adjust dehumidifiers and air movers as conditions change. If the air is already humid, wet materials will release moisture more slowly. If equipment is placed poorly or conditions are not monitored, drying may stall even when machines are running.
Why Moisture Mapping Is More Than an Inspection Step
The first moisture map establishes the scope of the loss, but the process should continue throughout drying. Water restoration is a controlled process, not a one-time equipment drop-off.
After extraction and initial setup, technicians should take follow-up readings to confirm that wet areas are responding. A material that remains elevated may require changes to airflow, dehumidification, or access. For example, a wall may dry from the surface while insulation inside remains wet. In another situation, a dense hardwood floor may require specialty drying techniques to reduce the risk of cupping, buckling, or permanent damage.
Final readings matter just as much. Removing drying equipment too early can leave moisture trapped in a cavity or beneath a floor covering. Running equipment longer than necessary can also increase disruption and cost. Moisture mapping helps establish a defensible stopping point based on the condition of the structure, not on how dry it looks.
Where Hidden Moisture Commonly Causes Trouble
In East Bridgeport, Milford, and Shelton, water damage often involves basements, plumbing leaks, storms, appliance failures, and roof-related intrusion. The source may be obvious, but the full impact rarely is.
Basements deserve close attention because concrete and masonry can hold moisture, and finished basement walls may conceal wet insulation or wood framing. After a plumbing leak, water often collects beneath vinyl plank flooring, behind baseboards, and under cabinets. In commercial settings, a leak above a drop ceiling can spread along ceiling tiles, insulation, wiring pathways, and wall assemblies before it is discovered.
Cabinet restoration is another area where mapping makes a difference. The face of a cabinet may appear undamaged while moisture is present at the toe kick, side panels, or subfloor beneath it. Depending on the materials, how long the water was present, and whether contamination is involved, a cabinet may be dried in place, require partial removal for access, or need replacement.
The Trade-Offs: When Mapping Cannot Save Every Material
Moisture mapping gives a clearer path forward, but it does not guarantee that every material can be restored. The right approach depends on the water source, the duration of exposure, the material type, and the condition of the assembly.
Clean water from a recently failed supply line may allow more materials to be dried and preserved when mitigation begins quickly. By contrast, sewage backup, floodwater, or water containing significant contaminants requires a different standard. Porous materials such as saturated carpet padding, insulation, and some drywall may need removal because cleaning and drying alone may not address health and sanitation concerns.
There are also access trade-offs. A technician may recommend removing a small section of baseboard or drywall to dry a wet wall cavity properly. That can feel frustrating when the surface looks fine, but limited, targeted access is often less disruptive than allowing hidden moisture to remain and lead to a larger mold or reconstruction project later.
What a Thorough Moisture Mapping Process Should Include
A reliable process begins by identifying and stopping the water source whenever possible. The technician then documents affected areas, takes initial moisture and environmental readings, and uses tools such as thermal imaging to identify conditions that require closer confirmation.
From there, the team develops a drying plan based on the materials and the category of water involved. This may include water extraction, controlled demolition, air movement, dehumidification, antimicrobial treatment when appropriate, and specialty drying systems for difficult assemblies. Equipment placement should be purposeful, not random.
Daily or scheduled monitoring is where accountability becomes visible. Updated readings should show whether the affected materials are drying as expected. If they are not, the plan should change. Clear communication is essential here, especially for business owners managing occupancy, operations, and potential safety concerns.
Questions to Ask After Water Damage
When reviewing a restoration plan, ask how the team determined the extent of water migration and how they will confirm the property is dry. Ask whether thermal images were verified with meter readings, which materials were tested, and whether unaffected comparison areas were used.
You should also ask how often the site will be monitored, what documentation will be provided, and whether any materials present a contamination concern. These questions are not about challenging the restoration team. They help you understand the condition of your property and the reasoning behind recommendations.
When water enters a property, quick action protects more than finishes and furnishings. It can protect the spaces where your family lives, your tenants work, or your business serves the community. PuroClean of East Bridgeport can help assess hidden moisture, stabilize the damage, and provide clear guidance for the next step toward recovery.

