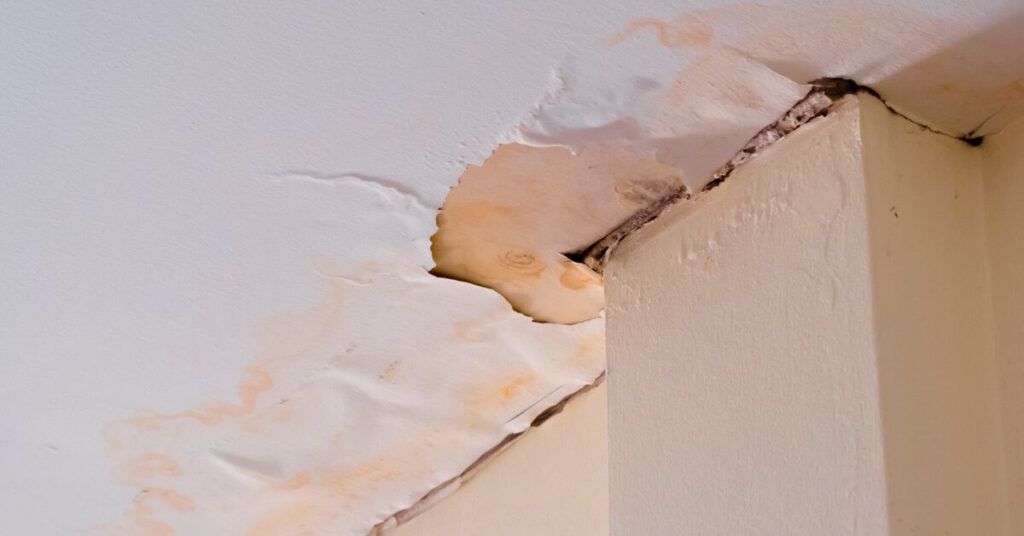
When you hear a faint dripping sound behind your shower wall, notice a sudden spike in your monthly City of Melbourne water bill, or smell a persistent musty odor in a hallway, your first instinct might be to grab a drywall saw and start cutting exploratory holes to find the source.
In Florida’s subtropical climate, cutting open walls blindly is one of the worst mistakes a property owner can make.
First, exploratory demolition is expensive, messy, and frequently misses the actual leak. Water follows the path of least resistance; a roof flashing leak in your attic or a pinhole copper pipe leak on the second floor can travel ten feet horizontally along a framing beam before dripping down inside a completely different room. You could cut four holes in your living room drywall and still miss the source.
Second, if a hidden leak has been dripping for more than 24 to 48 hours in Brevard County’s warm, humid air, dormant mold spores inside that dark wall cavity have likely germinated into active colonies. Cutting into a contaminated wall cavity without negative-air HEPA containment releases millions of microscopic mold spores directly into your central air conditioning system, spreading contamination throughout the entire house.
Modern restoration science eliminates guesswork. By combining systematic homeowner checks with non-invasive diagnostic instruments, you can pinpoint hidden water leaks behind drywall, stucco, and tile without tearing your walls open.
Step-by-Step Homeowner Checks: Zero Tools Required
Before calling for specialized electronic diagnostics, property owners can perform four simple, completely non-invasive checks to confirm whether an active plumbing leak is hiding inside their walls.
[ HOMEOWNER NON-INVASIVE LEAK CHECKS ]
│
┌──────────────────┬───────────┴───────────┬──────────────────┐
▼ ▼ ▼ ▼
[ 1. Water Meter ] [ 2. Acoustic Test ] [ 3. Sensory Scan ] [ 4. Utility Audit ]
Shut off all indoor Listen at quiet night Check for cool wall Compare monthly
fixtures & watch dial for hissing/dripping spots & paint blisters gallon usage spikes
1. The Water Meter Isolation Test
Your municipal water meter is the most accurate leak detector on your property.
- Turn off every water-using appliance and fixture inside and outside your home (faucets, washing machines, dishwashers, ice makers, irrigation zones, and pool auto-fillers).
- Walk out to your in-ground water meter box near the street and lift the lid.
- Look at the small triangular or star-shaped low-flow leak indicator dial on the meter face. If that small dial is spinning or moving even slightly while all fixtures are closed, pressurized water is actively escaping somewhere in your plumbing system.
- To determine whether the leak is inside your walls or underground between the meter and the house, close your home’s main interior water shut-off valve. If the meter dial stops spinning, the leak is inside your home’s walls or slab; if it continues spinning, the leak is in the underground main service line.
2. Late-Night Acoustic Listening
During the day, central air conditioning blowers, traffic noise, and household activity mask subtle plumbing sounds. Wait until late at night when the house is quiet, turn off the AC system at the thermostat for ten minutes, and press your ear or an inverted drinking glass against suspected bathroom, kitchen, or laundry walls. A faint hissing, spraying, or rhythmic dripping sound confirms an active pressurized supply line or drain leak.
3. Tactile Temperature and Texture Scanning
Run the back of your hand slowly across drywall surfaces along plumbing chases and exterior walls. Wet drywall and saturated insulation undergo continuous evaporative cooling, making damp sections feel noticeably cooler and slightly clammy compared to adjacent dry drywall. Gently press the wall surface with your thumb; if the gypsum core feels spongy or soft, water has compromised the wallboard from behind.
4. Visual Surface Micro-Indicators
Inspect painted walls and trim under bright angled flashlight beams to spot subtle distortion:
- Paint Blistering or Bubbling: Trapped moisture pushing outward against latex paint films creates small fluid- or air-filled bubbles.
- MDF Baseboard Swelling: Medium-Density Fiberboard baseboards act like sponges, swelling thicker and cracking top caulk lines when water pools along bottom wall plates.
- Hairline Drywall Tape Separation: Moisture dissolves drywall joint compound, causing vertical or horizontal paper tape seams to wrinkle or peel.
Professional Non-Invasive Leak Detection Technologies
When homeowner checks point to a hidden leak, certified restoration technicians and leak detection specialists deploy non-destructive instruments that read moisture levels and temperature signatures straight through finished walls, tile, and wood flooring.
Climate Experts
+———————————————————————————–+
| NON-INVASIVE WALL LEAK DETECTION TECHNOLOGIES |
+———————————————————————————–+
| DIAGNOSTIC INSTRUMENT | SCIENTIFIC PRINCIPLE | WHAT IT REVEALS |
+—————————-+——————————-+———————–+
| FLIR Thermal Imaging | Detects surface infrared | Maps cold blue/purple |
| Camera | temperature variations caused | evaporative cooling |
| | by evaporating moisture. | plumes behind walls. |
+—————————-+——————————-+———————–+
| Pinless Radio-Frequency | Emits low-frequency | Measures moisture |
| Moisture Meter | electromagnetic waves into | density up to 3/4″ |
| | wall materials without pins. | deep without holes. |
+—————————-+——————————-+———————–+
| Acoustic Ultrasonic | Amplifies high-frequency | Pinpoints exact |
| Listening Equipment | sound waves of pressurized | pinhole pipe bursts |
| | water escaping pipes. | behind drywall/slab. |
+—————————-+——————————-+———————–+
| Fiber-Optic Borescope | Micro-camera inserted via | Visualizes pipe joints|
| Camera (Minimally Invasive)| existing outlet/baseboard gap.| and mold inside studs.|
+———————————————————————————–+
1. FLIR Infrared Thermal Imaging Cameras
Infrared thermography is the gold standard for non-invasive moisture scanning. Contrary to popular belief, thermal cameras do not have X-ray vision to see through walls; instead, they measure microscopic surface temperature variations down to hundredths of a degree.
Leak Inspector+ 1
As hidden water inside a wall cavity evaporates, it draws heat away from the surrounding drywall—a physical phenomenon known as evaporative cooling. On a FLIR thermal display, dry walls appear warm (orange or yellow), while damp drywall and wet insulation appear as distinct, sharp-edged cold blue or purple shapes. If a hot water supply line is leaking inside a wall, it creates a bright glowing thermal plume. Thermal imaging allows technicians to scan an entire Melbourne home in minutes without touching a single wall.
Leak Inspector+ 2
2. Pinless Radio-Frequency Moisture Meters
Because cold drafts from AC vents or missing insulation can occasionally mimic cold moisture spots on a thermal camera, certified technicians always verify thermal anomalies using a pinless moisture meter.
Guide Sensmart-Thermal Imaging Camera &Thermal Scopes …
By pressing a flat sensor pad gently against the painted drywall or ceramic tile, the meter transmits a harmless radio-frequency signal roughly three-quarters of an inch into the substrate. Because water conducts electromagnetic signals much differently than dry gypsum or wood, the meter displays a precise digital moisture reading without leaving a single pinhole or scratch on your wall.
3. Acoustic Ultrasonic Leak Detectors
When a pressurized copper or CPVC supply pipe develops a pinhole leak inside a concrete block (CMU) wall or beneath a concrete slab, water escaping under 50 to 70 PSI creates distinct high-frequency acoustic vibrations. Technicians use ground microphones and wall-contact ultrasonic sensors filtered to block out background noise, allowing them to isolate the exact square inch where water is spraying inside the wall.
Climate Experts
4. Micro-Borescope Inspection Cameras
If visual confirmation inside a wall cavity is needed before repairs, technicians do not need to cut a large hole. By simply unscrewing an existing electrical outlet faceplate or removing a small section of baseboard trim, a flexible fiber-optic borescope camera (less than a quarter-inch wide) with an LED tip can be slipped into the wall void to inspect pipe joints, framing studs, and insulation directly.
Demonstrations and Visual Techniques
The video below shows how restoration professionals use infrared thermal imaging cameras and pinless moisture meters to pinpoint hidden water leaks behind finished drywall without destructive demolition.
1:00
Detect leaks behind walls with thermal imaging! 🏠🔍 Learn how in our quick guide. #HomeMaintenance
YouTube · South Eastern General Contractors
Common Hidden Leak Locations in Brevard County Homes
Knowing where leaks most frequently originate in Melbourne, Palm Bay, and Viera properties helps narrow down non-invasive diagnostic scans:
[ Shower Valve & Mixing Body ] ──> Leaks behind tiled wet walls into adjacent closets
[ AC Air Handler & Drain Line ] ─> Clogged PVC line overflows onto closet drywall
[ Exterior Stucco & Windows ] ───> Wind-driven rain saturates exterior wall cavities
[ Concrete Slab Pinhole Leak ] ──> Pressurized water wicks upward into bottom plates
Shower Mixing Valves and Diverters: Worn O-rings or cracked solder joints inside shower walls leak only when the shower is running, saturating the drywall on the opposite side of the bathroom wall (often inside a bedroom closet).- Central AC Condensate Drain Lines: In Florida’s humidity, air conditioners extract gallons of water daily. Algae clogs inside the PVC condensate line cause the air handler pan to overflow, saturating interior hallway walls and baseboards.
- Concrete Slab Pinhole Leaks: Older homes in Melbourne and Palm Bay with copper supply lines buried in concrete slabs frequently develop pinhole leaks caused by soil acidity and electrolysis, sending moisture wicking upward into interior partition walls.
- Second-Story Drain Stacks: Hairline cracks in PVC drain pipes or failed wax rings on upstairs toilets send water trickling silently down vertical wall chases into first-floor ceilings.
What Happens Once the Leak Is Located? The PuroClean Protocol
Pinpointing a hidden leak without tearing your walls open is only half the solution. Once the source is located and repaired by a licensed plumber or roofing contractor, the trapped moisture inside the wall cavity must be professionally extracted and dried before mold colonizes the framing.
Operating from our central commercial facility at 739 North Dr in the Coastal Technology Center, PuroClean of Melbourne follows strict Institute of Inspection, Cleaning and Restoration Certification (IICRC) S500 standards to dry walls with minimal disruption:
[ Step 1: FLIR Thermal & Pinless Moisture Mapping ]
│
▼
[ Step 2: Cavity Injection Drying (Saves Drywall in Place) ]
│
▼
[ Step 3: LGR Dehumidification & Psychrometric Monitoring ]
│
▼
[ Step 4: Targeted Flood Cuts (Only If Severely Saturated) ]
│
▼
[ Step 5: Turnkey General Contracting Repair & Paint ]
1. In-Place Wall Cavity Drying Systems
When clean water (Category 1) is caught early before mold growth begins, our Applied Structural Drying (ASD) technicians frequently dry wet walls without tearing out the drywall. By removing only the baseboard trim and drilling small, concealed half-inch ventilation holes near the bottom plate, we connect specialized Injectidry wall-cavity air injection hoses that force warm, dry air directly into the stud bay, drying the framing from the inside out.
2. Industrial LGR Dehumidification
We deploy Low-Grain Refrigerant (LGR) dehumidifiers and high-velocity axial air movers to establish low vapor pressure across the room, pulling remaining bound moisture out of drywall and framing studs within 3 to 5 days.
3. Controlled Flood Cuts and Turnkey Reconstruction
If the leak involved contaminated water (Category 2 or 3) or caused severe drywall softening and mold growth, we construct 6-mil poly containment under negative HEPA air pressure and perform clean, surgical flood cuts. Because PuroClean of Melbourne holds a full Florida General Contracting license, our in-house construction division seamlessly hangs new drywall, installs trim, and matches your interior paint under one roof.
Non-Invasive Leak Detection Comparison Matrix
The following matrix compares DIY homeowner checks against professional non-invasive diagnostic tools:
| Detection Method | Equipment Needed | Invasive / Destructive? | Best Application & Limitation |
| Water Meter Isolation Test | None (Visual dial check) | Completely Non-Invasive | Confirms if a pressurized plumbing leak exists; cannot pinpoint exact wall location. |
| FLIR Thermal Imaging Camera | Infrared Thermal Camera | Completely Non-Invasive | Scans entire walls/ceilings in minutes; reveals cold evaporative moisture plumes. |
| Pinless Moisture Meter | Radio-Frequency Scanner | Completely Non-Invasive | Confirms exact moisture density behind drywall/tile without leaving pinholes. |
| Acoustic Ultrasonic Sensor | Ground/Wall Microphone | Completely Non-Invasive | Pinpoints exact sound of pressurized leaks inside concrete block or slabs. |
| Fiber-Optic Borescope | Micro-Camera (1/4″ probe) | Minimally Invasive | Slips behind outlet covers or baseboards to visually inspect pipe joints inside walls. |
Frequently Asked Questions (FAQ)
1. Can a thermal imaging camera see water pipes through drywall?
Thermal imaging cameras do not have X-ray vision to see solid objects through walls. Instead, they detect subtle surface temperature differences on the drywall caused by evaporative cooling from hidden moisture or the heat signature of hot water pipes. When paired with a pinless radio-frequency moisture meter, thermal imaging allows technicians to map hidden leaks with pinpoint accuracy without cutting open drywall.
Leak Inspector+ 1
2. How can I check for a hidden water leak myself without any special tools?
Turn off every faucet, appliance, irrigation zone, and water-using fixture on your property, then check the small triangular low-flow leak indicator dial on your municipal water meter near the street. If the dial continues to move while all water is off, you have an active leak. You can also feel walls for unusual coolness, inspect baseboards for swelling, and listen at quiet nighttime hours for faint dripping or hissing sounds behind bathroom and kitchen walls.
3. Can wet walls be dried out without tearing down all the drywall?
Yes, if the water originated from a clean supply source (Category 1) and is addressed within 24 to 48 hours before mold colonizes the paper backing. Certified restoration technicians can remove the bottom baseboard, drill small concealed holes along the bottom plate, and use specialized wall-cavity air injection systems alongside industrial LGR dehumidifiers to dry the interior framing in place.
4. How quickly does mold grow inside a wall after a hidden leak starts in Melbourne, FL?
In Brevard County’s warm, humid subtropical climate, dormant mold spores inside a dark, damp wall cavity can germinate and form active colonies within 24 to 48 hours of water contact. Early non-invasive detection and rapid structural drying are essential to preventing a minor plumbing leak from turning into a major mold remediation project.
American Leak Detection
5. Will my homeowners insurance cover non-invasive leak detection and wall drying?
Most standard Florida homeowners insurance policies cover emergency water mitigation, structural drying, and necessary access to repair a sudden and accidental plumbing leak (such as a burst pipe inside a wall). Keep in mind that policies generally cover tearing out and replacing the drywall required to access the broken pipe, though the plumbing repair itself is typically paid by the homeowner. PuroClean of Melbourne provides thermal images, moisture maps, and itemized Xactimate® estimates to support your claim.
6. Where is PuroClean of Melbourne located, and how fast can you inspect my property?
Our central commercial facility is located at 739 North Dr in the Coastal Technology Center, Melbourne, FL 32934. Our certified emergency response teams operate 24 hours a day, 7 days a week, reaching residential and commercial properties across Melbourne, Palm Bay, Viera, Indialantic, and surrounding Space Coast communities within 60 minutes or less.
9. Partner with Melbourne’s Non-Invasive Moisture & Restoration Experts
When you suspect a hidden water leak inside your walls in Melbourne, Viera, Palm Bay, or the surrounding Space Coast area, don’t tear your home apart guessing where the water is coming from. Partner with the certified professionals who locate hidden moisture accurately and dry your structure with minimal disruption.
PuroClean of Melbourne is your trusted single-source solution for complete property recovery. From non-invasive FLIR thermal moisture mapping and psychrometric structural drying to certified mold remediation and turnkey General Contracting reconstruction, One Call Does It All.
Our comprehensive property damage restoration services include:
- 24/7 Emergency Water Extraction & Structural Drying
- Advanced FLIR Thermal Imaging & Moisture Diagnostics
- IICRC Certified Water, Mold & Odor Remediation
- Fire, Smoke & Soot Damage Restoration
- OSHA & FDOH Compliant Biohazard, Sewage & Trauma Cleanup
- Turnkey Structural Reconstruction & General Contracting
NON-INVASIVE LEAK DIAGNOSTICS & WATER RESTORATION IN MELBOURNE, FL
Suspect a hidden water leak behind your walls? Contact the certified, compassionate experts at PuroClean of Melbourne today for non-invasive thermal imaging diagnostics and immediate 24/7 response.
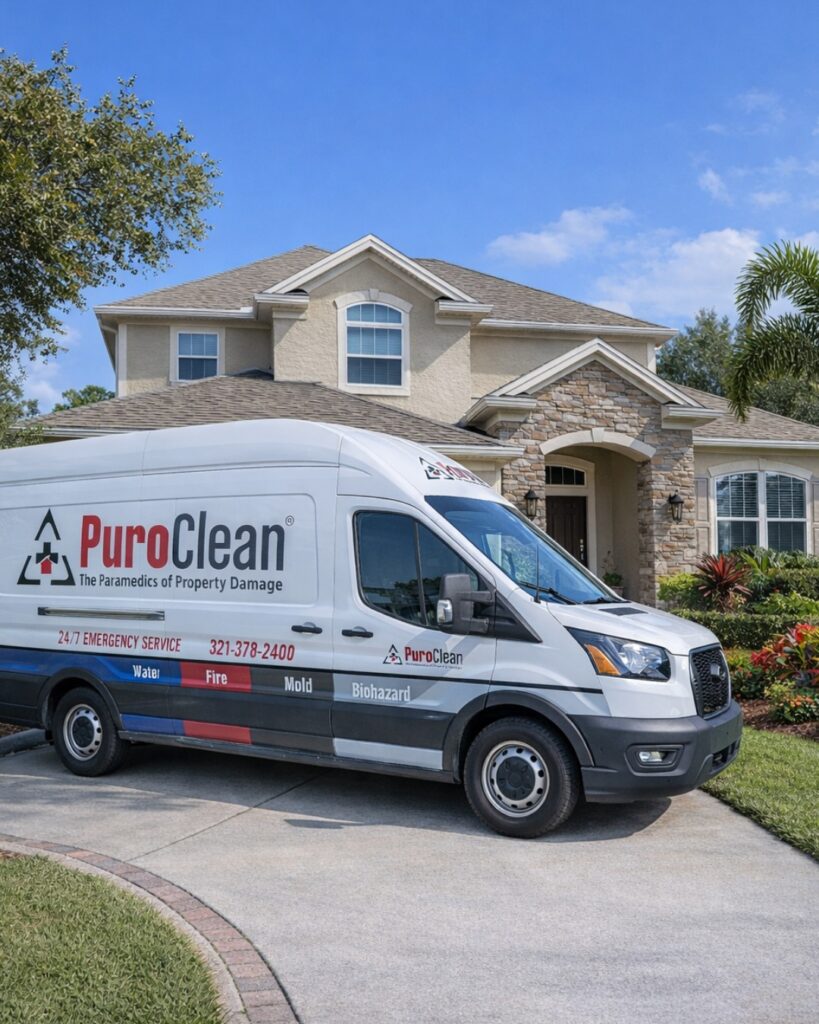
- 24/7 Direct Emergency Line: (321) 378-2400
- Facility Location: 739 North Dr, Melbourne, FL 32934 (Coastal Technology Center)
- Service Area: Serving Melbourne, Viera, Palm Bay, Indialantic, Melbourne Beach, West Melbourne, Suntree, Eau Gallie, Melbourne Village, and all surrounding Brevard County communities.