Biohazard Cleanup Workflow: Complete Step-by-Step Guide
Every year, nearly 500,000 workers in the United States face exposure to biohazard risks, according to the CDC. Quick action during a biohazard incident can make the difference between a safe environment and a dangerous one. Understanding each step of the cleanup process keeps people protected, prevents the spread of harmful materials, and ensures spaces can be safely used again.
Table of Contents
- Step 1: Assess And Secure The Hazard Area
- Step 2: Equip Teams With Proper PPE
- Step 3: Remove Biohazard Contaminants Safely
- Step 4: Decontaminate And Disinfect Surfaces
- Step 5: Verify Cleanup And Restore The Area
Quick Summary
| Key Point | Explanation |
|---|---|
| 1. Assess the Hazard Area First | Carefully analyze the contaminated space from a distance to ensure safety for yourself and others. |
| 2. Use Proper Personal Protective Equipment | Equip yourself with full PPE including gloves, coveralls, and respirators to prevent exposure to infectious materials. |
| 3. Systematically Remove Contaminants | Start cleaning from the outer edges to prevent spreading hazardous materials into clean areas using proper techniques. |
| 4. Thoroughly Decontaminate Surfaces | Apply EPA registered disinfectants effectively, allowing proper contact time for optimal pathogen elimination. |
| 5. Verify Cleanup Thoroughly | Use ATP testing to confirm no biological residues remain and document all stages of cleanup for accountability and safety. |
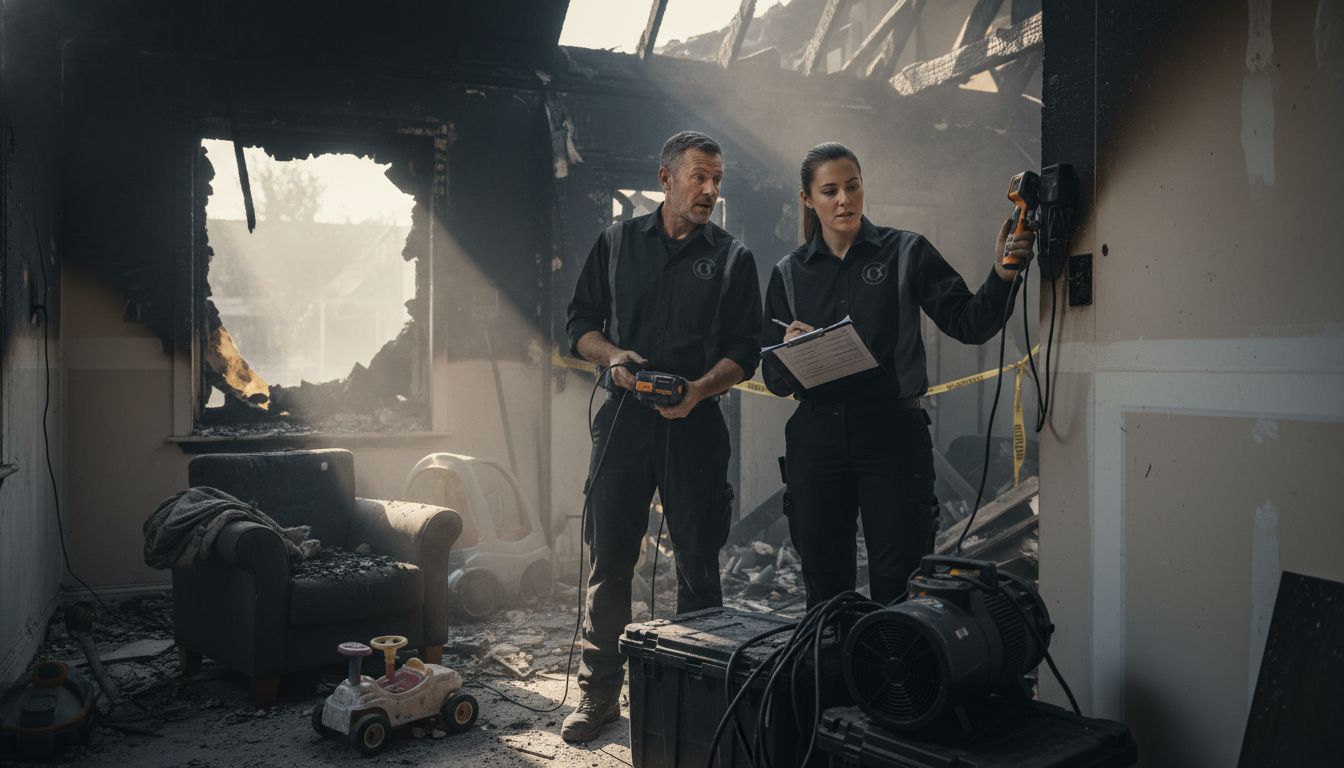
Step 1: Assess and Secure the Hazard Area
Your first step in biohazard cleanup involves carefully assessing and securing the contaminated area to protect yourself and prevent potential exposure. According to the Centers for Disease Control and Prevention (CDC), proper initial assessment is critical to ensure safety during hazardous material handling.
Start by visually scanning the entire area from a safe distance. Look for signs of biological contamination such as blood, bodily fluids, or other potentially infectious materials. Wear protective personal equipment including disposable gloves, safety goggles, and a respirator mask before entering the space. Your goal is to understand the extent of contamination without directly touching anything.
Next, establish a clear perimeter around the hazardous zone. Use caution tape or physical barriers to prevent unauthorized entry and minimize risk of cross contamination. Block all entrances and exits leading to the contaminated space. Ensure no children or unprotected individuals can accidentally access the area.
Pro Tip: Always assume biological materials are potentially infectious and handle with extreme caution.
Document everything you observe with clear photographs and written notes. Record the size of the contaminated area, visible material types, and potential spread zones. This documentation will be crucial for professional cleanup teams and potential insurance claims.
Once you have completed your initial assessment, prepare for the next critical stage of biohazard cleanup by gathering appropriate cleaning and personal protective supplies.
Step 2: Equip Teams with Proper PPE
Biohazard cleanup requires rigorous personal protective equipment (PPE) to shield workers from potential biological hazards and prevent cross contamination. According to OSHA standards, comprehensive protection is non negotiable when handling potentially infectious materials.
Begin by selecting a full PPE ensemble that provides complete body coverage. This means disposable full body coveralls that completely seal your clothing underneath. Choose coveralls with integrated hoods and elastic closures at wrists and ankles to prevent any potential exposure points. Ensure the material is fluid resistant and provides a strong barrier against biological contaminants.
Layer your protection strategically. Start with disposable nitrile gloves as your first line of defense. Wear double gloves if possible triple layer protection is even better. Select gloves with extended cuffs that can be tucked under your coverall sleeves to create a continuous protective barrier.
Protect your respiratory system with high quality respirator masks. N95 or higher grade respirators are recommended for biohazard scenarios. These masks filter out microscopic particles and protect against airborne biological materials. Pair the respirator with safety goggles or a full face shield to prevent potential splashes or accidental contact with mucous membranes.
Pro Tip: Always perform a seal check on your respirator to ensure a tight fit before entering the contaminated zone.
Complete your PPE ensemble with chemical resistant boots or shoe covers. These should be disposable and capable of being decontaminated or discarded after use. Waterproof and slip resistant footwear helps prevent accidental exposure and provides stable movement during cleanup operations.
With your team fully equipped, you are now prepared to move forward with the next critical phase of biohazard containment and cleanup.
Here’s a summary of recommended PPE for biohazard cleanup:
| PPE Item | Recommended Type | Key Features |
|---|---|---|
| Coveralls | Disposable, full body | Fluid-resistant Integrated hood Elastic cuffs |
| Gloves | Nitrile, disposable | Double/triple layer Extended cuffs |
| Respirator | N95 or higher-grade | Seal check required Filters airborne hazards |
| Eye Protection | Safety goggles/basic shield | Anti-fog Full face coverage |
| Footwear | Chemical-resistant boots | Slip-resistant Disposable or easily cleaned |
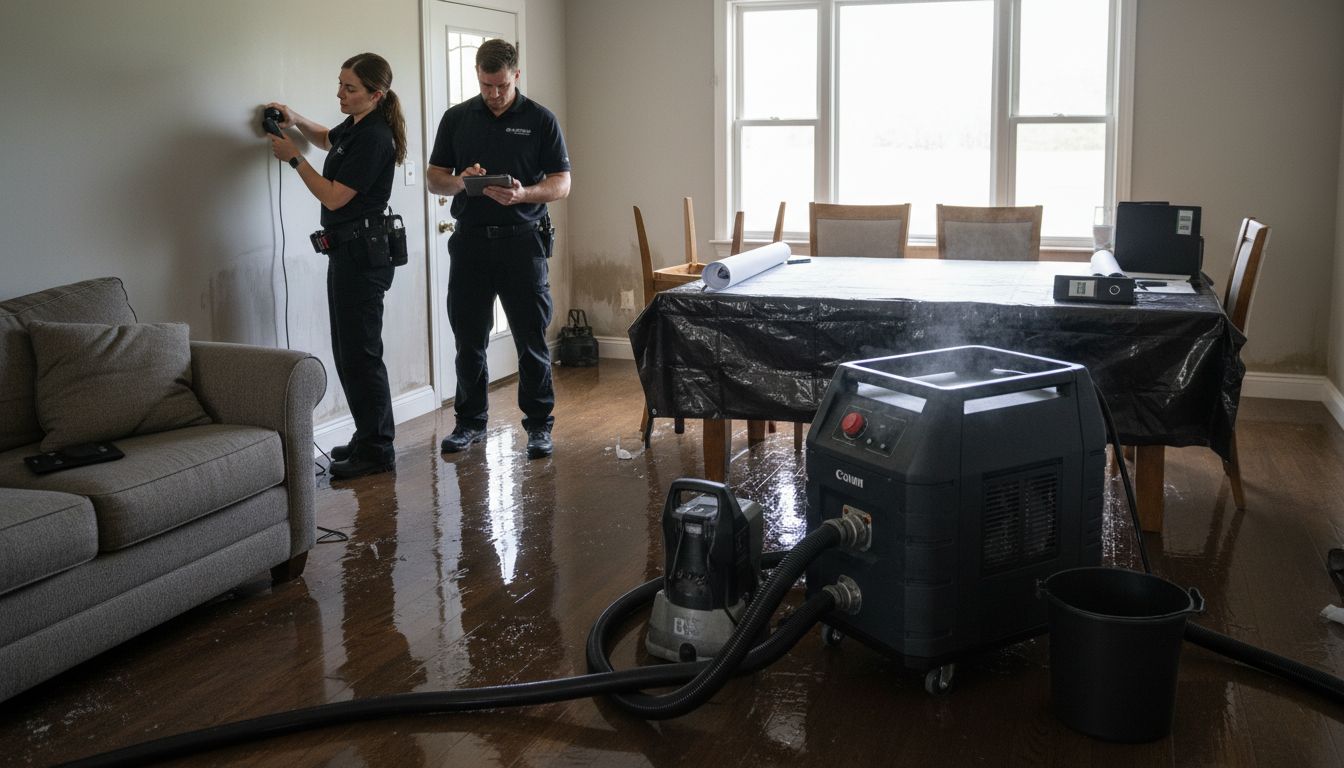
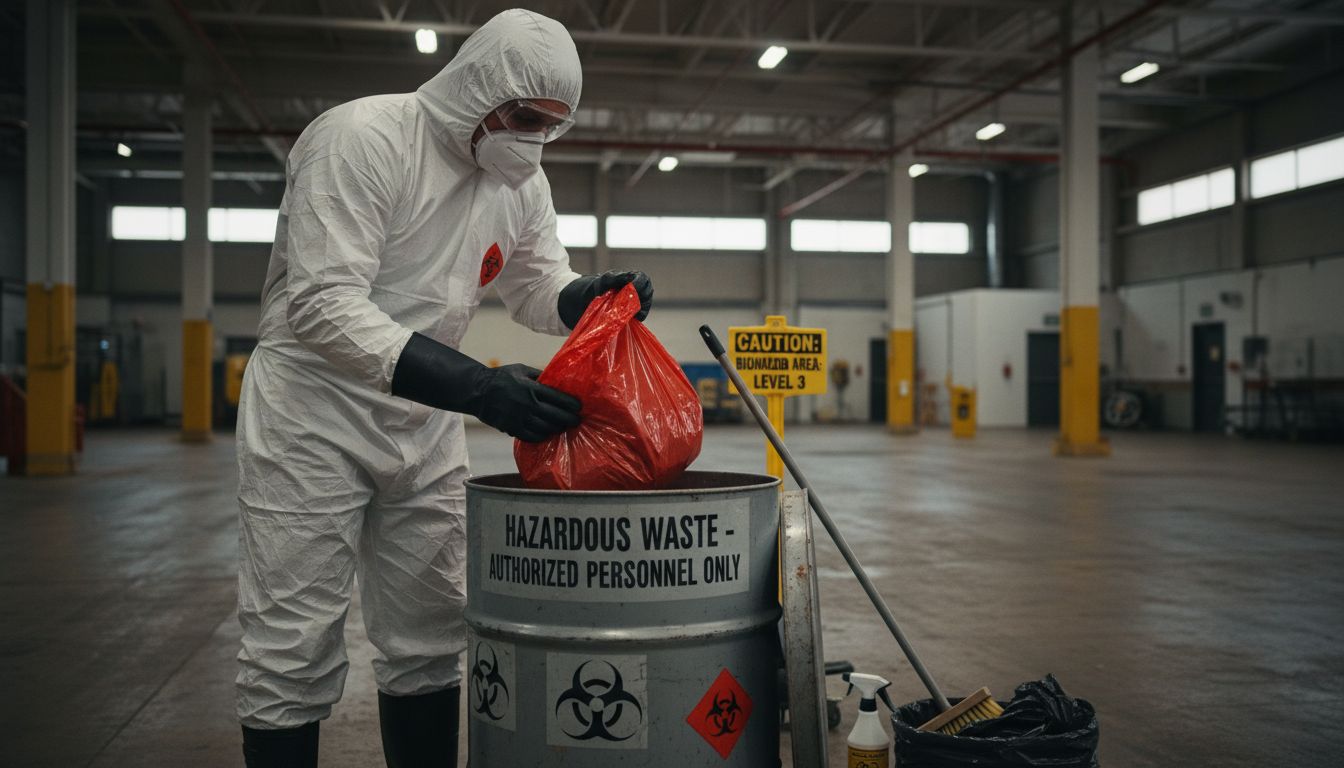
Step 3: Remove Biohazard Contaminants Safely
Removing biohazard contaminants requires a methodical and cautious approach to prevent potential health risks and cross contamination. Your primary goal is to eliminate infectious materials completely while protecting yourself and others from exposure.
Start by creating a systematic removal strategy. Work from the outer edges of the contaminated area towards the center. This approach prevents spreading biological materials across clean zones. Use disposable absorbent materials like specialized biohazard cleaning cloths or paper towels to initially contain and soak up liquid contaminants.
Choose professional grade disinfectants specifically designed for biohazard cleanup. Look for EPA registered solutions that are proven effective against bloodborne pathogens and infectious microorganisms. Apply the disinfectant generously using a spray bottle or professional application method. Allow the solution to sit for the recommended contact time typically between 5 to 10 minutes to ensure complete microbial destruction.
Carefully remove contaminated materials using long handled tools to maintain distance. Place all potentially infectious items into designated biohazard waste bags. These bags should be thick mil plastic typically red or orange colored and clearly marked with biohazard symbols. Seal bags completely preventing any potential leakage or exposure.
Pro Tip: Always double bag biohazardous waste to prevent accidental spillage or contamination.
After initial cleaning complete a thorough second pass using fresh disinfectant.
 This ensures complete removal of potentially missed contaminants. Pay extra attention to porous surfaces like wood or fabric which can absorb biological materials more readily.
Certified biohazard cleanup professionals recommend multiple decontamination stages to guarantee total safety. Your careful approach now prepares the area for final sanitization and verification of complete biological material removal.
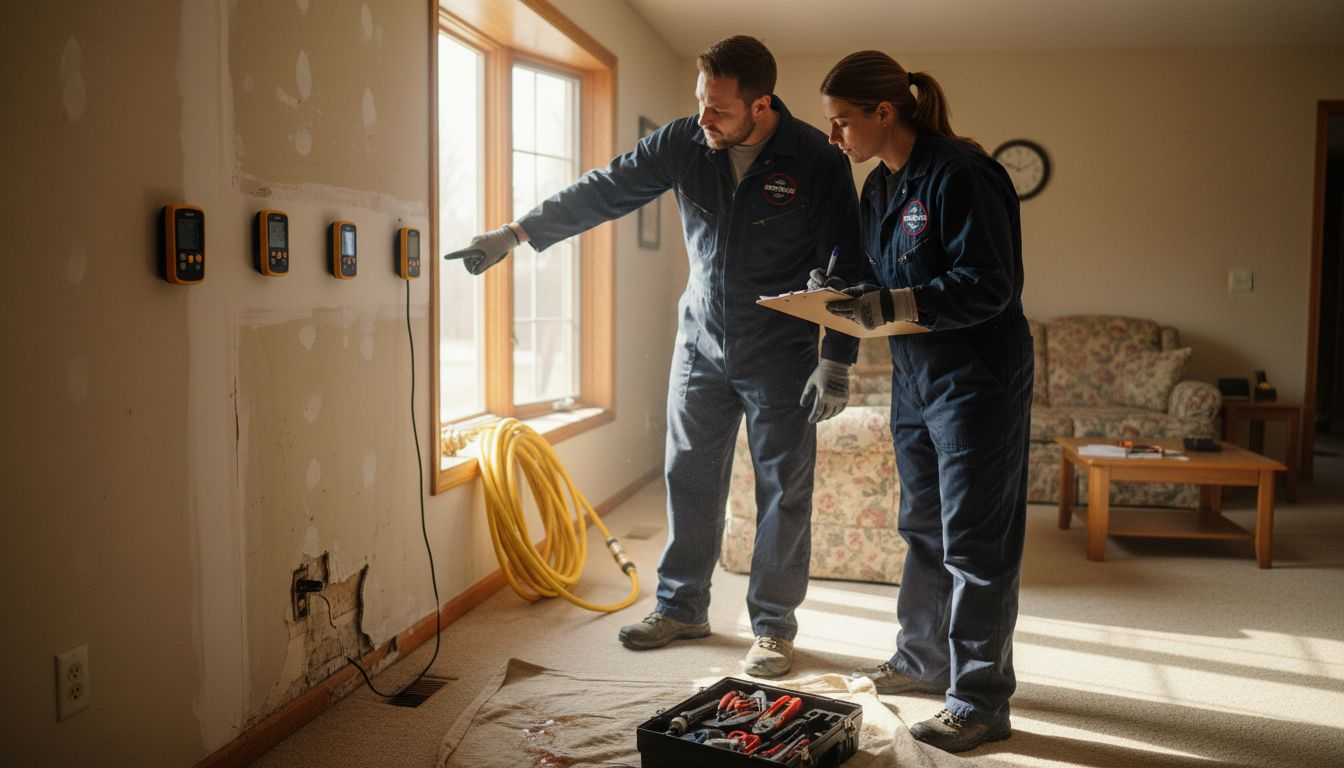
Step 4: Decontaminate and Disinfect Surfaces
Decontaminating surfaces requires a precise and thorough approach to eliminate all potential biological hazards. According to EPA guidelines, selecting the right disinfectant is crucial for complete pathogen elimination.
Begin by selecting an EPA registered disinfectant specifically designed to combat biohazards. These solutions are scientifically formulated to destroy a wide range of microorganisms including viruses bacteria and other infectious agents. Ensure your chosen product has broad spectrum effectiveness and is appropriate for the specific surface type you are treating.
Apply the disinfectant systematically. Start from the cleanest areas and work towards the most contaminated zones. Use clean disposable cloths or professional grade spray equipment to ensure even coverage. Saturate the surface completely avoiding any dry spots that could harbor remaining contaminants. Allow the disinfectant to remain on the surface for the full recommended contact time typically between 5 to 10 minutes.
Pay special attention to high touch surfaces and areas with porous materials. These zones often require multiple applications and more rigorous cleaning techniques. Wooden surfaces fabric materials and textured surfaces demand extra care as they can absorb and retain biological materials more effectively than smooth nonporous surfaces.
Pro Tip: Always work from clean areas to contaminated areas to prevent cross contamination during the disinfection process.
After the initial disinfection complete a second thorough pass. This ensures any missed areas receive proper treatment. Use fresh disinfectant and clean application tools to guarantee comprehensive coverage. Document your cleaning process including the products used contact times and specific areas treated.
Coronavirus cleaning guidelines recommend multiple verification steps to ensure complete surface decontamination. Your meticulous approach now prepares the area for final inspection and clearance.
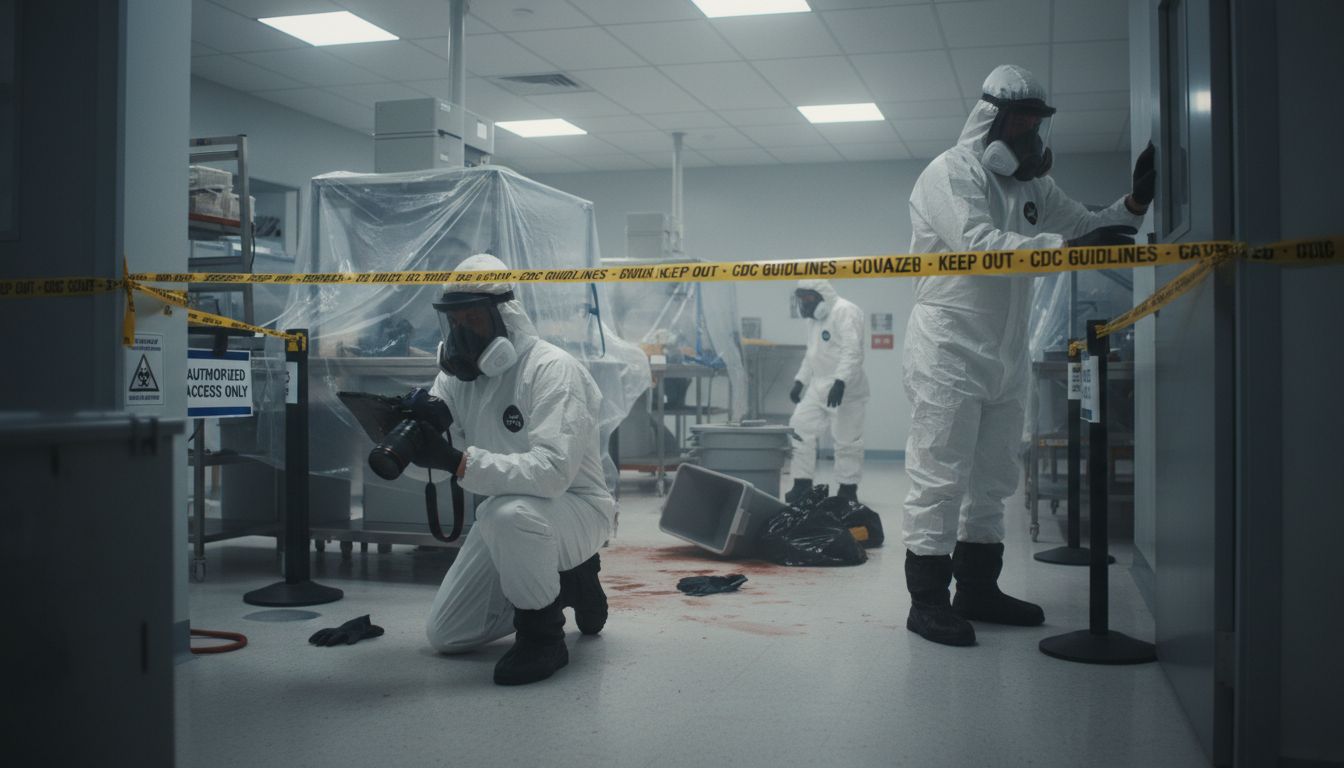
Step 5: Verify Cleanup and Restore the Area
The final stage of biohazard cleanup involves comprehensive verification and careful area restoration. This critical step ensures that all biological contaminants have been completely eliminated and the space is safe for reoccupation.
Begin with a thorough visual inspection of the entire cleaned area. Use bright lighting and carefully examine every surface for any remaining traces of biological materials. Look for subtle discolorations irregular textures or any signs that might indicate incomplete decontamination. Use clean white cloths to wipe surfaces and check for any residual contamination that might not be immediately visible.
Proceed with scientific verification methods. Use ATP testing swabs to measure biological residue levels on surfaces. These specialized testing kits can detect microscopic organic material that visual inspections might miss. Take multiple samples from different areas documenting each test location and result. The goal is to confirm that biological contamination levels are below safety thresholds.
Remove all temporary barriers and protective coverings carefully. Dispose of these materials as biohazardous waste following strict containment protocols. Conduct a final sweep to ensure no protective equipment or cleaning materials remain in the space. Restore the area to its original configuration making sure all furniture or equipment is returned to its proper place.
Pro Tip: Maintain detailed documentation of the entire cleanup process including initial assessment testing results and final verification for potential insurance or legal requirements.
Complete a final air quality test to confirm no airborne biological particles remain. This step provides an additional layer of safety verification ensuring the space is completely restored and safe for future use.
Certified biohazard cleanup professionals recommend comprehensive documentation and multiple verification stages to guarantee total area restoration and safety.
Trust Expert Help for Complete Biohazard Cleanup and Restoration
Biohazard cleanup is complex and dangerous. Handling infectious materials safely while following detailed steps like assessment, using proper PPE, removal, and disinfection demands skill and care. You want the peace of mind that these critical stages are done right to protect your health and property. At PuroClean of Northeast Sacramento we understand these challenges deeply. Our trained professionals use advanced technology and certified methods to remove hazards efficiently and restore your space safely. We also guide you through insurance processes and are available 24/7 when emergencies strike.
Don’t risk incomplete cleanup or exposure. Take the first step to secure your environment by contacting PuroClean of Northeast Sacramento today. Learn how our comprehensive biohazard services align with best practices like those in the Biohazard Cleanup Workflow: Complete Step-by-Step Guide. Protect yourself and your property now with trusted experts ready to respond immediately.
Frequently Asked Questions
What is the first step in the biohazard cleanup workflow?
The first step in the biohazard cleanup workflow is to assess and secure the hazard area. Begin by conducting a visual inspection from a safe distance and establish a perimeter using caution tape to prevent unauthorized access.
What kind of personal protective equipment (PPE) is essential for biohazard cleanup?
Essential PPE for biohazard cleanup includes disposable coveralls, nitrile gloves, respirators, safety goggles, and chemical-resistant boots. Equip yourself with a full ensemble to ensure complete body coverage and reduce the risk of exposure to harmful biological materials.
How should I safely remove biohazard contaminants?
To safely remove biohazard contaminants, create a systematic removal strategy from the outer edges of the contaminated area to the center. Use absorbent materials to soak up liquids and place all infectious items in designated biohazard waste bags to prevent cross-contamination.
What steps should I take to disinfect surfaces in a biohazard area?
To disinfect surfaces, select an EPA registered disinfectant and apply it evenly, starting from the cleanest areas and moving toward the most contaminated zones. Ensure that the disinfectant remains on surfaces for the recommended contact time, generally between 5 to 10 minutes, for effective pathogen elimination.
How can I verify that the biohazard cleanup is complete?
To verify the cleanup, conduct a thorough visual inspection and utilize scientific methods, such as ATP testing, to confirm that biological residue levels are safe. Document your findings and ensure no signs of contamination remain before restoring the area for future use.
What should I include in my documentation during the biohazard cleanup process?
Your documentation should include initial assessment details, product usage, contact times, testing results, and verification outcomes. Maintain clear records to support potential insurance or legal requirements and to ensure a comprehensive understanding of the cleanup process.
Recommended
What is Specialist Cleaning? Understanding Its Importance | Rozie – Malta’s Best Cleaning Services
Guide to Biohazard Cleanup Alexandria VA for Owners
Crime Scene Cleanup – PuroClean of Walnut Creek
Biohazard & Hoarding Cleanup Services in Walnut Creek, CA
Why Certified Biohazard Cleanup Alexandria Matters for Safety