DIY Mold Remediation Process: Complete Step-by-Step Guide
Over 45 percent of american homes report mold problems at some point, making it a hidden but common issue across the country. Mold growth can threaten your property and even put your family’s health at risk, especially when moisture goes unchecked. Knowing how to safely assess, contain, and remove mold helps you protect your investment and breathe easier. This step by step guide breaks down the essentials every homeowner needs for effective mold remediation.
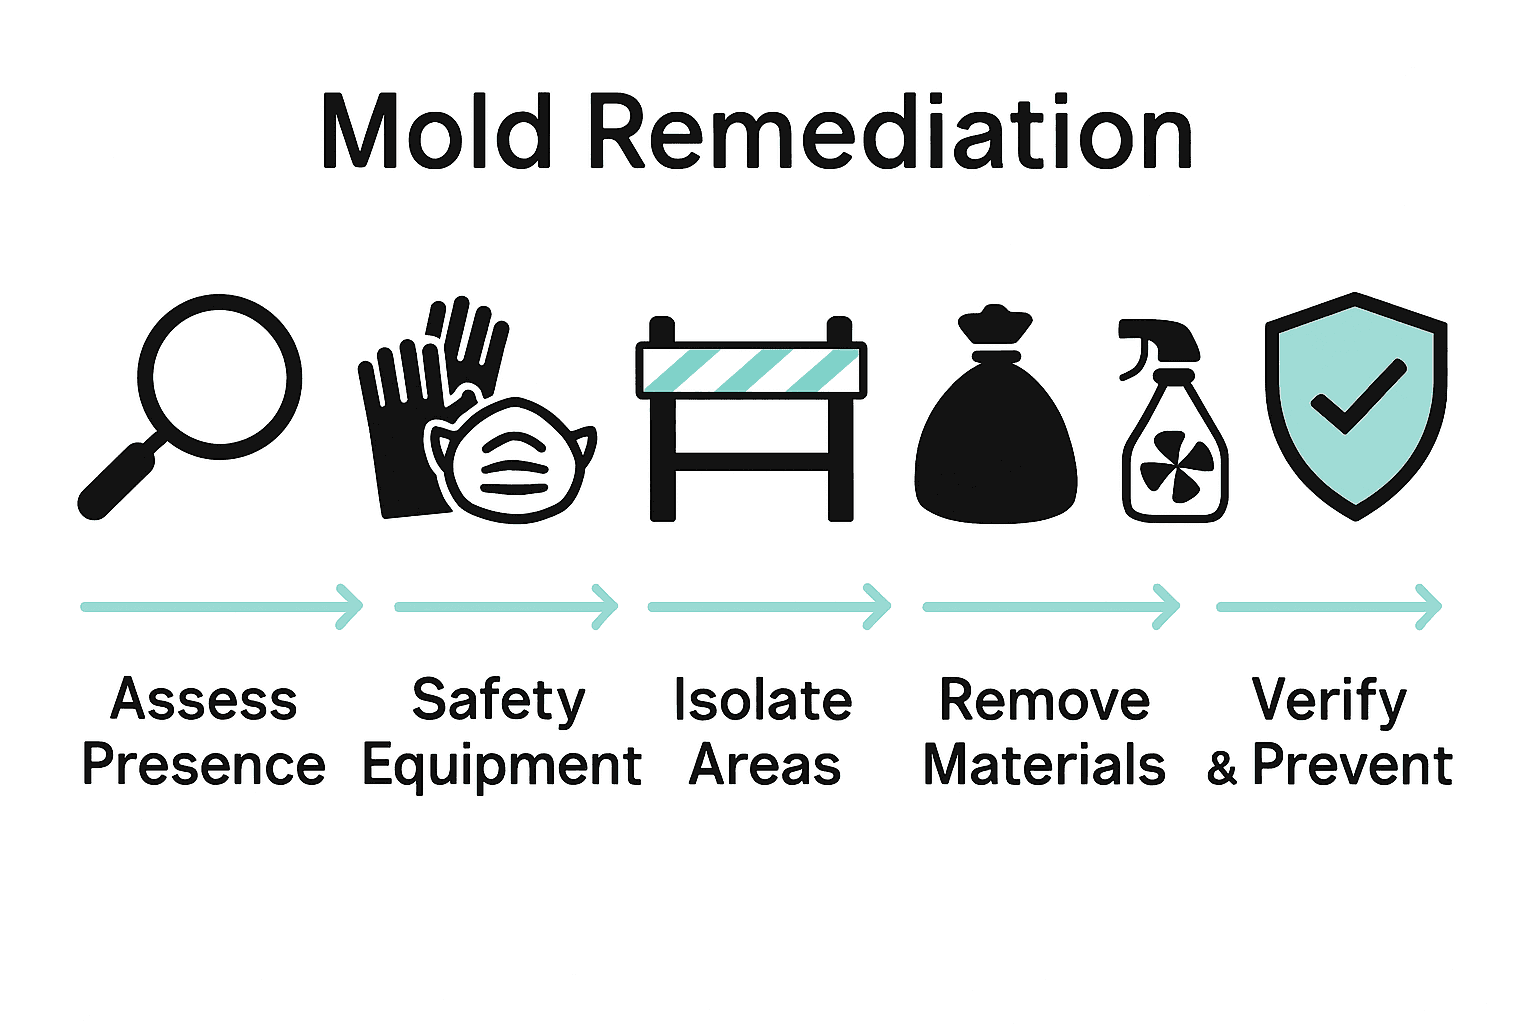
Table of Contents
- Step 1: Assess Mold Presence And Scope
- Step 2: Gather Necessary Safety Equipment
- Step 3: Isolate And Prepare Affected Areas
- Step 4: Remove Mold And Contaminated Materials
- Step 5: Clean, Disinfect, And Dry Thoroughly
- Step 6: Verify Mold Removal And Prevent Recurrence
Quick Summary
| Key Point | Explanation |
|---|---|
| 1. Assess mold presence first | Conduct a visual inspection in moisture-prone areas to determine if the issue requires professional help or can be addressed by yourself. |
| 2. Gather necessary safety equipment | Use gloves, N95 respirators, and goggles to protect yourself from mold exposure during cleanup activities. |
| 3. Isolate affected areas properly | Seal off contaminated spaces with plastic sheeting to prevent mold spores from spreading to other parts of the home. |
| 4. Remove contaminated materials carefully | Dispose of mold-infested items using heavy plastic bags and clean hard surfaces with detergent to eliminate mold growth. |
| 5. Verify and prevent future mold growth | Check treated areas for moisture and mold, and implement ongoing moisture control strategies to avoid recurrence. |
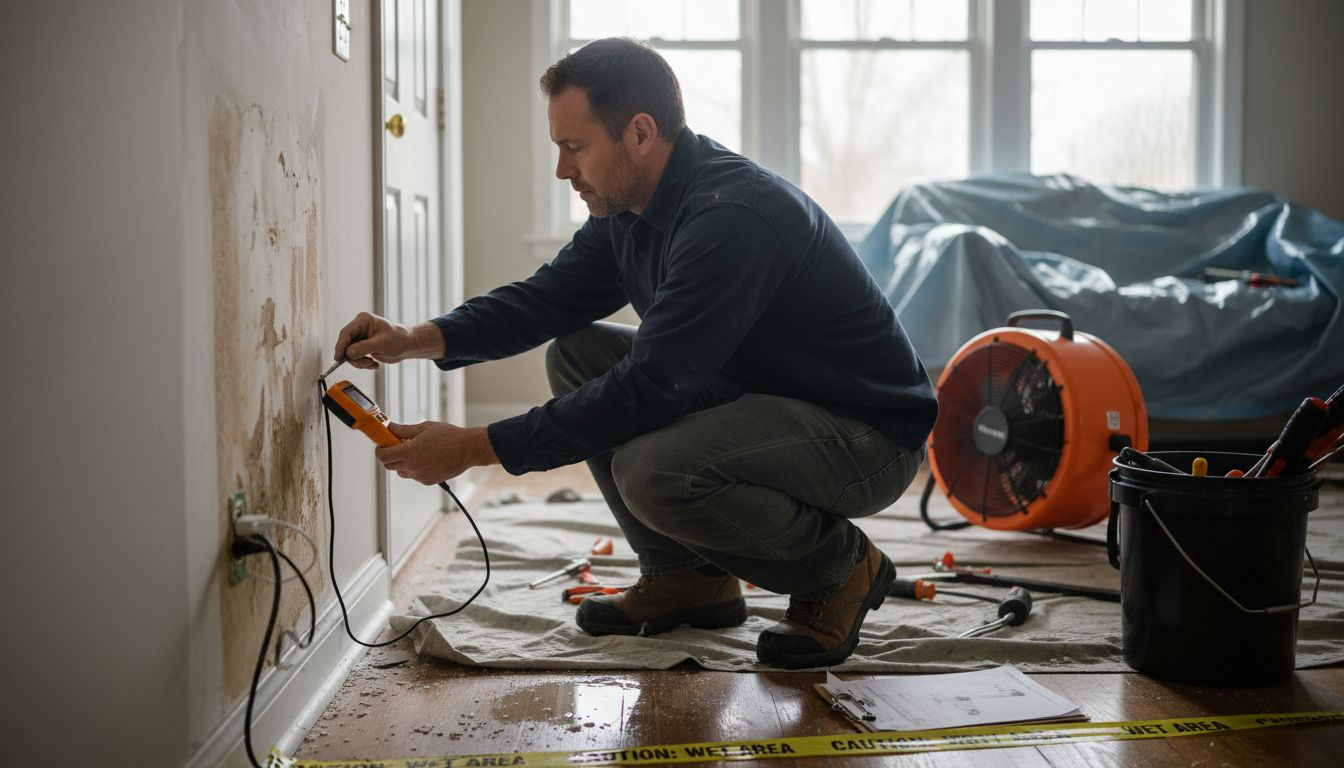
Step 1: Assess Mold Presence and Scope
Mold assessment is your critical first step in understanding the extent and potential risks of contamination in your home. This initial investigation determines whether you can tackle the problem yourself or need professional intervention.
Start by conducting a thorough visual inspection of areas prone to moisture and potential mold growth. Check bathrooms, basements, under sinks, around windows, and any spaces with previous water damage. According to the EPA, if the moldy area is less than about 10 square feet, homeowners can typically handle the cleanup themselves. Larger areas or those with extensive water damage require more specialized remediation strategies.
Use your senses during the assessment. Look for visible discoloration or fuzzy patches in colors ranging from white and green to black. Notice any musty or earthy odors. Carefully document your findings with photographs to track the mold’s location and spread. The EPA recommends identifying the type of mold damaged materials to determine the most appropriate cleanup approach.
Pro tip: Wear protective gear like gloves and an N95 respirator mask during your inspection to prevent direct exposure to mold spores. Understanding the scope prepares you for the next critical steps in effective mold removal.
Step 2: Gather Necessary Safety Equipment
Before diving into mold remediation, protecting yourself is paramount. Safety equipment acts as your first line of defense against potential health risks associated with mold exposure.
CDC guidelines recommend comprehensive personal protective equipment to safeguard against mold during cleanup. Your essential safety kit should include: disposable gloves (preferably nitrile), an N95 respirator mask, safety goggles or protective eyewear, and disposable coveralls or old clothing you can immediately wash after the job. The Minnesota Department of Health specifically advises using respiratory protection capable of filtering particles down to 1 micron, which makes the N95 respirator an ideal choice.
When selecting your safety gear, prioritize items that provide complete coverage and protection. Ensure your respirator fits snugly against your face, your goggles create a seal around your eyes, and your gloves extend past your wrists. Disposable coveralls can prevent mold spores from attaching to your regular clothing. Pro tip: Have a designated area to remove and bag contaminated protective gear after your remediation work to prevent cross contamination.
Your thorough preparation sets the stage for safe and effective mold removal.
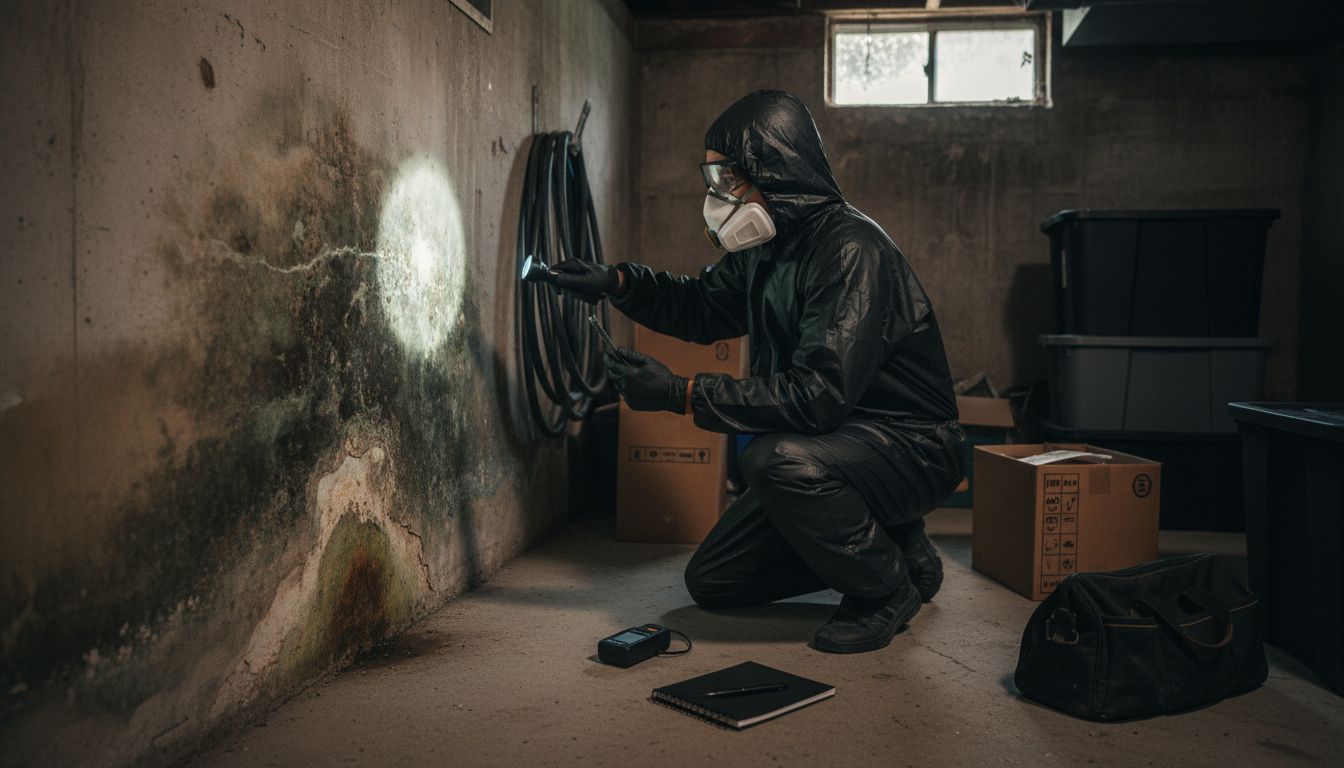
Step 3: Isolate and Prepare Affected Areas
Preventing mold spore spread is crucial during remediation. Your goal in this step is to create a controlled environment that minimizes contamination risk to other parts of your home.
EPA guidelines emphasize selecting appropriate containment equipment to prevent mold spores from migrating during cleanup. Start by sealing off the affected area using plastic sheeting and painter’s tape. Cover air vents, doorways, and any openings to create a physical barrier. If you’re working in a room with multiple entry points, consider using a zippered plastic containment barrier that allows controlled access while maintaining isolation.
Remove or cover furniture, carpets, and other items near the contaminated zone to protect them from potential spore contamination. The EPA recommends adapting your containment strategy to fit the specific situation. Pro tip: Create a clean staging area just outside the contained space where you can safely remove protective gear and store cleaning supplies. This helps prevent accidental cross contamination and keeps your work organized.
Your careful preparation sets the foundation for effective and safe mold removal.
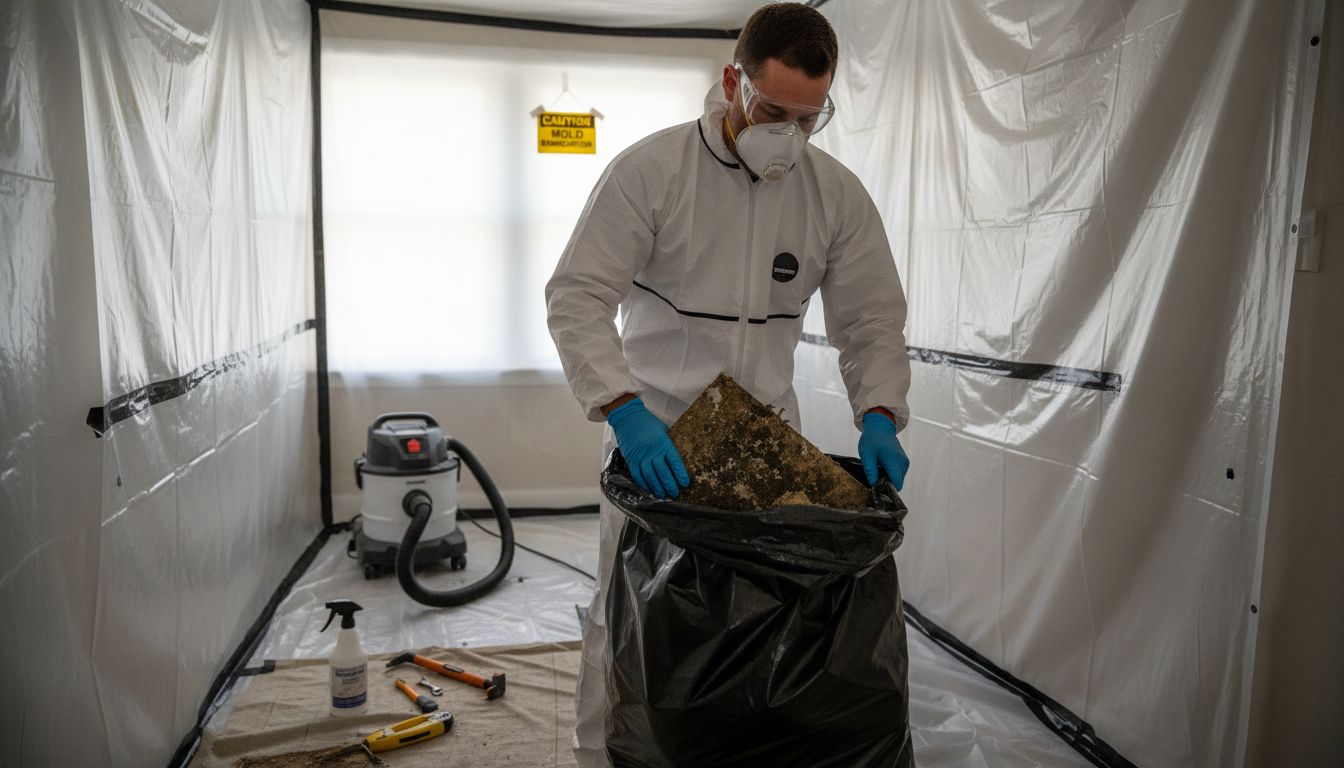
Step 4: Remove Mold and Contaminated Materials
Removing mold and contaminated materials requires careful strategy and systematic approach. Your goal is to eliminate mold growth while preventing further spread and potential health risks.
EPA guidelines recommend specific techniques for different surface types. For hard surfaces, scrub thoroughly with detergent and water, ensuring complete drying afterward. Porous materials like carpets, ceiling tiles, and drywall often require complete removal if substantial mold growth is present. The Wisconsin Department of Health Services suggests starting your cleaning from the top of the affected area and working downward, using a general household cleaner solution and repeating until all visible mold disappears.
When removing contaminated materials, work systematically and carefully. Double bag moldy items in heavy plastic bags before disposal to prevent spore release. For extensive contamination or materials deeply penetrated by mold, consider professional assessment. Pro tip: Use a HEPA vacuum to capture loose spores after removing contaminated materials, which helps prevent potential recontamination.
Careful material removal sets the stage for thorough cleanup and prevention of future mold growth.
Step 5: Clean, Disinfect, and Dry Thoroughly
The final stage of mold remediation focuses on comprehensive cleaning, thorough disinfection, and complete drying to prevent future mold growth and ensure a safe environment.
EPA guidelines emphasize the critical importance of drying wet materials within 48 hours to prevent mold reoccurrence. Clean hard surfaces using a mild detergent solution, scrubbing carefully to remove all visible mold. EPA recommends utilizing dehumidifiers, fans, and heaters to accelerate the drying process and eliminate residual moisture that could trigger new mold development.
After cleaning, apply an EPA registered antimicrobial solution designed specifically for mold remediation. Ensure complete coverage of the treated area, including adjacent surfaces that might have been exposed. Pro tip: Use multiple fans positioned strategically to maximize air circulation and speed up the drying process. Focus on creating cross ventilation that moves moisture out of the space efficiently.
Your meticulous cleaning and drying approach will help prevent future mold growth and protect your property’s structural integrity.
Step 6: Verify Mold Removal and Prevent Recurrence
The final stage of mold remediation involves confirming the success of your cleanup efforts and implementing long term strategies to prevent future mold growth. This critical step ensures your hard work pays off and protects your property from future contamination.
EPA guidelines recommend thoroughly checking for the potential return of moisture and mold problems after remediation. Conduct a comprehensive visual inspection of the treated area under good lighting, looking for any signs of remaining discoloration or new mold patches. Use a moisture meter to confirm that surfaces have dried completely and humidity levels remain below 50 percent.
EPA advises fixing plumbing leaks and water problems immediately to prevent future mold development. Pro tip: Implement ongoing moisture control strategies such as using dehumidifiers in damp areas, ensuring proper ventilation, and addressing any water intrusion points promptly. Regularly inspect potential problem areas like bathrooms, basements, and spaces around windows and pipes to catch potential issues before they escalate.
Your proactive approach will help maintain a mold free environment and protect your property’s structural integrity.
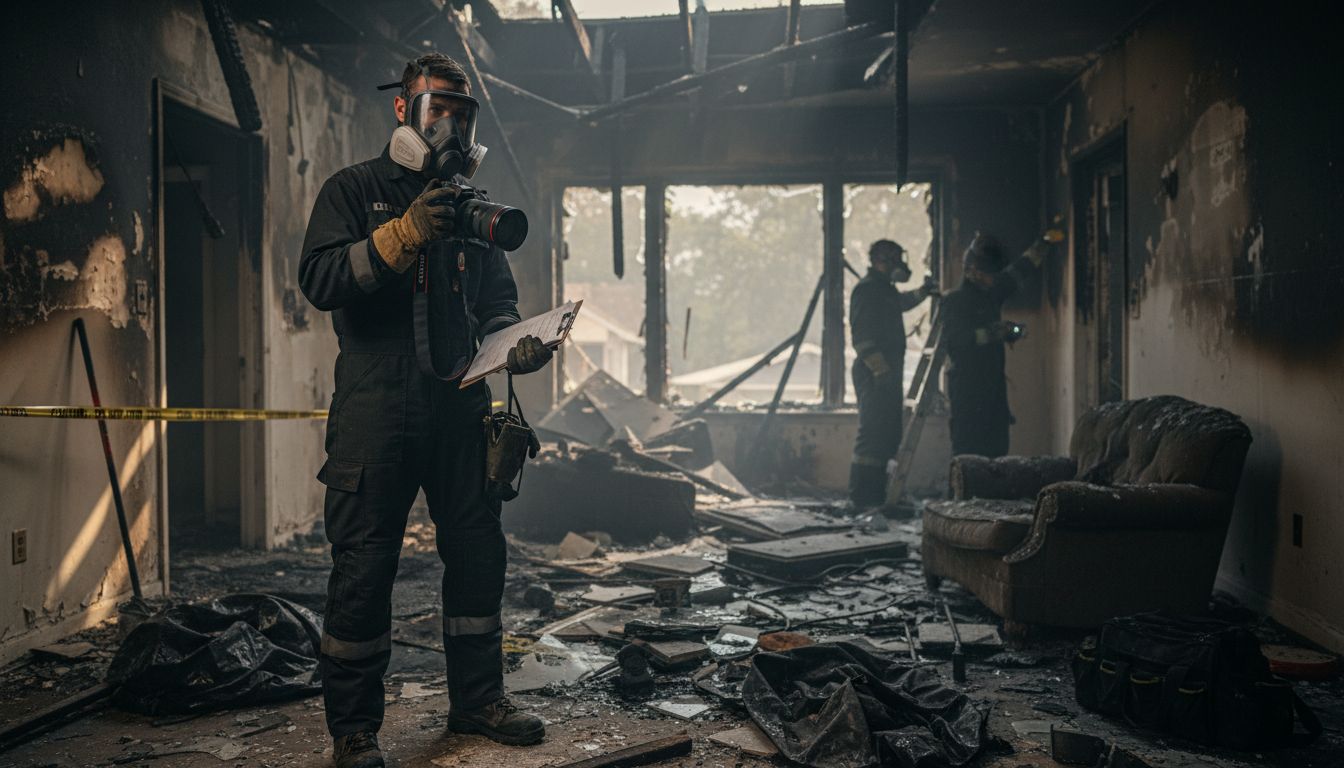
Ensure Complete Mold Remediation With Expert Support
Tackling mold problems on your own can feel overwhelming especially when faced with the safety precautions and the detailed steps like assessing mold presence, isolating affected areas, and thorough drying outlined in the DIY Mold Remediation Process. Protecting your home and health means understanding when the challenge grows beyond a simple cleanup to requiring professional help that guarantees complete and safe removal.
Do not risk your family’s wellbeing or property value by facing mold alone. Our team at PuroClean of Northeast Sacramento specializes in advanced mold removal and water damage restoration using industry leading technology and strict safety protocols. We help you every step of the way from emergency response to final inspection to prevent recurrence and restore peace of mind.
Ready to stop mold in its tracks? Contact us today at PuroClean of Northeast Sacramento for fast, professional mold remediation services that protect what matters most. Learn more about our full range of property damage restoration solutions designed to keep your home safe and healthy.
Frequently Asked Questions
What is the first step in the DIY mold remediation process?
Begin by assessing the mold presence and scope in your home. Conduct a thorough visual inspection of areas prone to moisture and document your findings with photographs to understand the extent of the contamination.
How can I ensure my safety during mold removal?
Gather necessary safety equipment, including disposable gloves, an N95 respirator mask, safety goggles, and coveralls. Wear these protective items during the remediation process to prevent health risks associated with mold exposure.
How should I isolate affected areas when removing mold?
Isolate the contaminated areas by sealing them off with plastic sheeting and painter’s tape. Cover any furniture and close off air vents to minimize the risk of mold spores spreading to other parts of your home.
What are the best techniques for removing mold from surfaces?
For hard surfaces, scrub them with a detergent and water solution, ensuring they dry completely afterward. For porous materials with substantial mold, remove and double-bag those items to prevent spore release.
How can I ensure thorough cleaning and drying after mold removal?
Clean and disinfect all affected surfaces with an antimicrobial solution and ensure complete drying within 48 hours. Use dehumidifiers and fans to lower humidity and speed up the drying process.
What should I do after completing mold remediation to prevent recurrence?
Verify mold removal by checking for any remaining discoloration and use a moisture meter to ensure surfaces are dry. Implement ongoing moisture control strategies, such as using dehumidifiers and addressing water intrusion promptly, to maintain a mold-free environment.
Recommended
Understanding the Mold Remediation Process in 6 Important Steps – PuroClean of Coral Gables
Why Remove Mold Professionally: Complete Guide – PuroClean of Northeast Sacramento
The Essential Guide: Professional vs. DIY Mold Remediation on Wood – PuroClean of Coral Gables