Effective Water Damage Mitigation Steps for Fast Recovery
Did you know that over 14,000 people in the US experience a water damage emergency at home or work each day? Water intrusion can destroy property faster than most people realize, creating hidden hazards and lasting damage. Taking immediate, careful action not only protects your safety but can save thousands in repairs. Understanding the safest and most effective steps right after water damage can make all the difference for your health and property.
Table of Contents
- Step 1: Assess Water Damage And Ensure Safety
- Step 2: Stop The Source And Remove Standing Water
- Step 3: Extract Moisture And Dry The Area
- Step 4: Clean, Disinfect, And Prevent Mold Growth
- Step 5: Inspect And Restore Damaged Materials
Quick Summary
| Key Point | Explanation |
|---|---|
| 1. Prioritize personal safety first | Always wear protective gear during water damage assessments to avoid hazards like contamination or electrical risks. |
| 2. Stop the water source immediately | Quickly identify and shut off the source of water to prevent further damage and reduce restoration costs. |
| 3. Extract moisture rapidly | Use fans and dehumidifiers to dry affected areas promptly, preventing mold growth and structural deterioration. |
| 4. Clean and disinfect thoroughly | Promptly clean all surfaces and items to prevent mold. Maintain low humidity levels to discourage its growth. |
| 5. Assess and restore materials carefully | Sort items into salvageable, restorable, and disposable categories to minimize loss and guide restoration efforts. |
Step 1: Assess Water Damage and Ensure Safety
When water damage strikes, your first priority is protecting yourself and understanding the extent of potential hazards. This critical first step involves carefully evaluating your property while maintaining personal safety and recognizing potential contamination risks.
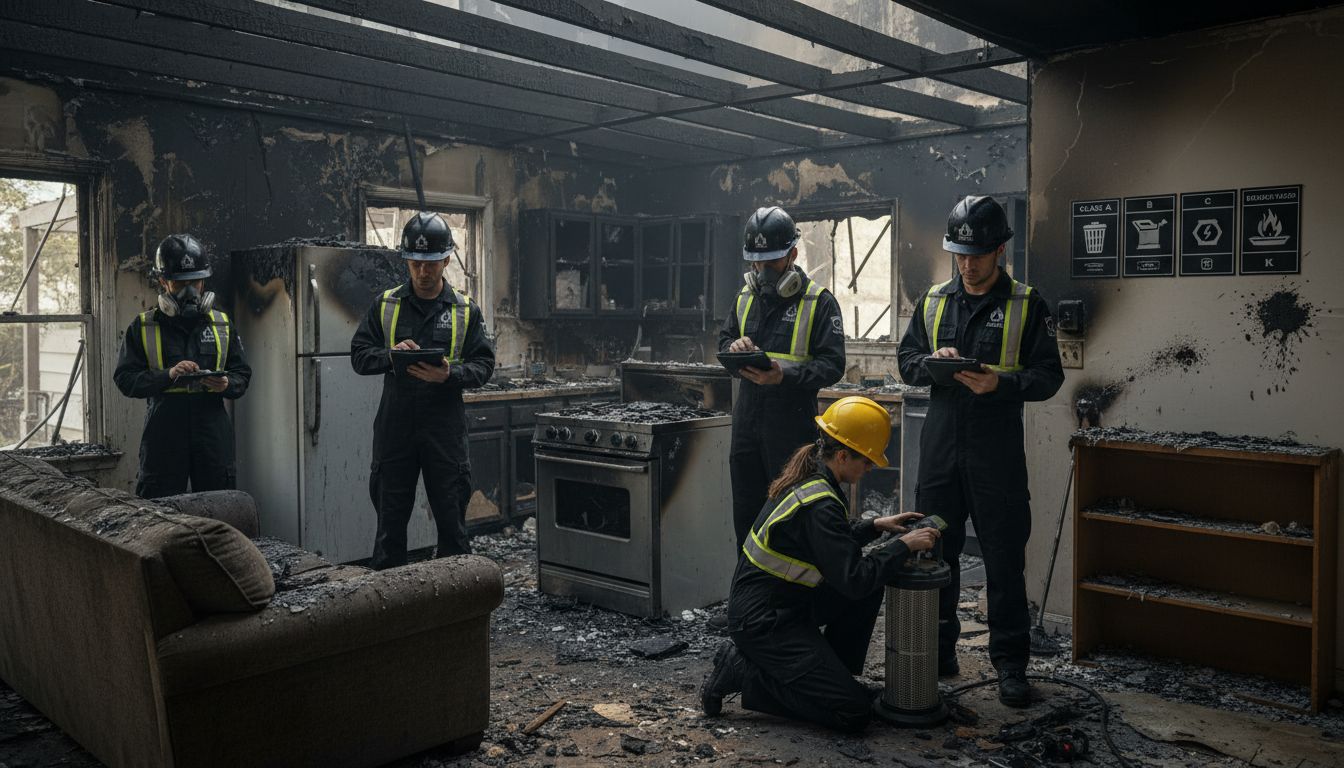
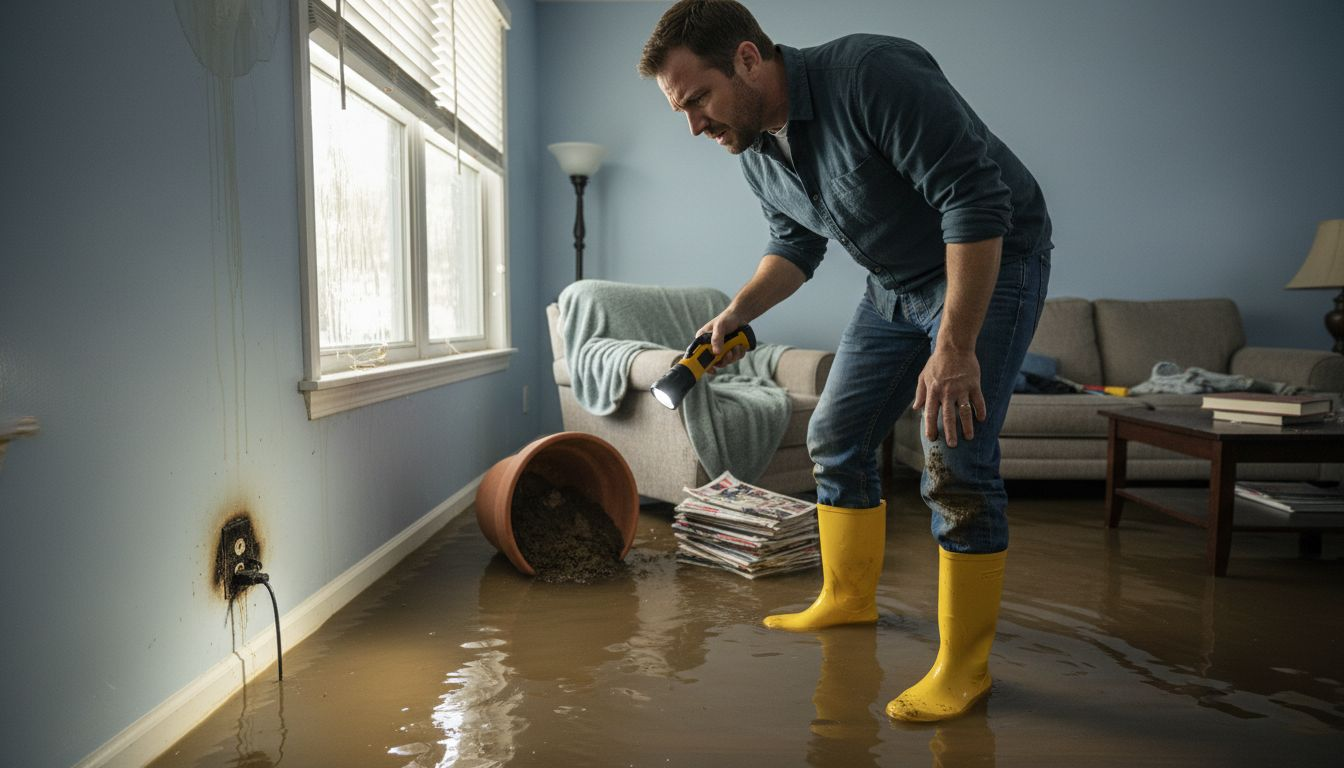
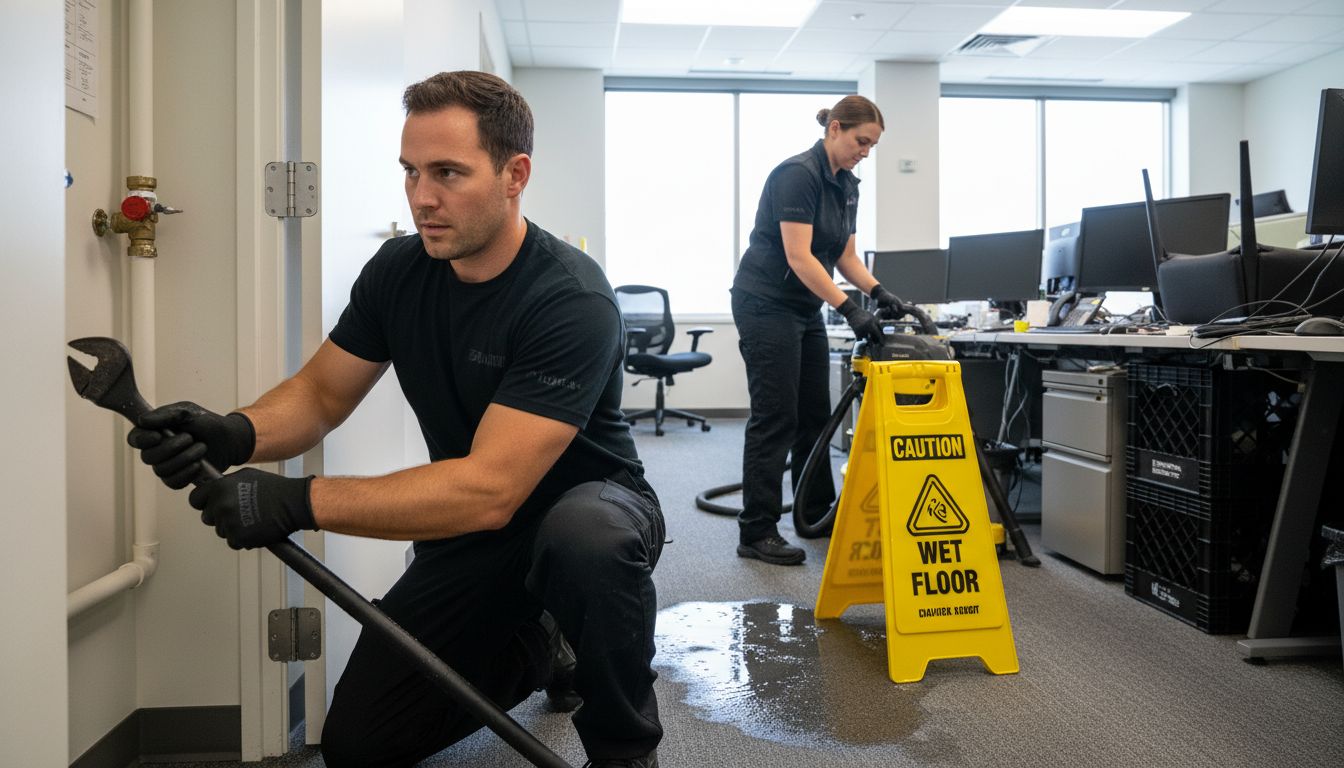
According to the CDC, water damage assessment requires thorough investigation to reduce disease risks from floodwaters. Begin by wearing protective gear such as waterproof boots, rubber gloves, and safety glasses. Carefully inspect affected areas without stepping into standing water, which might contain dangerous electrical currents or hidden structural damage. Look for visible signs of water intrusion including discoloration on walls, warped flooring, wet carpeting, and potential mold growth.
The Health NY guidelines recommend removing standing water cautiously and cleaning items soaked by floodwaters immediately. Document everything with photographs for potential insurance claims. If water levels are significant or you notice sewage contamination, contact professional restoration experts who can safely assess and mitigate potential structural and health risks. Your safety remains the absolute priority during this initial assessment phase.
Ready to move forward? The next step involves water extraction and preventing further damage to your property.
Step 2: Stop the Source and Remove Standing Water
Your immediate goal is to halt ongoing water intrusion and minimize potential damage by identifying and stopping the water source. Quick and strategic action prevents further property destruction and reduces long term restoration costs.
According to the Health NY, removing standing water promptly is crucial for safety. Start by shutting off primary water sources such as main water valves or specific pipe connections causing the leak. If the water source is from external flooding or storm damage, use sandbags or temporary barriers to redirect water flow. For indoor leaks, locate and close pipe valves or contact a professional plumber for complex situations.
The CDC emphasizes the importance of managing standing water to prevent potential health hazards. Use pumps, wet vacuums, or manual methods like mops and buckets to remove water systematically. Prioritize areas with electrical equipment and ensure all power sources are disconnected before water removal.
 Consider using fans and dehumidifiers to start drying processes immediately.
Warning: Never enter standing water if electrical systems might be compromised. When in doubt, call professional restoration experts who can safely manage water extraction and prevent additional property damage. Your next step will focus on comprehensive water extraction and initial drying techniques.
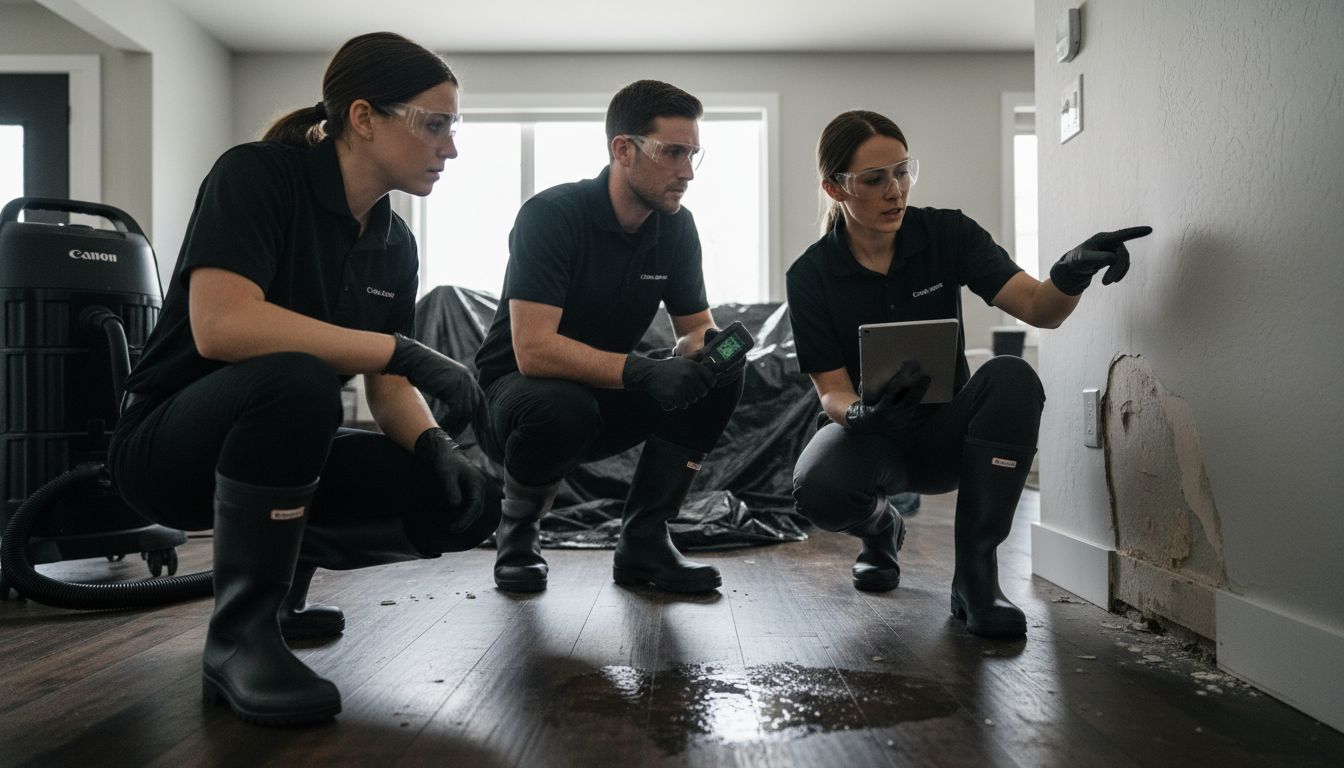
Step 3: Extract Moisture and Dry the Area
Removing moisture quickly is crucial to preventing secondary damage like mold growth and structural deterioration. Your goal is to create an environment that promotes rapid and thorough drying across all affected surfaces.
According to the Health NY guidelines, ventilation and humidity reduction are key strategies for effective area drying. Begin by opening windows and doors to promote air circulation. Position industrial fans at strategic angles to maximize airflow and use dehumidifiers to extract moisture from the air. Focus on creating cross ventilation in wet areas. Pay special attention to hidden spaces like wall cavities, under flooring, and inside cabinets where moisture can linger undetected.
Professional restoration often involves specialized equipment such as infrared moisture meters to identify dampness invisible to the naked eye. Remove wet materials like carpeting, drywall, and insulation that cannot be thoroughly dried within 48 hours. For fabric items, use high powered fans and consider professional cleaning services. Water Damage Prevention: Prevention is the Best Medicine recommends maintaining indoor humidity levels below 60% to inhibit mold and bacterial growth.
Warning: Incomplete drying can lead to long term structural damage and potential health risks.
If you are unsure about thorough moisture extraction, consult professional restoration experts who can ensure comprehensive drying and prevent future complications. Your next step involves assessing and mitigating potential contamination risks.
Step 4: Clean, Disinfect, and Prevent Mold Growth
Addressing water damage goes beyond drying surfaces. Your critical mission now is to thoroughly clean, disinfect, and create a comprehensive strategy to prevent potentially dangerous mold growth that can compromise your property and health.
According to the Health NY guidelines, cleaning items soaked by floodwaters promptly is essential to preventing mold development. Start by sorting salvageable and non salvageable items. For washable materials, use hot water and specialized antimicrobial cleaners. Nonporous surfaces like tile and metal require thorough scrubbing with disinfectant solutions. Wear protective equipment including rubber gloves, masks, and eye protection during the cleaning process.
Experts recommend focusing on hard to reach areas where moisture can hide. Mold Cleaning Do’s and Don’ts suggests using a solution of one cup of bleach per gallon of water for non porous surfaces. Ensure complete drying after cleaning and maintain indoor humidity levels below 50%. Consider using dehumidifiers and maintaining proper ventilation to create an environment that discourages mold growth.
Warning: Some mold contamination requires professional intervention. If you notice extensive mold coverage or experience respiratory issues, contact restoration specialists immediately. Your final step will involve documenting damage for insurance purposes and implementing long term prevention strategies.
Step 5: Inspect and Restore Damaged Materials
After addressing water and potential mold issues, the next critical phase involves carefully evaluating and restoring salvageable materials. Your goal is to minimize total property loss and strategically determine what can be rehabilitated versus what must be replaced.
According to the Health NY guidelines, sorting items and discarding contaminated materials is fundamental to successful restoration. Begin by creating three distinct categories: immediately salvageable items, potentially restorable materials, and items requiring disposal. Focus on porous materials like carpeting, drywall, and wooden structures which absorb water most readily. Tips to Salvage Your Furniture After a Flood recommends inspecting furniture for structural integrity and assessing water penetration depth before attempting restoration.
Professional restoration typically involves specialized techniques for different material types. Wooden furniture might require professional drying and refinishing, while fabric items could need professional cleaning or replacement. Electronics and important documents demand immediate specialized attention to prevent permanent damage. Prioritize items with sentimental or critical value, but remain objective about what can realistically be saved.
Warning: Some materials pose health risks when water damaged. Contaminated items especially those exposed to sewage or prolonged moisture can harbor dangerous bacteria and should be handled with extreme caution. When uncertain about an item restoration potential, consult professional restoration experts who can provide precise guidance. Your final step involves comprehensive documentation for insurance purposes and developing future prevention strategies.
Act Fast to Protect Your Home with Expert Water Damage Restoration
Water damage poses serious threats beyond wet surfaces and structural risks. From hidden moisture pockets to dangerous mold growth and contamination, the challenges outlined in “Effective Water Damage Mitigation Steps for Fast Recovery” reveal how critical immediate, professional response is. The pain points of stopping water intrusion, thoroughly drying the property, and safely disinfecting can overwhelm any homeowner or property manager when dealing with flooding or leaks.
You do not have to face these challenges alone. At PuroClean of Northeast Sacramento, we specialize in fast, reliable water damage restoration using proven techniques and state of the art equipment.
Ready to stop water damage from causing costly, long term destruction? Contact us now for 24/7 emergency response and personalized remediation plans designed to get your home or business back to safe, healthy conditions. Learn more about our comprehensive Water Damage Restoration Services and how we help ease insurance claims so you can focus on recovery. Don’t wait until moisture turns into mold secure your property today.
Frequently Asked Questions
What are the first steps in water damage mitigation?
Begin by assessing the water damage while ensuring your safety. Wear protective gear and inspect affected areas for hazards like standing water and mold, without entering standing water, to evaluate the situation critically.
How can I effectively stop the source of water intrusion?
Identify and shut off the primary water sources immediately. This may involve closing main water valves or using barriers to divert external flooding, preventing additional damage to your property.
What methods should I use for removing standing water?
Use pumps or wet vacuums to extract standing water efficiently. Act fast, ideally within a few hours, to reduce damage and potential health risks associated with prolonged water exposure.
How do I ensure thorough drying after extracting moisture?
Promote drying by maximizing ventilation in affected areas. Open windows and doors, use fans and dehumidifiers, and focus on hidden spaces like wall cavities to prevent mold growth within 48 hours.
What should I do to prevent mold growth after water damage?
Clean and disinfect all affected surfaces promptly, focusing on areas that retain moisture. Maintain indoor humidity levels below 50% and ensure all materials are thoroughly dried to minimize mold risks.
How do I determine whether materials can be restored after water damage?
Sort materials into salvageable, potentially restorable, and those requiring disposal. Focus on evaluating the structural integrity of items and decide on restoration or replacement based on their condition and moisture exposure.
Recommended
Water Damage Timeline Alexandria: Restoration Process Guide
How does Water Mitigation Works: 10 Tips – PuroClean of Alexandria