Dealing with water damaged ceilings is a critical issue that demands immediate attention. Neglecting it can jeopardize the structural integrity of your home and pose safety risks. In this article, we’ll take you through;
the step-by-step process of restoring water damaged ceilings, ensuring a quick and effective recovery.
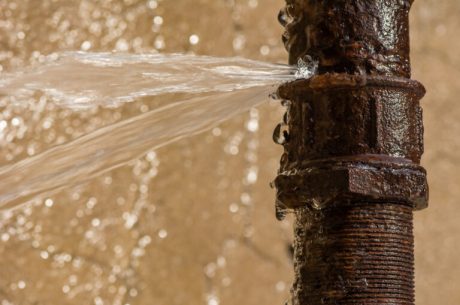
1. Stop the Water Source and Prioritize Safety
The first and most vital step is to stop the source of water causing the damage. Identify and address the leakage or water intrusion point promptly. Simultaneously, prioritize safety by turning off electricity to the affected area. This precaution prevents further damage and minimizes the risk of accidents.
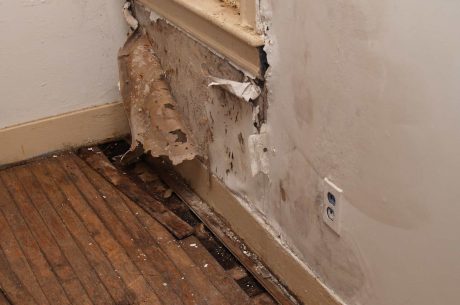
2. Assess the Extent of Damage
Before initiating repairs, evaluate the extent of the damage to your ceiling. Determine if the water has saturated the drywall and insulation. A thorough assessment helps in planning an effective restoration strategy.
3. Quick Intervention: Establish Drainage Points
If stopping the leak immediately is challenging, consider creating drainage points to release trapped water. While this may result in minor damages, it prevents the formation of a water-damaged ceiling. Strategically place holes in the affected drywall to facilitate drainage. While temporary, this step is crucial to prevent further water accumulation.
4. Remove Damaged Sections
To prevent the spread of water damage, promptly eliminate the affected sections of the ceiling. Carefully cut out damaged drywall and insulation, creating a clean and stable base for repairs. Ensure you cut beyond the visible damage to eliminate hidden moisture pockets.
5. Allow Adequate Drying Time
Proper drying is essential to prevent mold growth and further structural damage. Use fans and dehumidifiers to expedite the drying process. It’s imperative to ensure that the ceiling is thoroughly dry before proceeding to the next steps.
6. Install New Sheeting
Replace the removed sections with new drywall or sheetrock. Ensure the new material matches the specifications of the existing ceiling. Use appropriate adhesives and secure the new sheathing firmly to achieve a seamless integration.
7. Seal and Finish
After installing the new sections, meticulously seal the seams and joints. Use joint compound and tape to achieve a smooth finish. This step is crucial for both aesthetic appeal and preventing future water infiltration.
8. Paint and Restore
Once the ceiling is properly sealed and finished, paint it to restore its appearance. Choose a high-quality paint that complements your existing color scheme. Proper finishing enhances the overall look and ensures long-lasting results.
9. Address Underlying Issues
While visible damage may be repaired, it’s essential to address any underlying issues. Conduct a thorough inspection to identify the root cause of the water damage and implement preventive measures.
10. Professional Assistance from PuroClean Restoration Specialists Scottsdale
For complex water damage scenarios or if you prefer professional expertise, contact PuroClean Restoration Specialists Scottsdale at (480) 767-5588. Our experienced team is equipped to handle all aspects of water damage restoration, ensuring your home is restored to its pre-damaged state efficiently and effectively.
Repairing water-damaged ceilings demands a systematic approach, from halting the water source to thorough drying and meticulous restoration. Following these steps will help you mitigate further damage and restore the integrity of your home.
For prompt and reliable water damage restoration services in Scottsdale, trust PuroClean Restoration Specialists Scottsdale AZ – your dedicated partner in restoring your home to its full glory. Call us at (480) 767-5588 for immediate assistance and expert guidance.