Ceiling Tile Water Damage
Ceiling tile water damage can turn a clean, professional space into an eyesore — and worse, it can signal bigger problems like leaks, mold, and structural deterioration. Whether you’ve noticed small brown spots or sagging tiles ready to fall, acting quickly protects both your property and indoor air quality.
At PuroClean Disaster Response Services, our IICRC-certified restoration team has helped countless homeowners and businesses across Cary, Apex, Holly Springs, Morrisville, and Raleigh recover from water-damaged ceilings. Here’s how to identify, repair, and prevent ceiling tile water damage before it spreads.
What Causes Ceiling Tile Water Damage?
Ceiling tiles often hide the early signs of leaks, so problems can go unnoticed until stains appear or tiles start to warp. The most common causes include:
- Roof leaks: Heavy rain, clogged gutters, or storm damage can cause water to penetrate roofing materials and seep through ceilings. Over time, even small leaks can saturate insulation, stain drywall, and weaken structural supports — especially if maintenance is delayed after major storms.
- Plumbing issues: Leaky or burst pipes hidden above ceilings are among the most common causes of water damage in offices, bathrooms, and basements. A slow drip from a joint or valve can go unnoticed for weeks, while a burst pipe can release gallons of water in minutes, damaging walls, flooring, and electrical systems.
- HVAC condensation: Inadequate insulation on ductwork or blocked condensate drains can cause moisture to accumulate and drip onto ceiling tiles or drywall. This type of leak is especially common in commercial buildings where HVAC systems run constantly, and it can lead to mold growth if not addressed promptly.
- High humidity: North Carolina’s naturally humid climate means moisture can build up indoors even without an active leak. Poor ventilation, overworked air conditioners, or unsealed crawlspaces allow condensation to form on cool surfaces, eventually leading to damp ceilings, mildew odors, and potential mold problems.
These conditions can quickly create ceiling water stains, discoloration, and even mold on ceiling tiles if moisture isn’t controlled.
Step 1: Assessing the Extent of Ceiling Tile Water Damage
Before diving into repairs, it’s essential to evaluate the level of damage. A thorough assessment helps you decide on the right approach — cleaning, repairing, or replacing the tiles. Look out for these key indicators:
Before replacing tiles, perform a careful inspection to determine the severity of the problem.
Key Warning Signs
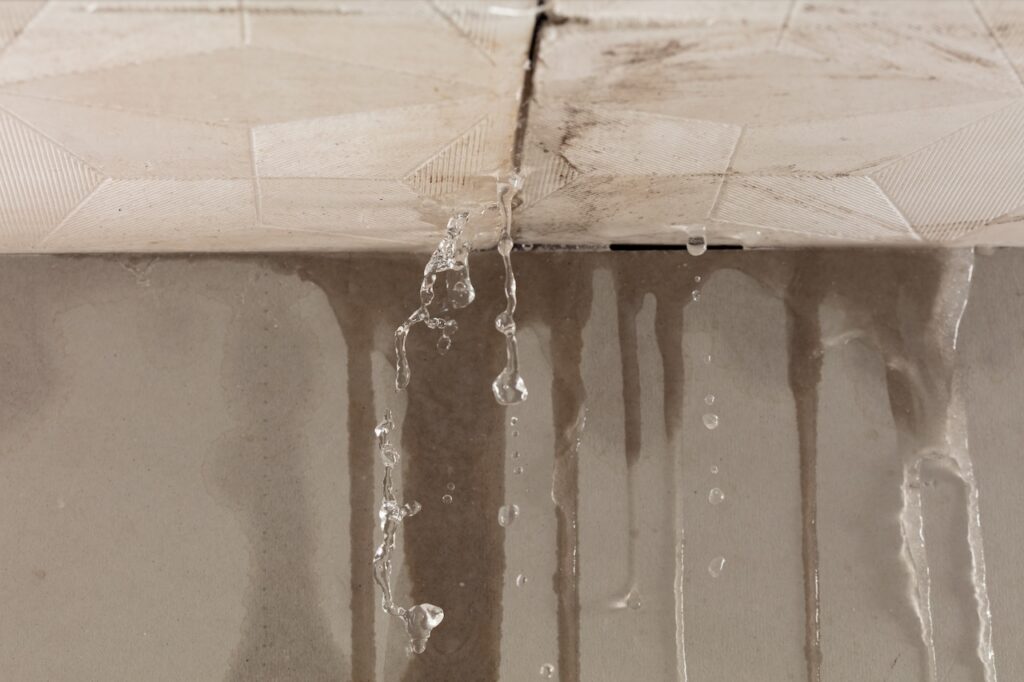
- Discoloration or Stains. Yellow, brown, or gray patches are early indicators of water intrusion. The stains often spread outward in irregular rings.
- Sagging or Bulging Tiles. When tiles absorb too much water, they lose structural integrity and may eventually collapse — posing a safety hazard.
- Mold or Mildew Growth. Dark spots, fuzzy patches, or musty odors point to mold contamination.. According to the Environmental Protection Agency (EPA), damp materials should be dried within 24–48 hours to prevent mold growth and poor indoor air quality.
- Rust or Rot in the Framework. The metal grid supporting your ceiling tiles can rust, and wooden framing may rot, indicating deeper moisture penetration.
Once you identify these signs, trace the water source immediately. Without fixing the cause — such as a roof leak or pipe issue — repairs will only be temporary.

Brown stains on your ceiling tiles indicate potential mold.
Step 2: Cleaning and Drying Damaged Ceiling Tiles
If the tiles are only lightly stained and structurally sound, they can often be cleaned and reused. However, careful handling is essential to avoid worsening the damage or trapping moisture inside the material.
Cleaning Process
- Remove Surface Dust: Use a soft brush or vacuum with a brush attachment to gently remove debris before applying any cleaning solution. Clearing away surface dust first prevents dirt from spreading and makes stain removal more effective.
- Prepare a Cleaning Solution: Mix warm water with a small amount of mild detergent to create a gentle cleaner that won’t damage the tile’s surface. Avoid harsh chemicals, which can erode finishes or cause discoloration.
- Treat Stains: Dip a sponge in the solution and lightly clean the stained areas, using minimal water. If stains persist, allow the area to dry and repeat the process instead of scrubbing too hard, which could weaken the tile.
- Disinfect: For tougher stains or any signs of mold, use a diluted bleach mix (1 part bleach to 10 parts water). Always test the solution in a corner first to ensure it doesn’t cause fading. According to the Environmental Protection Agency (EPA), disinfecting damp materials promptly helps prevent mold growth and poor indoor air quality.
Drying Process
- Ventilate the Space: Open windows and use fans to circulate air, speeding up evaporation and reducing humidity. Proper airflow helps dry both the tiles and surrounding materials like insulation or drywall.
- Run Dehumidifiers: These devices pull excess moisture from the air, preventing secondary issues like mold and mildew while accelerating the drying process. Keep them running until the space feels dry to the touch.
- Monitor Humidity: Maintain indoor humidity levels below 50%, as recommended by the EPA, to discourage condensation and microbial growth. Monitoring with a hygrometer ensures that moisture levels stay low even after visible drying.
A dehumidifier dries the air to minimize the water damage.
Step 3: Dealing with Mold on Ceiling Tiles
Mold thrives in warm, moist environments and can develop quickly after a water leak. It not only damages tiles but can release airborne spores that cause respiratory irritation or allergies.
If you find mold:
- Wear protective gear such as gloves and an N95 mask: Always protect yourself before cleaning. Mold spores can irritate your skin and lungs, so wear gloves, an N95 mask, and safety glasses while working.
- Use a mold-specific cleaner or diluted bleach solution: Apply a commercial mold remover or a 1:10 bleach-to-water mix to the affected area. Gently wipe the surface without oversaturating it, then let it dry completely.
- Dispose of heavily contaminated tiles in sealed plastic bags: If tiles are soft, crumbling, or deeply stained, it’s safer to remove and discard them. Seal them in plastic bags before disposal to contain mold spores.
- Inspect nearby insulation and ceiling cavities — mold often spreads beyond visible areas: Check the surrounding area for dampness or discoloration. If you notice mold on insulation or framing, professional remediation may be needed to prevent recurrence.
If mold covers more than 10 square feet or keeps returning, call PuroClean Disaster Response Services for professional mold remediation. Our technicians use advanced containment and air filtration systems to ensure safe, complete removal.

Water-resistant materials like PVC panels are the way to go to avoid water damage to ceiling tiles.
Step 4: Repairing or Replacing Ceiling Tiles
Once the affected area is completely dry and free of mold, the next step is to determine whether the ceiling tiles can be repaired or need full replacement.
If the damage is minimal, repair may be a practical option. Minor cracks or chips can be filled with caulk or patching compound, then sanded smooth and repainted to match the surrounding surface. For stained but structurally sound tiles, applying a high-quality stain-blocking primer before repainting can permanently cover discoloration and restore a clean, uniform appearance.
However, in cases where tiles are severely damaged, warped, crumbling, or mold-infested, replacement is the safer and more durable choice. Upgrading to moisture-resistant materials — such as PVC or vinyl ceiling tiles—provides added protection against future water damage. These modern materials are lightweight, easy to clean, and ideal for moisture-prone areas like bathrooms, basements, and kitchens.
Before installing new tiles, always inspect the support grid. If the metal framework shows signs of rust or corrosion, it should be cleaned, repainted with a rust-resistant coating, or replaced entirely. This ensures the ceiling remains secure, attractive, and resistant to future water intrusion.
Step 5: Preventing Future Ceiling Tile Water Damage
After restoration, prevention is the best way to avoid recurring ceiling issues. Start by addressing the sources of moisture — inspect the roof regularly for damaged shingles or flashing, and repair any plumbing leaks right away, especially in bathrooms and kitchens. Also, make sure HVAC ducts are insulated and condensation lines are clear to prevent dripping water.
Keep indoor humidity under control by running dehumidifiers in damp areas and using vent fans in bathrooms and kitchens to reduce steam. Maintaining good air circulation throughout the home or office also helps prevent condensation and mold growth.
For added protection, consider upgrading to water-resistant ceiling tiles in moisture-prone rooms or applying a waterproof sealant to existing ones. Finally, perform routine inspections for early signs of staining, warping, or musty odors. Catching problems early helps prevent costly repairs and keeps your ceiling in excellent condition for years to come.
Step 6: When to Call a Professional
Some cases of ceiling leak repair and water damage can be handled by property owners, but you should call a certified restoration professional if:
- The leak source is hidden or structural: If the water’s origin isn’t visible or is inside walls or ceilings, professionals can locate it accurately using specialized moisture detection tools.
- Mold growth covers a large area: If mold spreads beyond a small patch, it requires expert removal. The EPA advises professional cleanup for areas larger than about 10 square feet.
- Water has spread to insulation, drywall, or framing: Hidden moisture in these materials can cause rot and mold. Professionals use industrial drying equipment to prevent lasting damage.
- You need documentation for insurance claims: Certified restoration companies provide inspection reports and photos that help streamline the insurance process.
At PuroClean Disaster Response Services, we use professional-grade moisture meters, infrared imaging, and HEPA filtration equipment to restore ceilings and indoor air quality efficiently. Our technicians are IICRC-certified and trained to handle even the most complex water damage scenarios.
FAQs About Ceiling Tile Water Damage
Q1: What causes ceiling tile water damage?
Usually roof leaks, plumbing failures, or condensation from HVAC systems. Poor ventilation and humidity can also cause moisture buildup.
Q2: Can I paint over ceiling water stains?
Yes — after the tiles are completely dry and mold-free. Use a stain-blocking primer before applying your final paint layer.
Q3: Are DIY ceiling repairs safe?
Small stains or single-tile replacements are fine, but major leaks or mold require professional inspection to prevent hidden damage.
Q4: How do I know if mold is behind the tiles?
Musty odors, recurring stains, or visible black spots often indicate hidden mold. Professionals can verify it with moisture mapping or air testing.
Q5: What’s the best ceiling material for preventing water damage?
PVC and vinyl ceiling tiles are most resistant to moisture and mold. They’re ideal for bathrooms, basements, and commercial kitchens.
Contact PuroClean Disaster Response Services
Don’t let ceiling tile water damage spread into a larger, more expensive problem.
Trust PuroClean Disaster Response Services for fast, professional cleanup, drying, and restoration.
Call us today at (919) 481-4600 or visit our website to schedule your inspection in Cary, Apex, Holly Springs, Morrisville, or Raleigh.
We’ll locate the source of the leak, remove moisture, and restore your ceiling to its pre-damage condition — quickly and safely.


