Table of Contents
In the first 48 hours after a natural disaster, homeowners must act quickly and carefully. This post gives you a clear, urgent checklist for safety, damage assessment, cleanup triage, documentation, and moisture control. It also shows when DIY efforts suffice and when you should call restoration professionals. By following these steps, you’ll reduce risks, protect your property, and streamline the road to full recovery.
9 Urgent Steps to Protect Your Home After a Natural Disaster
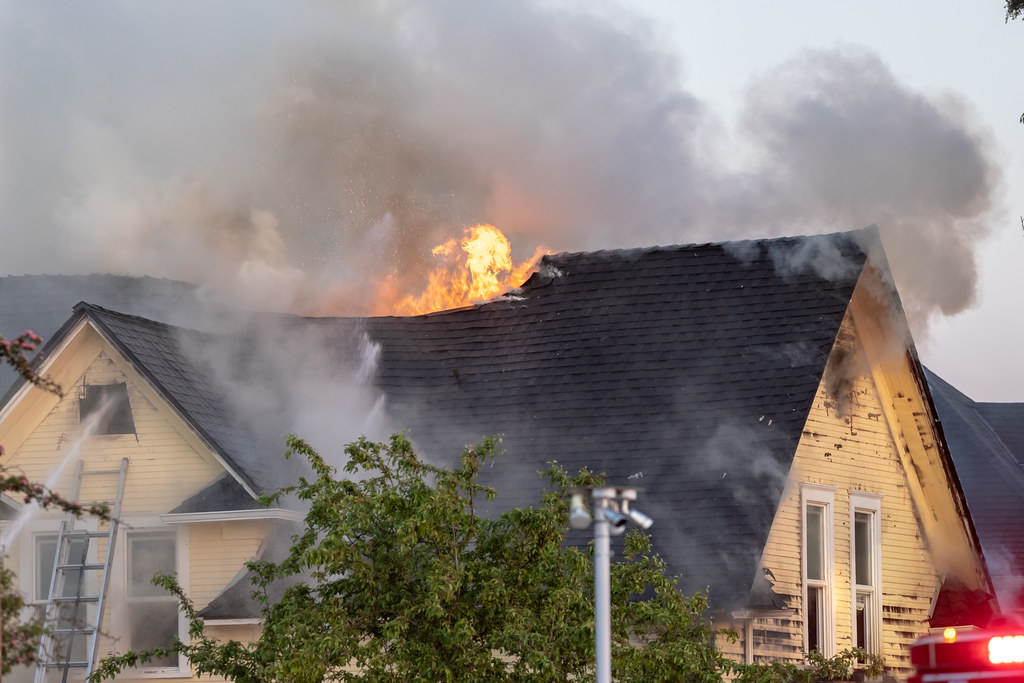
When the storm, flood, earthquake, or wildfire subsides, those first hours matter most. After a natural disaster, damage is fresh and risks abound—water intrusion, structural collapse, mold growth, electrical hazards, and more. If you wait too long to act, damage escalates, losses mount, and cleanup becomes far harder.
Below is a vital, practical checklist to guide homeowners through those first 48 hours following a natural disaster. Use it to minimize harm, protect your home, and set the stage for full restoration.
1. Ensure Personal Safety First
After a natural disaster, the most important thing is keeping your loved ones safe.
- Check for injuries. Attend to any wounds, bleeding, or shock. Call emergency services if needed.
- Avoid hazards. Look out for downed power lines, gas leaks (smell of gas, hissing sounds), broken glass, structural damage.
- Turn off utilities. If safe, shut off gas, electricity, and water at main valves.
- Wear protective gear. Gloves, boots, masks (N95 or better), safety glasses. Disaster debris may hide sharp objects, contaminants, or toxic materials.
- Stay informed. Monitor local news, emergency alerts, or official social media for warnings (e.g. aftershocks, flooding).
Never rush into a damaged structure before confirming it’s safe to do so.
2. Document Everything Immediately
You’ll thank yourself (and your insurer) later.
- Take wide-angle and close-up photos & video of all damage: exterior, interior, roof, walls, flooring, appliances, possessions.
- Record the water line, burn marks, cracks, or flooding level.
- Keep a log of when you first noticed damage, when you moved items, when cleanup started.
- Save receipts for any emergency purchases (tarp, fans, supplies).
Good documentation supports your insurance claim and helps restoration pros understand the scope of work.
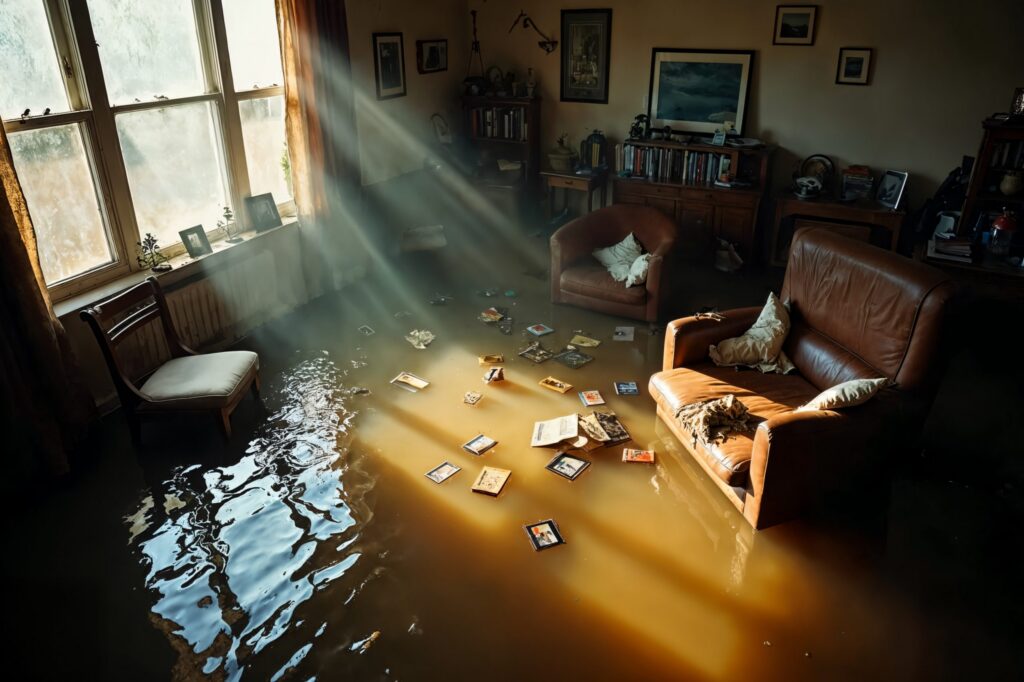
3. Triage and Remove Standing Water / Moisture
One of the biggest risks after a natural disaster is unchecked moisture leading to mold and structural damage.
- Use pumps, wet/dry vacs, buckets, or submersible pumps to remove standing water.
- Open windows and doors (if conditions allow) to ventilate.
- Position fans to blow air outward.
- Use dehumidifiers (if power or generator allows) in enclosed spaces to pull excess moisture.
- Remove wet contents (rugs, curtains, furniture, cushions) to a dry area for cleaning or drying.
According to the CDC, “air out your house … use fans to dry wet areas” immediately after water intrusion. CDC. Also, mold can begin forming in as little as 24–48 hours if moisture lingers.
4. Structural and Hazard Assessment
Even if your home looks “mostly intact,” hidden structural issues may pose danger.
- Check for sagging floors, walls that lean or crack, bowing ceilings, or splits in foundation.
- Look for damaged roofing, broken shingles, missing flashing, or exposed sheathing.
- Inspect HVAC systems, ductwork, plumbing, and electrical panels for water damage.
- If you live in a house built before 1978, be mindful of lead paint hazards; soils and silt may carry lead.
- Avoid DIY demolition of major elements unless you are confident and insured; a structural engineer or qualified contractor may be needed.
5. Clean Surfaces & Remove Debris
With standing water cleared and hazards assessed, begin cleanup.
- Remove mud and debris first — the bulk of damage is often from sediment.
- Wash hard surfaces using detergent and plenty of water. Clean top to bottom.
- Disinfect with a diluted bleach solution or EPA-registered disinfectant (e.g. ¼ cup household bleach per gallon of water) for non-porous surfaces.
- Discard porous, unsalvageable items such as soaked drywall, insulation, carpeting, mattresses, and upholstered items that can’t fully dry or disinfect.
- Vent and dry cavities (wall cavities, behind cabinets) by propping open cavities and directing airflow.
Quick cleanup limits secondary damage (mold, rot, collapse). The Department of the Interior recommends removing drywall at least 2 feet above the flood line to prevent creeping mold.
6. Secure the Property
While you may not restore everything immediately, you can prevent further loss.
- Tarp damaged roofs, cover holes in walls or windows with plywood or plastic sheeting.
- Board up or secure doorframes, windows, and entrances if broken or unstable.
- Lock up to prevent looting or intrusion.
- Elevate salvageable items off floors (e.g. place furniture on blocks or platforms).
- Seal off wet rooms with plastic sheeting to limit moisture migration.
These measures buy you time until full restoration begins.
7. Contact Key Stakeholders & Begin Insurance Process
Time is of the essence when dealing with insurers and recovery support.
- Notify your insurance agent immediately to submit a claim. Provide your documentation (photos, videos).
- Provide access to adjusters to inspect damage thoroughly.
- Start the scope of work and cost estimate (ideally with a restoration professional).
- If available, contact local disaster assistance resources (FEMA, state aid, nonprofits).
- Ask your insurance whether you can “protect from further damage” immediately (tarping, boarding, drying).
This is also the moment to hire trustworthy, certified disaster restoration professionals—especially if damage is beyond DIY scope.
8. Begin Controlled Restoration Steps (If Safe)
If preliminary safety checks are good, you can start limited restoration steps yourself if you choose. But always know your limits.
- Drying & dehumidification: Run air movers and dehumidifiers continuously where possible.
- Prevent mold: Apply mold inhibitors to cleaned surfaces where safe.
- Salvage and restore: Bring back furniture, cabinets, appliances after thorough drying/disinfection.
- Monitor progress and adjust: Track degrees of moisture reduction, humidity levels, check behind walls for hidden wetness.
Be cautious about full reconstruction until structural inspections and approvals are complete.
9. Watch for Secondary Risks & Act Early
Even after immediate cleanup, there’s no guarantee the danger is over.
- Mold growth can begin quickly in humid, moist conditions.
- Odors and air quality problems may indicate lingering smoke, ash, or microbial growth.
- Pest intrusion (insects, rodents) as damaged exteriors open entry points.
- Health hazards: Be aware of contaminated water, dust, toxins, especially when cleaning or disturbing materials. Use respirators and protective gear.
- Emotional and mental health: Stress, trauma, disorientation can affect homeowners and families. Seek help or resources if needed.
A comprehensive recovery requires vigilance beyond the first day or two.
FAQs about what to do after a natural disasters
Q: Can I move back into my house immediately after the first 48 hours?
A: Only if structural inspection confirms it’s safe, utilities are restored, and no hidden contamination remains. Otherwise, wait and address issues first.
Q: How long before mold becomes a serious problem?
A: Mold can begin forming within 24 to 48 hours in damp, humid conditions—prompt moisture removal is crucial. (CDC guidance) CDC
Q: Should I clean everything myself?
A: You can handle small, light damage. But for heavy water intrusion, structural damage, smoke, or mold, hiring a certified restoration company is safer and more effective.
Q: What documents should I prepare for insurance?
A: Date- and time-stamped photos, video walkthroughs, receipts, repair estimates, logs of cleanup steps, and any contractor bids.
Q: How do I prevent this kind of damage in the future?
A: Improve drainage, reinforce roofing and exteriors, elevate utilities, install flood barriers, maintain landscaping, and build or update disaster response plans.
Why You Should Choose PuroClean of Coral Gables for Disaster Restoration
When damage is extensive, you don’t want delays or guesswork. PuroClean of Coral Gables brings fast, expert disaster restoration and cleanup services. Here’s what sets us apart:
- Rapid deployment: Our trained team is ready 24/7 to respond to flood, fire, storm or mold emergencies.
- Full-service restoration: Water extraction, structural drying, smoke/odor removal, mold remediation, reconstruction—you don’t have to juggle vendors.
- Certified professionals: We follow industry standards and work with your insurance company to streamline claims.
- Transparent communication: You’ll get regular updates, detailed documentation, and a clear plan from day one.
- Local commitment: We know the Coral Gables / Dade County area—its challenges, codes, and community needs.
If after a natural disaster your property has suffered and you need expert, reliable help now, call PuroClean of Coral Gables. We’ll guide you through first steps, clean up, and full restoration—fast, safe, and with dignity.
Conclusion
After a natural disaster, the first 48 hours are your window to make or break long-term recovery. Focus first on safety, then document damage, remove water, assess structure, clean and disinfect, secure your home, engage insurance, and start measured restoration. Don’t wait—the difference between a smooth recovery and catastrophic losses often lies in these initial actions.
If your home is facing damage beyond quick DIY fixes, trust PuroClean of Coral Gables to step in with 24/7 disaster restoration and cleanup services. Let us turn crisis into a path toward renewal.


