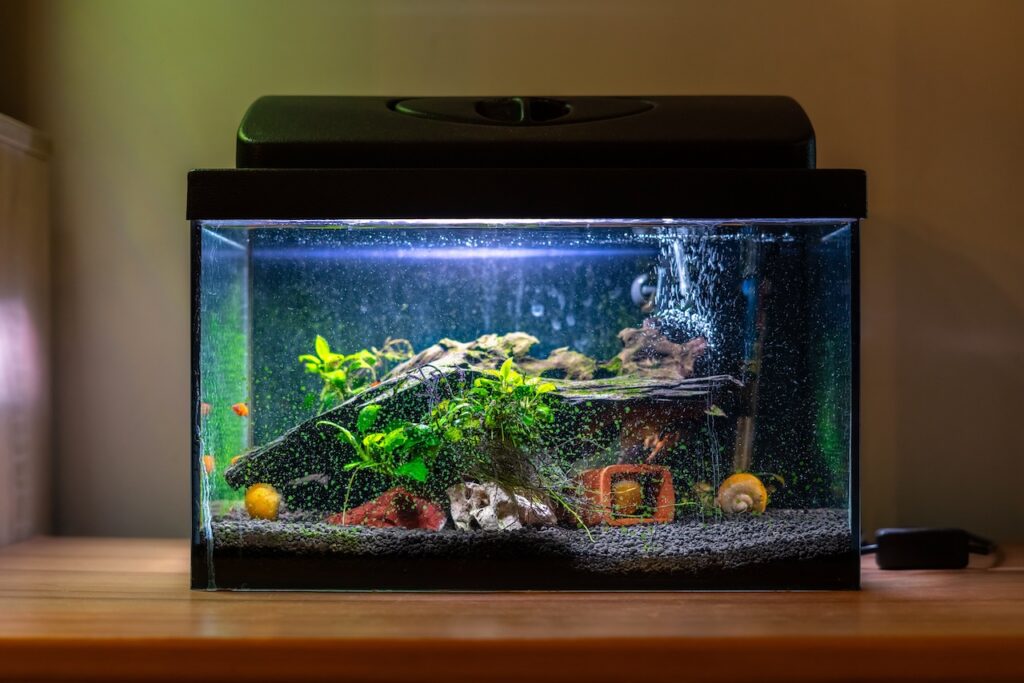
An aquarium is more than just a glass box; it’s a vibrant ecosystem that provides tranquility and beauty. But what happens when you notice water pooling around your tank or droplets seeping from the seams? It’s a dreaded scenario for any fish keeper. Knowing how to fix an aquarium leak not only protects your aquatic friends but also prevents potential water damage to your home.
In this guide, we’ll show you how to fix an aquarium leak, covering everything from identifying the source of the leak to sealing it effectively, along with tips to prevent future issues.
Identifying the Source of the Leak
Before grabbing tools, you need to pinpoint the exact location of the leak.
Here’s how to identify the source of the leak in your aquarium:
Common Leak Areas
- Seams: Most leaks occur in the silicone seals that hold the glass panes together.
- Cracks in Glass: Small chips or cracks in the glass may expand over time, causing leaks.
- Accessories or Equipment: Check areas where filters, hoses, or heaters attach to the tank.
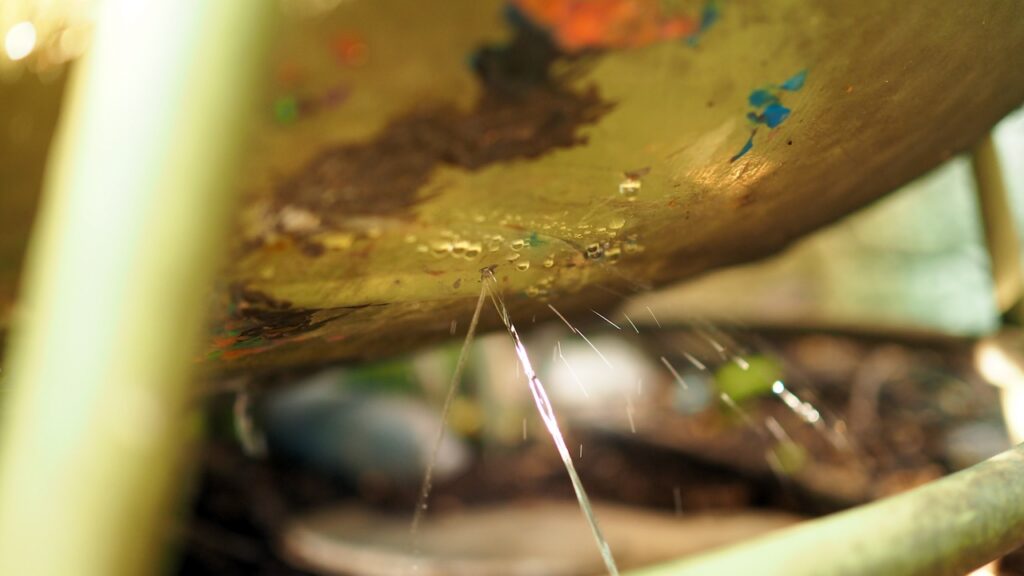
How to Locate the Leak
- Visual Inspection: Look for visible cracks, worn silicone, or areas where water drips consistently.
- Dry Towel Test: Wipe the exterior of the aquarium with a dry towel and monitor where water reappears.
- Food Coloring Method: Add a few drops of food coloring near suspected areas; watch where it seeps out.
Identifying the source is crucial for effective repair. Fixing a seam leak is much different from replacing a cracked glass panel.
Tools and Materials Needed for Repair

To fix an aquarium leak, you’ll need a set of specialized tools and materials that ensure safety and long-lasting results.
Essential Tools
- Razor blades or a silicone scraper: For removing old sealant.
- Caulking gun: To apply silicone accurately.
- Utility knife: Handy for cutting excess silicone.
Materials You’ll Need
- Aquarium-safe silicone sealant: Only use products labeled as non-toxic and safe for aquatic use.
- Painter’s tape: To create clean, straight edges for the sealant.
- Cleaning supplies: Isopropyl alcohol and lint-free cloths for cleaning surfaces.
Optional Add-Ons
- Epoxy resin: This is used to repair cracks in the glass.
- Safety gloves: To protect your hands during the process.
Investing in the right tools can make all the difference between a temporary fix and a durable repair.
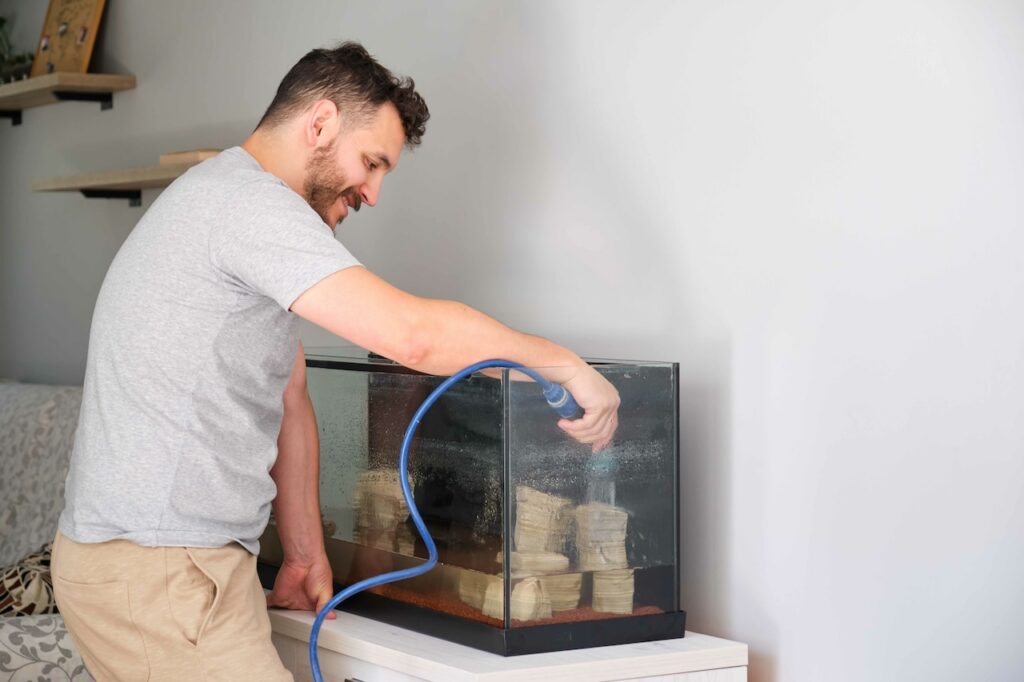
How to Fix Aquarium Leak
Once you’ve identified the issue and gathered your tools, follow these steps on how to fix an aquarium leak:
Step 1: Prepare the Aquarium
- Relocate Fish and Plants: Transfer your aquatic life to a temporary tank with the same water conditions.
- Drain the Tank: Remove water until the leak area is fully exposed.
- Clean the Area: Use isopropyl alcohol to clean the glass and seams, ensuring it’s free of algae and debris.
Step 2: Remove Old Silicone
- Gently scrape away the old silicone from the seam using a razor blade or scraper.
- Be cautious not to scratch the glass or damage surrounding areas.
Step 3: Apply New Silicone
- Apply painter’s tape around the seam to create clean lines.
- Load aquarium-safe silicone into a caulking gun and carefully run a bead along the seam.
- Smooth the silicone with a gloved finger or tool for even application.
Step 4: Let It Cure
- Allow the silicone to cure for at least 24–48 hours (refer to the manufacturer’s instructions).
- Do not refill the aquarium until the sealant is completely set.
Step 5: Test the Repair
- Refill the tank partially to test for leaks.
- If the seal holds, gradually reintroduce water, decorations, and your aquatic inhabitants.
Repairing an aquarium seam might seem daunting, but taking it step by step ensures a safe environment for your fish.
Tips for Preventing Future Leaks
Preventing leaks is far easier—and less stressful—than repairing them.
Here’s how to safeguard your aquarium:
Regular Maintenance
- Inspect Seams Monthly: Look for signs of wear, such as bubbling or peeling silicone.
- Check Equipment: Ensure filters, heaters, and other accessories are properly installed and free from damage.
Use Proper Support
- Always place your aquarium on a sturdy, level stand designed to hold its weight.
- Use foam or padding beneath the tank to absorb pressure points.
Avoid Overfilling
- Keep the water level slightly below the tank’s brim to reduce pressure on the glass and seams.
Monitor Water Quality
- Poor water quality can weaken silicone over time. Test and maintain optimal conditions for pH, temperature, and cleanliness.
When to Call a Professional
Now that you know how to fix an aquarium leak, you will be able to protect your fish before things get out of hand. For larger leaks or water damage, you may need the help of professionals:
Signs You Need Help
- Cracked glass panels or widespread damage.
- Persistent leaks despite sealing efforts.
- Water damage to flooring or walls surrounding the aquarium.
Water Damage Restoration from Purofirst of Metropolitan Washington
For water damage restoration and repairs, contact Purofirst of Metropolitan Washington at 800-500-2399. We specialize in restoring areas affected by leaks, ensuring your home remains safe and damage-free.

