This would be a great guide on How To Dry Wet Walls After Water Damage. Water damage can wreak havoc on a home or workspace, causing not only structural issues but also potentially leading to mold growth and other health hazards. Whether it’s from a burst pipe, flooding, or a leaky roof, the aftermath of water damage can be overwhelming. One of the critical steps in the restoration process is drying out the walls and removing excess moisture effectively.
In this blog post, we’ll explore the essential techniques and methods for drying out walls after water damage, ensuring thorough moisture removal and preventing further damage to your property. From identifying the extent of the damage to employing specialized equipment and techniques, we’ll provide you with the knowledge and guidance needed to tackle this daunting task with confidence. So, let’s dive in and learn how to salvage your space effectively!
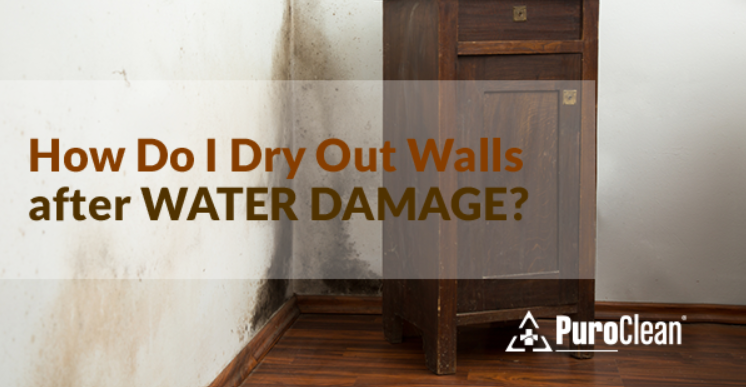
After an event that causes water damage in your home, not only would the floors be affected, but often the walls are as well. Thus, it’s essential to know how to dry wet walls—or call a restoration company immediately. Quick drying reduces the risk of structural damage and prevents mold from growing.
Understanding how water saturates drywall
Before you learn how to dry a wall after water damage, here’s a look into how water saturates drywall. Water that enters a room from ground level will cover the floor and floor covering. It will then begin to “wick” up the wall because of capillary action in porous materials. The extent of this movement depends on the wall’s construction, the amount of water, and the water’s height on the wall material.
Drywall is an absorbent material that contains gypsum and a cardboard-like paper on both sides. Drywall can wick water up to 30 inches! The water will be present on both sides of the wall. Often, however, it’s higher on the inside due to restricted evaporation on that side of the drywall. While water damage is sometimes visible, at other times, the wall does not show signs of this moisture.
What Happens when walls are damaged by water
When walls are damaged by water, several immediate and long-term consequences can arise, impacting both the structure of the building and the health of its occupants. Here are some common effects of water damage on walls:
- Structural Weakness: Water weakens the structural integrity of walls by saturating building materials such as drywall, plaster, and wood. Over time, this can lead to warping, buckling, or even collapse, posing significant safety risks.
- Mold and Mildew Growth: Moisture provides an ideal environment for mold and mildew to thrive. If left unchecked, mold colonies can spread rapidly on walls and other surfaces, causing health problems such as respiratory issues, allergies, and exacerbating conditions like asthma.
- Staining and Discoloration: Water damage often leaves unsightly stains and discoloration on walls, ceilings, and other surfaces. These stains can be difficult to remove and may require professional restoration services to fully restore the aesthetics of the affected areas.
- Odors: Water-soaked walls can emit musty, unpleasant odors caused by mold, mildew, and bacterial growth. These odors can permeate throughout the building, making it uncomfortable and unpleasant to inhabit the space.
- Electrical Hazards: Water infiltration into walls can pose serious electrical hazards, especially if the water comes into contact with electrical wiring or outlets. This increases the risk of electrical fires, shocks, and other safety hazards.
- Decreased Property Value: Water damage can significantly decrease the value of a property, making it more challenging to sell or rent. Potential buyers or tenants may be deterred by the visible signs of water damage and the associated risks.
Overall, the effects of water damage on walls can be extensive and costly if not addressed promptly and effectively. It’s essential to take swift action to mitigate the damage, thoroughly dry out the affected areas, and address any underlying issues to prevent further deterioration and ensure the safety and well-being of occupants.
How to dry a wall after water damage
To begin with, decide whether to handle the problem yourself or call a professional company. We recommend the latter if you don’t know how to dry wet walls or the damage is extensive. Sometimes, the water damage is obvious, but most times, it’s hidden, and those not trained in water damage restoration may miss it.
If you want to DIY, here’s how to dry wet walls out:
Water damage restoration professionals are equipped with the necessary tools and expertise to effectively dry out severely damaged walls. They possess the skills to identify hidden pockets of water damage that property owners might overlook. Nevertheless, for those inclined towards a do-it-yourself approach, the following steps can be invaluable:
1. Turn off the Water Source:
In cases of flooding from burst pipes, shutting off the water source is paramount. This action prevents further water infiltration into the affected area, mitigating additional damage. It’s essential to engage a licensed plumber to repair the ruptured pipe before proceeding with wall drying.
2. Clear Wall Decor and Fixtures:
Remove paintings, wall hangings, shelving, and any other decor to facilitate airflow to the walls, aiding in the drying process. Drenched wall coverings should be promptly removed to prevent mold and mildew growth.
3. Remove Wallpaper:
Wallpaper can trap moisture against the wall, hindering drying efforts. Patiently peel away wallpaper layers and utilize appropriate solutions from hardware stores to dissolve adhesive residue.
4. Detach Molding and Baseboards:
To promote proper ventilation, remove baseboards and molding by carefully breaking the caulk seal and prying them off. Store them in a dry location to prevent damage. Drill small holes near the base of the wall to facilitate airflow into the wall cavity, a crucial step that accelerates drying.
5. Address Insulation and Wallboard:
If insulation is saturated, discard it. Evaluate the extent of water damage to determine if wallboard removal is necessary, as it can be a costly and disruptive process.
6. Ensure Adequate Ventilation:
Initiate the dehumidification process by circulating fresh air throughout the space. Weather permitting, open doors and windows to facilitate airflow. Utilize fans strategically—window fans for outdoor air intake, blower fans for ground-level air movement, and pedestal fans for circulation at higher levels. Dehumidifiers are essential in removing excess moisture from the air, with heavy-duty options available for rental. Desiccant dehumidifiers, which employ silica gel to absorb humidity, are particularly effective in subfreezing conditions.
7. Monitor Moisture Levels:
Use a moisture meter to assess the moisture content in the walls before proceeding with refinishing. Remember that thorough drying is a time-consuming process, and only when the moisture meter indicates no excess moisture can you safely reinstall removed items.
Drying wet walls quickly and correctly is crucial. If you can’t dry your walls immediately, don’t let the problem get worse by waiting. Call a water damage remediation specialist and leverage their expertise, experience, and equipment.
How restoration professionals dry damp walls after water damage
First, technicians determine the extent of the water using a range of water damage restoration tools. One choice is a non-invasive moisture meter. This meter uses radio waves to test for water without putting holes in the wall.
Another professional instrument is an infrared imaging (IR) camera. Since the evaporation from wet walls makes them cooler than dry walls, the IR camera can find water in walls. It does so with no holes or other invasions of the wall material.
Once the professionals identify wet walls, they use specialized drying equipment to dry them.
If the walls aren’t insulated:
In this case, the restoration professional can dry wet walls out without holes or removing the baseboard. The technicians place high capacity air movers along the wall every 10 to 14 feet. These air movers remove moisture from wall’s surface, evaporating it quickly. As the moisture evaporates, more moisture goes to the surface where it evaporates.
The restoration expert will also install a low grain refrigerant dehumidifier in the damp wall. Depending on the moisture levels, one or more will be needed. This advanced drying equipment reduces the humidity levels to help with drying and prevent mold growth.
When proper, the restoration professional will install an inner-wall drying system by putting small holes above the sill plate and forcing air into the wall cavity. Studies have shown that this solution is the best and fastest way to dry walls with water damage.
Additionally, if there‘s a moisture barrier on the outside or inside the wall, the drying plan changes. Moisture barriers are coatings or materials that inhibit the movement of moisture from the wall material.
Most latex paints are permeable and don’t make up a barrier. But, glossy paints may create a barrier and enamel paint or vinyl wall coverings create a complete barrier. Technicians will need to perforate or remove them to allow moisture to escape and the walls to dry. If there’s plastic or foil on the inside of the wall, then technicians will need to remove the wall. That’s because drying will not occur properly and mold will develop in such situations.
If the walls are insulated:
If there is fiberglass insulation with paper backing, then an inner-wall drying system can be used, as described above. But, if the insulation is foil-backed fiberglass, blown-in cellulose, or a Styrofoam material, then it can’t be dried successfully.
In those cases, removing the damaged portion of the wall along with the insulation is necessary to allow rapid drying and to prevent mold growth.
Monitoring the drying system
Regardless of the procedures used by the restoration professional, homeowners should know that the equipment must operate, without stopping, throughout the drying process.
Finally, restoration professionals will monitor the drying system at least once a day. That ensures the equipment is operating correctly during the drying process. Monitoring includes moisture measurements to determine when the materials will successfully dry. Material dryness is measured against similar unaffected contents in that structure. When dryness levels are equal, the drying is finished, and the equipment removed.
To recap, this is how to dry wet walls
- After addressing the water source, remove paintings and other objects from the wall.
- Follow up by removing moldings, baseboards, and wallpaper.
- Open windows and doors to help speed up the drying process.
- Use fans to move air around the damp walls. Also use dehumidifiers, which can help remove moisture from the air and walls.
- Professionals use tools like moisture meters, infrared imaging devices, dehumidifiers and heavy-duty fans. That ensures the walls are truly dry before further repair, painting or refinishing.
For Wall water damage drying and repair in Staten Island, New York
A professional restoration company, such as PuroClean, understands and uses the principles and procedures of how to dry damp walls. For efficient drywall water damage repair, call the PuroClean of Bulls Head on 347-501-6155. Our trained and certified technicians can dry walls and other items quickly and thoroughly, preventing further damage and mold growth.
