Table of Contents
Painting over mold may seem like a quick cosmetic fix—but it’s a mistake that can cause long-term structural and health problems. Hidden mold continues to grow behind the paint, feeding on moisture and organic materials, and releasing spores into the air.
If you’re wondering how to remove mold that has been painted over, this guide from PuroClean Emergency Restoration Services of Sterling, VA explains how to identify, clean, and prevent mold correctly—using proven, professional methods that keep your home or business safe.
Why Painted-Over Mold Is Dangerous
Covering mold with paint traps moisture beneath the surface. This creates a perfect environment for spores to multiply and spread through drywall, wood, or insulation.
Over time, this can lead to:
- Structural damage: Weakening walls, ceilings, or flooring.
- Persistent odors: Mold emits volatile organic compounds (VOCs) that produce a strong, musty smell.
- Health issues: Exposure to spores can cause allergies, respiratory irritation, and headaches, especially for children or those with asthma.
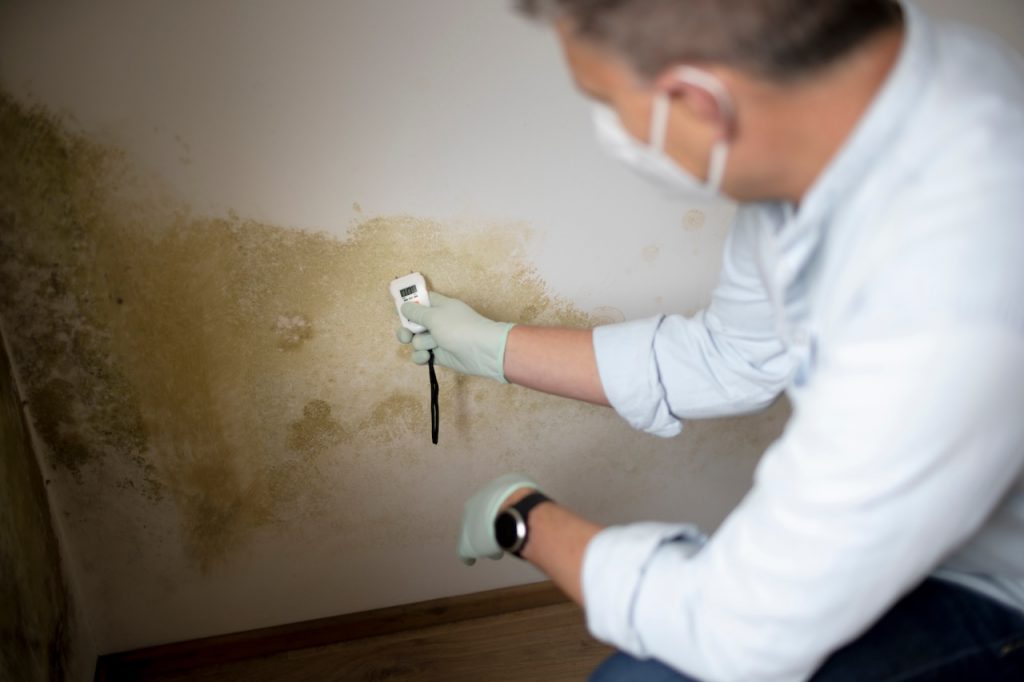
Moisture meters are invaluable when it comes to water damage detection.
How to Detect Mold Under Paint
Even when mold is hidden beneath paint, it often gives itself away through visual and sensory clues. Common Signs:
- Discoloration: Yellow, brown, or greenish stains that bleed through paint.
- Peeling or bubbling: Moisture from mold growth lifts paint layers.
- Warped drywall: Swelling or softness indicates trapped moisture.
- Musty smell: A persistent earthy odor is a clear warning sign.
Pro Tip for Sterling Homeowners: Mold often develops behind walls or in basements after humidity spikes—especially during Virginia’s damp spring and summer months. Using a moisture meter or infrared camera can help confirm hidden mold growth beneath painted surfaces before it spreads further.

Be wary of musty odors, discoloration, and bubbling and/or peeling.
Step-by-Step: How to Remove Mold That Has Been Painted Over
If mold has been painted over, removing it safely takes patience and attention to detail. The goal is not just to clean what’s visible—but to eliminate the spores beneath the surface that can quickly regrow. Follow these detailed steps to protect your health and restore your walls properly.
1. Prepare the Area
Before starting any mold cleanup, protect yourself and contain the affected zone. Mold spores become airborne easily, and inhaling them can cause allergic reactions or respiratory issues.
- Wear proper safety gear: Use rubber gloves, an N95 respirator mask, and protective goggles. If possible, wear disposable coveralls to keep spores off your clothing.
- Isolate the work area: Seal doorways and vents with plastic sheeting and painter’s tape to prevent spores from spreading to clean areas.
- Improve airflow: Open windows and doors to provide ventilation. If you’re working in a small or windowless area, use an air purifier with a HEPA filter to capture airborne particles.
This preparation step is critical. Many DIY attempts fail because the area wasn’t properly contained, allowing spores to spread and recolonize elsewhere.
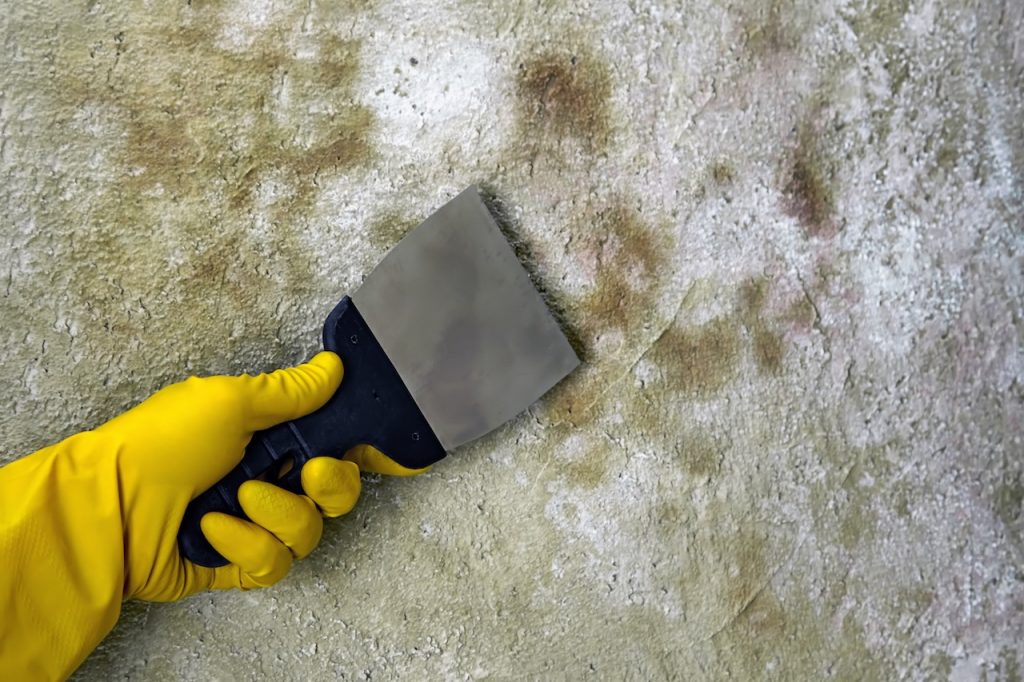
2. Strip the Paint
Mold can’t be fully treated unless you remove the layer of paint covering it. Painted-over mold often grows into the drywall or wood beneath, so exposing it is essential.
- Use a paint scraper or orbital sander to gently lift or sand away the paint until you reach the bare surface.
- Work slowly and carefully to avoid scattering dust or spores. Never use high-speed power sanding indoors—this can release large amounts of contaminated dust into the air.
- Collect paint debris immediately and keep it contained in disposable plastic bags.
Once the underlying material is visible, you’ll be able to see the extent of the mold damage—dark or fuzzy patches spreading outward indicate that the infestation has penetrated deeper.
3. Kill the Mold
Now that the mold is exposed, it’s time to disinfect the area. There are several safe, effective ways to do this depending on your surface type and preference.
- Bleach and Water (1:10 mix) – Effective on non-porous surfaces like tile or concrete. Mix one cup of bleach per gallon of water. Apply with a sponge or spray bottle and let it sit for 10–15 minutes before scrubbing. Keep in mind that bleach can discolor some surfaces.
- White Vinegar (undiluted) – A natural, non-toxic option that kills most mold species. Spray it directly on the affected area and let it sit for at least one hour before wiping clean.
- Commercial Mold Removers – Products containing hydrogen peroxide or quaternary ammonium compounds are highly effective and widely available at hardware stores in Sterling, VA. Always follow the label directions for application and dwell time.
Use a stiff nylon brush to scrub away the mold thoroughly, reaching into crevices and pores where spores may linger. Then, wipe the area with a clean damp cloth to remove residue.
4. Rinse and Dry Completely
Moisture is mold’s fuel source. Even after treatment, if the area remains damp, the problem will return.
- Wipe all treated surfaces with clean water to remove leftover cleaning solution.
- Run fans or a dehumidifier to accelerate drying—especially important in humid climate.
- Keep humidity levels below 50–60%, using a hygrometer to monitor indoor conditions.
Proper drying may take 24–48 hours depending on room temperature and airflow. Do not repaint or seal the surface until it’s completely dry.
5. Dispose of Contaminated Materials
Once cleaning is complete, safely dispose of all contaminated materials to avoid reintroducing mold spores into your environment.
- Place used rags, brushes, sanding pads, and paint chips in heavy-duty plastic bags.
- Seal the bags tightly before throwing them away.
- Clean reusable tools with a disinfectant solution or rubbing alcohol before storing them.
Avoid tossing contaminated debris into regular open trash bins inside your home—take them directly outside to prevent spores from spreading back indoors.
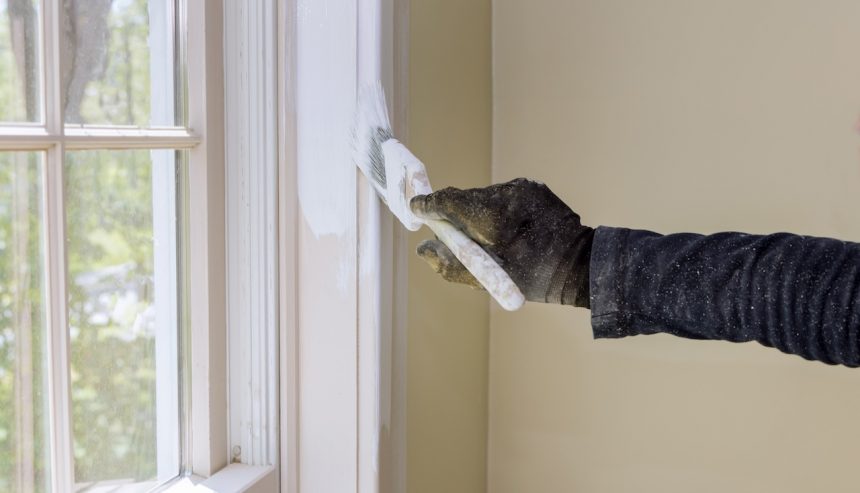
It is important to remove the paint down to the base before attempting to reapply a new coat.
Repainting After Mold Removal
Once the mold has been completely removed and the area is dry, you can safely repaint the surface. However, it’s important to follow these steps to prevent mold from reappearing:
- Apply a Mold-Resistant Primer: Before painting, use a mold-resistant primer to create a barrier that helps prevent future mold growth.
- Use Mold-Resistant Paint: Consider using paint that contains antimicrobial agents, which can deter mold from growing on the surface.
- Ensure Proper Ventilation: If the mold issue was caused by poor ventilation, especially in areas like bathrooms or kitchens, consider improving airflow by installing exhaust fans or dehumidifiers.
Professional Mold Assessment Options
While removing mold on your own is possible for small areas, large-scale mold problems or mold growing for an extended period may require professional help. A professional mold assessment can thoroughly evaluate your property to determine the extent of the mold damage and the best course of action.
Our certified technicians specialize in mold remediation and have the expertise to handle even the most severe cases. Using advanced equipment, we can detect mold that isn’t visible and implement comprehensive mold removal and moisture control solutions to ensure your property is mold-free.
This FEMA webpage, Mold: Problems & Solutions, is a great starting place for assessing the damage.
Sterling’s Mold Removal Experts
If not properly removed, painted-over mold can lead to long-term damage. At PuroClean of Sterling, we specialize in safe and effective mold removal services, helping you restore your property to a healthy condition. Our team has the experience and tools to remove hidden mold and ensure it doesn’t return.
For more information on mold removal services, visit PuroClean Emergency Restoration Services or call (703) 579-8912. Don’t wait—contact our experts today to ensure your home or business is mold-free.
FAQ: Mold Removal and Repainting
Q1: Can I just paint over mold with primer?
No. Paint traps moisture, allowing mold to spread behind the surface.
Q2: Does bleach kill all types of mold?
Bleach works on non-porous materials like tiles, but not deep within drywall or wood.
Q3: How long after cleaning can I repaint?
Wait at least 24–48 hours to ensure the surface is fully dry.
Q4: What happens if mold returns?
It means moisture remains. Contact PuroClean of Sterling for a moisture inspection.
Q5: Is professional mold removal worth it?
Yes—experts can identify hidden mold, prevent regrowth, and save you from structural repairs later.
Summary
- Painting over mold only hides the problem—it doesn’t fix it.
- Remove paint, clean with mold-killing solutions, and dry completely.
- Repaint only with mold-resistant products.
- Keep humidity low and ventilation high.
- For large or hidden mold, call PuroClean of Sterling, VA for expert help.
Check out more topics in our blog: