


Jump To
- Why Soot Is So Hard to Remove
- How to Clean Soot From Walls and Ceilings
- Cleaning Soot From Furniture
- Restoring Belongings After Smoke and Soot Damage
- Common Soot Cleaning Mistakes to Avoid
- When to Call a Professional vs Clean Soot Yourself
- Frequently Asked Questions
Soot spreads fast after a fire, and it sticks to nearly everything in its path. The best way to remove it depends on the surface and the kind of residue left behind. Our team at PuroClean of Redmond/Woodinville handles professional soot removal across the Greater Eastside, and this guide walks through how we clean each material.
Soot is not just dirt. It’s a fine, oily film left by burned material, and it can stain, etch, and smell for weeks. Some surfaces wipe clean in minutes. Others need real care, or you’ll grind the damage in deeper.
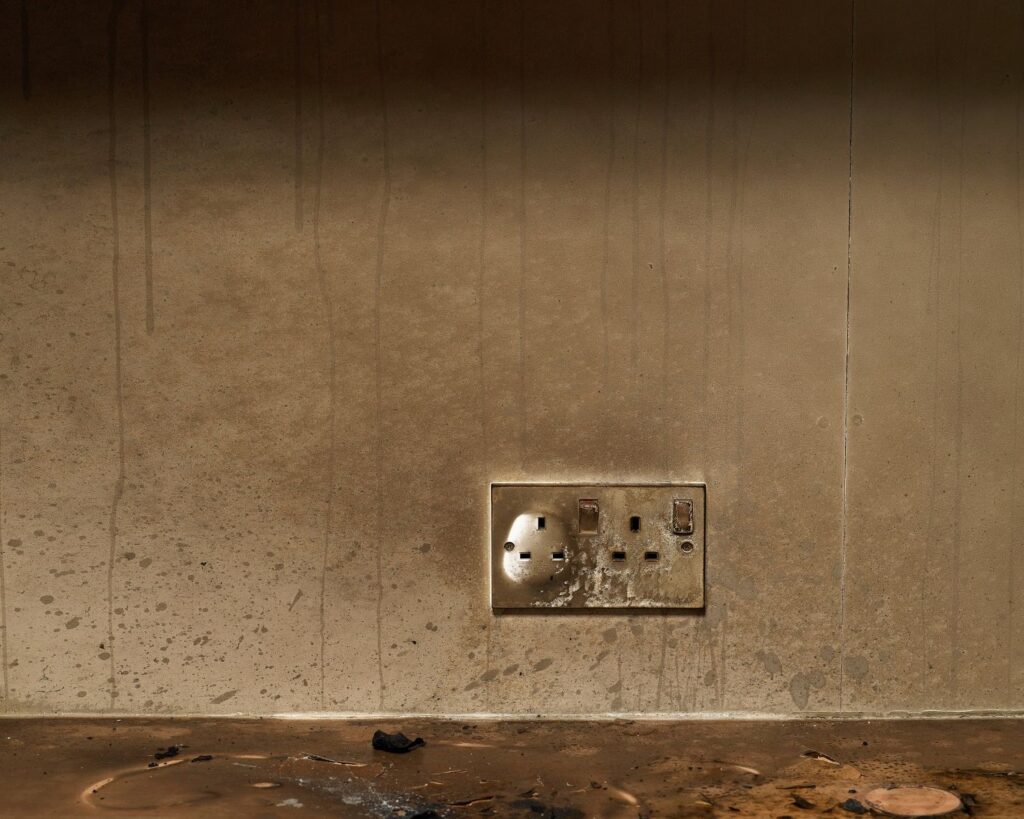
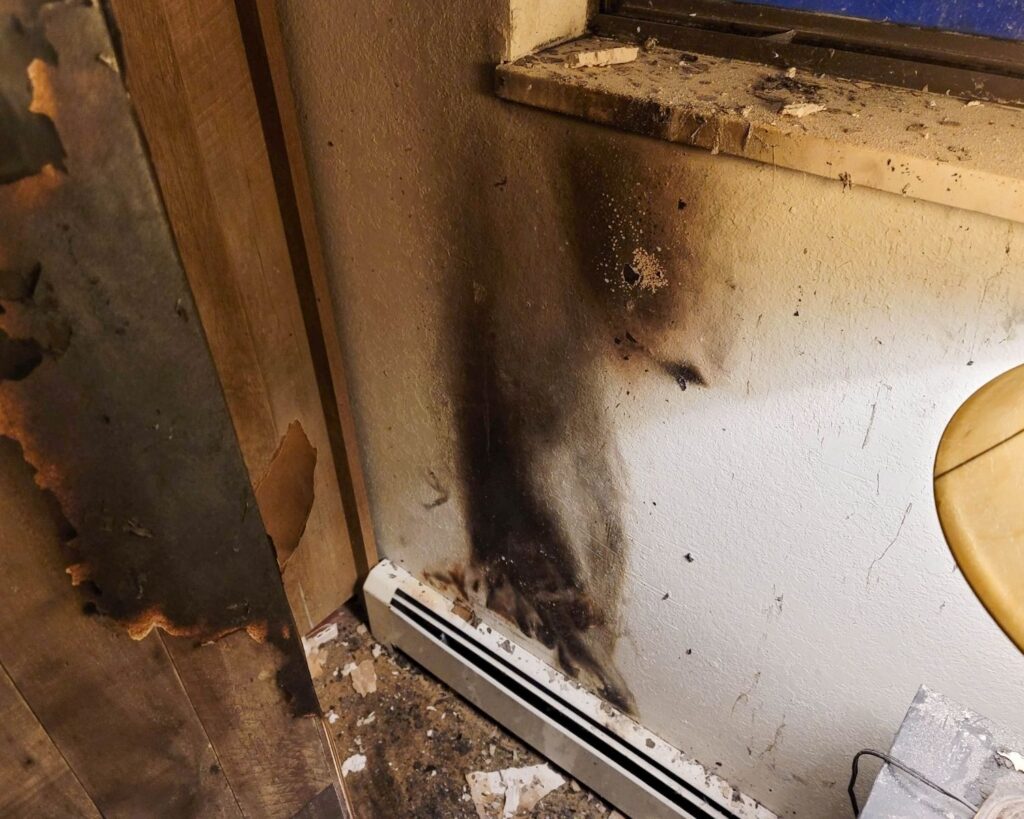
Soot travels well beyond the burn area, coating walls, ceilings, and belongings in rooms that never saw flame.
Why Soot Is So Hard to Remove
Soot is hard to remove because it’s acidic, greasy, and small enough to work its way into porous surfaces. A fire leaves different residue types behind. Each one reacts to cleaning products in its own way, so the wrong mix can set a stain for good.
Professionals sort soot into a few main types, following fire and smoke restoration standards. Dry soot comes from fast, high-heat fires like paper or wood. It’s powdery and often brushes away. Oily or greasy soot comes from things like plastics and cooking fires, and it smears the moment you touch it.
Then there’s protein residue from burned food. You can barely see it, but it leaves a thick, stubborn smell and a greasy coat on cabinets and counters. That’s the one most people underestimate.
The 3 Types of Soot We See Most
Dry Soot
Powdery and light, this comes from wood or paper fires and often brushes or vacuums away with care.
Oily or Greasy Soot
From plastics and kitchen fires, this type smears the instant you touch it and needs a degreaser.
Protein Residue
Left by burned food, this residue is nearly invisible but very smelly, and it coats kitchens in a thin, greasy film.
Here’s why the residue type matters so much for your home. We once restored a family home in Everett after an electrical fire, where dry soot had drifted into rooms far from the source. Matching the method to the residue is what protects your walls and your belongings from more harm.
Time works against you, too. Soot is acidic, so it keeps eating at paint, metal, and finishes the longer it sits. What could have been a wipe-down on day one can become a permanent stain by day three.
Dealing With Soot Right Now?
Soot gets harder to clean the longer it sits. Our IICRC-certified team responds around the clock across Redmond, Woodinville, and the Greater Eastside, and estimates are always free.Request Your Free Estimate
How to Clean Soot From Walls and Ceilings
Start soot cleaning on walls and ceilings with a dry chemical sponge, never water. Water and normal cleaners can smear oily soot and drive it into paint or drywall. A dry sponge lifts the loose residue first, so the surface is ready for a deeper clean.
A soot sponge, made of soft rubber, is the right tool. Wipe in one direction. Turn to a clean side often, and never scrub in circles, because that just spreads soot around.
Here’s the order we follow on painted walls:
- Open windows for airflow, and put on gloves and an N95 mask
- Vacuum loose soot with a HEPA filter vacuum, holding the nozzle just off the surface
- Wipe the wall with a dry chemical sponge, top to bottom, turning it often
- For oily residue, follow with a mild degreaser on a clean cloth, working in small sections
- Rinse lightly, then dry the area right away with a fresh towel

A dry chemical sponge lifts soot without water, which keeps oily residue from smearing deeper into the paint.
Painted walls usually respond well to this. Wallpaper, raw wood, and flat paint are trickier, since they soak up residue and can’t take much moisture. If it starts to smear or lift, stop and let a pro step in.
Cleaning Soot From Furniture
Furniture needs a material-by-material approach, because wood, fabric, and metal each react to soot differently. Solid wood can often be cleaned and saved. Soft, padded pieces hold soot and odor deep in the fibers, so they take more work. Start dry, go slow, and test a hidden spot first.
Wood Furniture
Vacuum the loose soot first, then wipe with a dry sponge. For what’s left, use a wood-safe cleaner on a soft cloth, not a soaked one. Dry it right after. Too much moisture can swell the wood or cloud the finish.
Upholstery and Fabric
Go easy here. Vacuum with a HEPA filter and a brush attachment, and resist the urge to rub. Rubbing pushes soot into the weave and can stain it permanently. Heavily soaked cushions often need professional cleaning to fully lift the residue and the smell.
Metal and Hardware
Metal legs, handles, and hinges clean up fairly easily. A dry wipe followed by a mild cleaner usually does it. Dry the metal quickly, though, since leftover soot is acidic and can pit or rust the surface over time.
Restoring Belongings After Smoke and Soot Damage
Belongings need sorting before cleaning, because some items are safe to clean at home and others are not. Electronics, family photos, and important papers are easy to ruin with the wrong move. When in doubt, set it aside and ask first.
One tip before you touch anything: photograph the damage for your insurance claim. A quick record of what was harmed can make the whole claim smoother later on.
Electronics
Don’t power anything on. Soot inside a device is conductive and can cause a short or even a fire. Leave computers, TVs, and game consoles unplugged, and have them checked before use. Cleaning the insides is a job for a specialist.
Clothing, Bedding, and Soft Goods
Soft items trap both soot and smell. Regular home washing rarely gets it all, and dryer heat can lock the odor in. Specialty cleaning works far better here. Our guide to smoke odor removal covers the smell that ordinary laundering leaves behind.
Dishes, Documents, and Keepsakes
Wash sealed dishes and glass in warm, soapy water before you use them again. Paper is fragile. Handle it gently, keep it flat, and don’t stack wet items. Photos and documents can sometimes be saved by specialists, even when they look ruined.
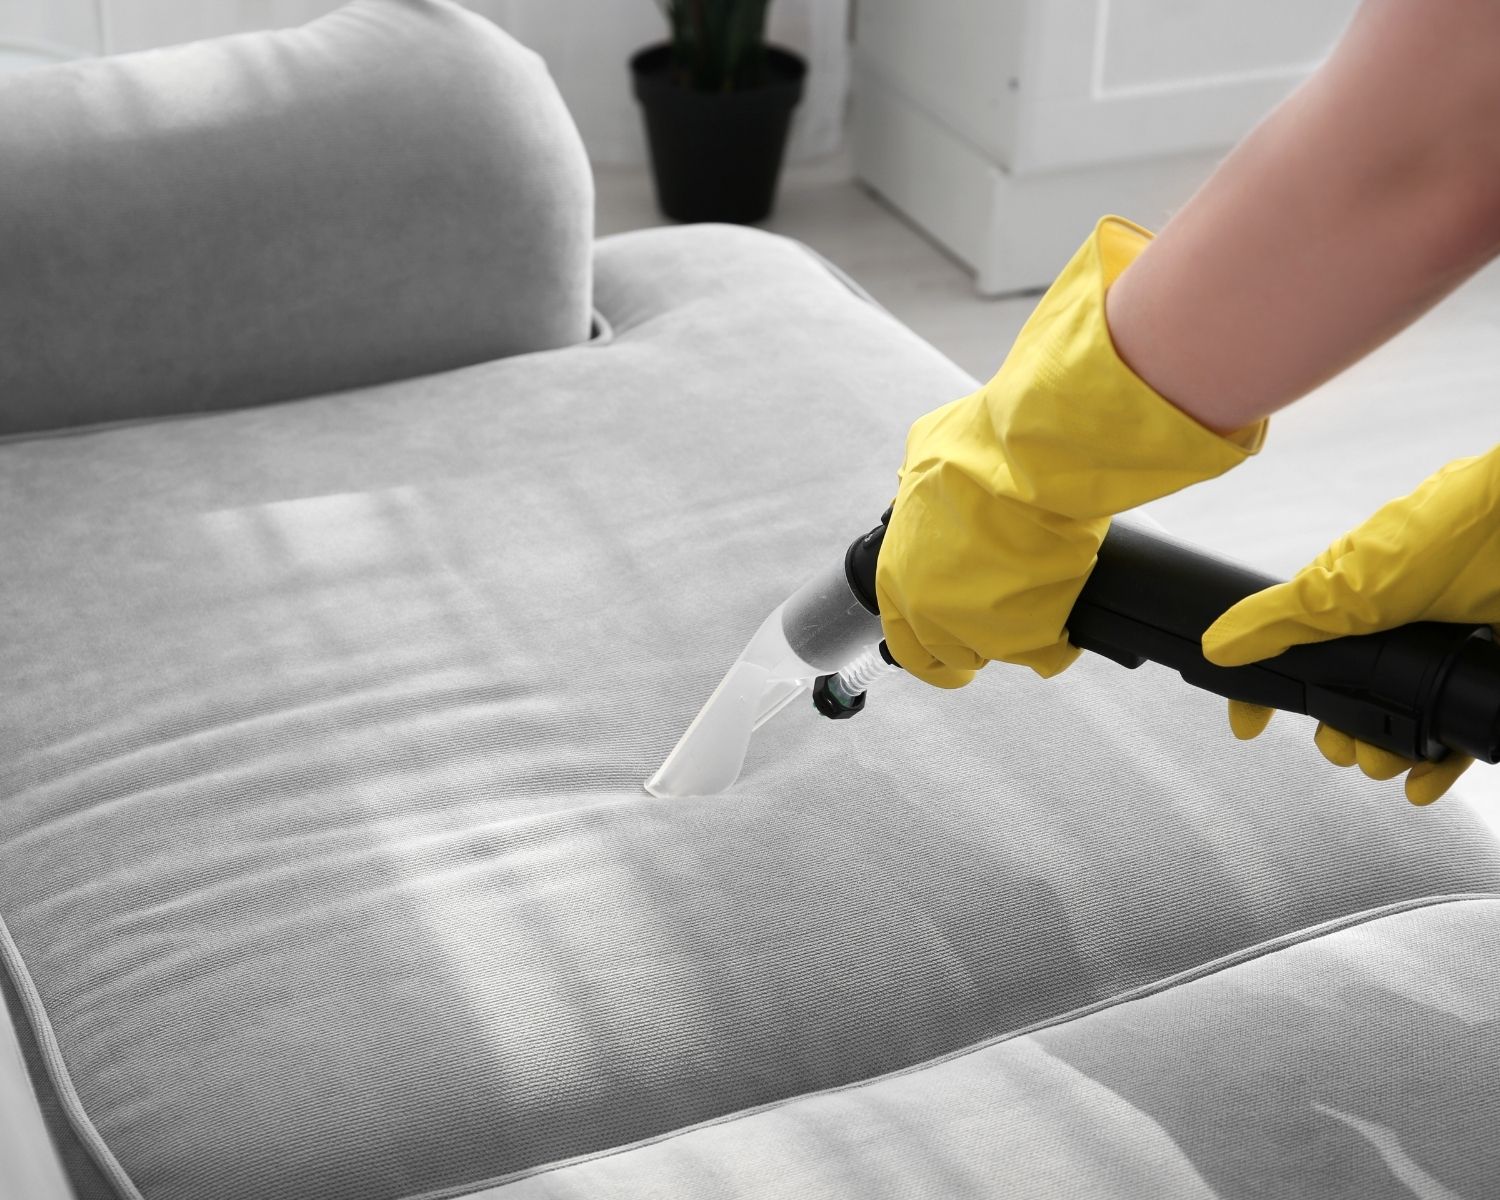
Upholstered furniture needs a gentler touch than hard surfaces, and extraction tools pull soot out of fabric without grinding it in.
Here’s a quick look at how the most common surfaces compare.
| Surface | Common Soot Type | First Step | DIY or Call a Pro |
|---|---|---|---|
| Painted walls | Dry or oily | HEPA vacuum, then dry sponge | DIY if light, pro if heavy |
| Wood furniture | Oily | Dry wipe, then wood-safe cleaner | DIY if light |
| Upholstery and fabric | Oily, holds odor | HEPA vacuum, no rubbing | Pro for heavy soot |
| Electronics | Fine, hidden | Leave off and unplug | Always call a pro |
| Clothing and textiles | Oily, holds odor | Specialty cleaning | Pro for best results |
| Dishes and glass | Light | Warm, soapy wash | DIY |
| Photos and documents | Fine | Handle gently, keep flat | Pro to restore |
Common Soot Cleaning Mistakes to Avoid
The most common soot cleaning mistakes make the damage worse, not better. They usually come from one thing: rushing. Slow down, match the method to the surface, and you’ll avoid setting stains or spreading residue across clean rooms.
Here are the slip-ups we see most often:
- Wiping oily soot with a wet cloth, which smears it deeper into the surface
- Scrubbing in circles instead of wiping in one direction
- Running soot-covered clothes through a home washer and dryer, which locks in the smell
- Turning on electronics before they have been checked
- Waiting days to start, so acidic soot has time to stain and etch
- Using one sponge across a whole room without turning to a clean side
None of these feel like mistakes in the moment, and that’s the trap. Soot cleanup rewards patience and the right tools. If a job feels bigger than a quick wipe-down, it usually is.
When to Call a Professional vs Clean Soot Yourself
Light soot on a small, sturdy surface is often a safe DIY job, but heavy or widespread soot calls for a professional. Bigger fires leave health risks, hidden damage, and residue that home products can’t fully remove. Knowing the line saves you money and keeps you safe.
Safety comes first. The soot and dirty water left behind can be harmful to touch, according to the U.S. Fire Administration. Wear gloves and a mask, and keep kids and pets out until the cleanup is done.
A fire rarely leaves only soot, either. Firefighting soaks drywall, floors, and framing, so soot cleanup often runs right alongside water damage cleanup. Handling both at once keeps small problems from turning into big ones.
A pro brings HEPA vacuums, the right cleaner for each residue, and clear guidance on professional versus DIY fire damage cleanup. We follow IICRC methods, so surfaces get cleaned once, correctly, instead of smeared and redone. With more than 16 years of local work and over 45 years of combined team experience, we’ve seen what saves a home and what sinks it.
Soot Cleanup You Can Trust, Close to Home
Soot damage is stressful, and you don’t have to face it alone. Our IICRC-certified team at PuroClean of Redmond/Woodinville has served the Northshore and Greater Eastside communities since 2009, with around-the-clock response and free estimates. Give us a call any time, day or night, and we’ll help from there.
Frequently Asked Questions
Can I remove soot from walls with just soap and water?
Not as a first step. Water can smear oily soot and push it into the paint. Start with a dry chemical sponge to lift the loose residue, then use a mild degreaser only if it’s needed.
Does soot come off furniture, or do I have to throw it out?
Most furniture can be cleaned and saved, especially solid wood. Padded pieces with heavy soot are harder, but professional cleaning can often rescue them too. Sort first, then decide item by item.
Is soot dangerous to breathe or touch?
Yes. Soot can irritate your lungs, eyes, and skin, and the residue is acidic. Wear gloves and an N95 mask during cleanup, and keep children and pets away until the area is clean.
How soon should soot be cleaned after a fire?
As soon as it’s safe to enter. Soot keeps damaging surfaces the longer it sits, staining paint, metal, and finishes within days. Fast cleanup means more of your home and belongings can be saved.